| View previous topic :: View next topic |
| Author |
Message |
mick1969
LifeTime Member

Age: 55
Zodiac: 
Joined: 20 Dec 2009
Posts: 2651
Location: redcar by sea,cleveland
|
 Posted: Thu Jul 01, 2010 16:50 Post subject: 2" rear suspension lift on a 3.2 lwb Posted: Thu Jul 01, 2010 16:50 Post subject: 2" rear suspension lift on a 3.2 lwb |
 |
|
aquired rear coil spring spacers of SUBZERO on here
1st i raised the rear end securely and placed on blocks and jack stands used the trucks bottle jack to raise the bottom camber arm removed the wheel
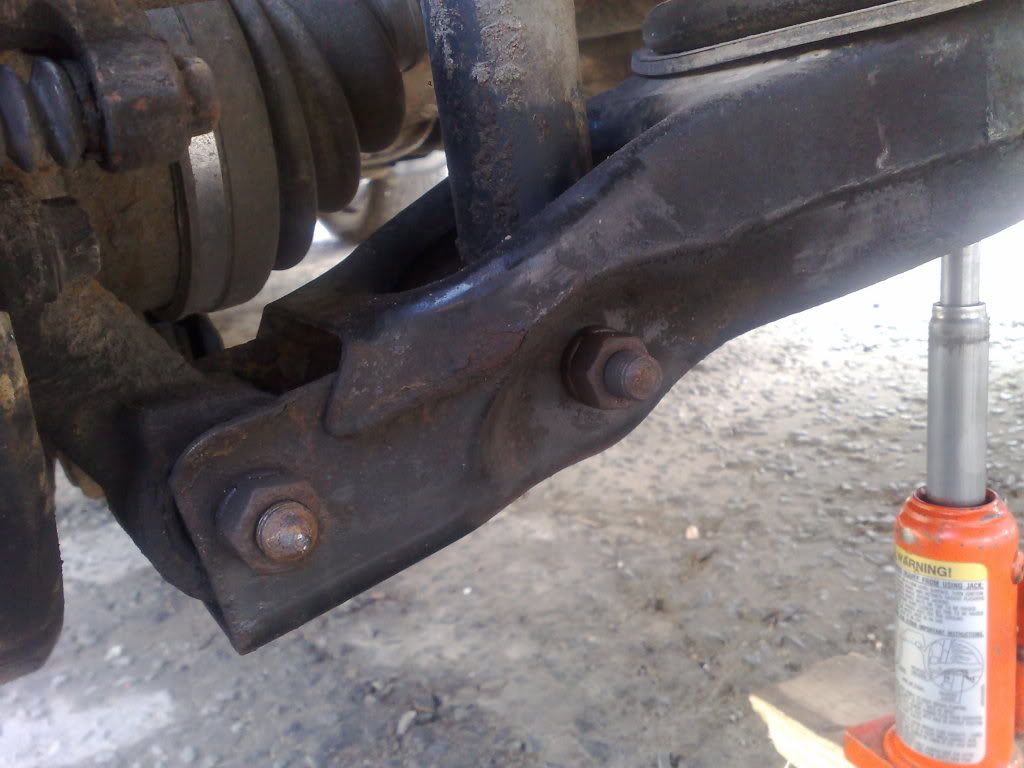
then remove these 2 bolts below
<a href="http://s247.photobucket.com/albums/gg126/mickster2008/?action=view¤t=12032010271.jpg" target="_blank"><img src="http://i247.photobucket.com/albums/gg126/mickster2008/12032010271.jpg" border="0" alt="Photobucket"></a>
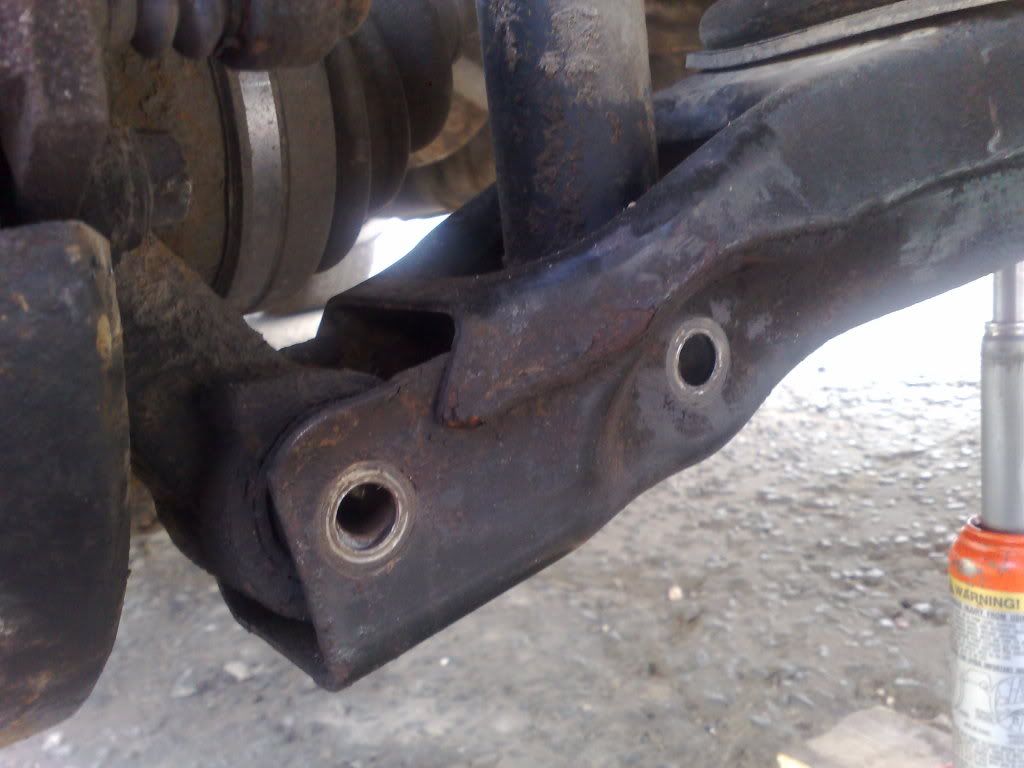
like so
<a href="http://s247.photobucket.com/albums/gg126/mickster2008/?action=view¤t=12032010273.jpg" target="_blank"><img src="http://i247.photobucket.com/albums/gg126/mickster2008/12032010273.jpg" border="0" alt="Photobucket"></a>
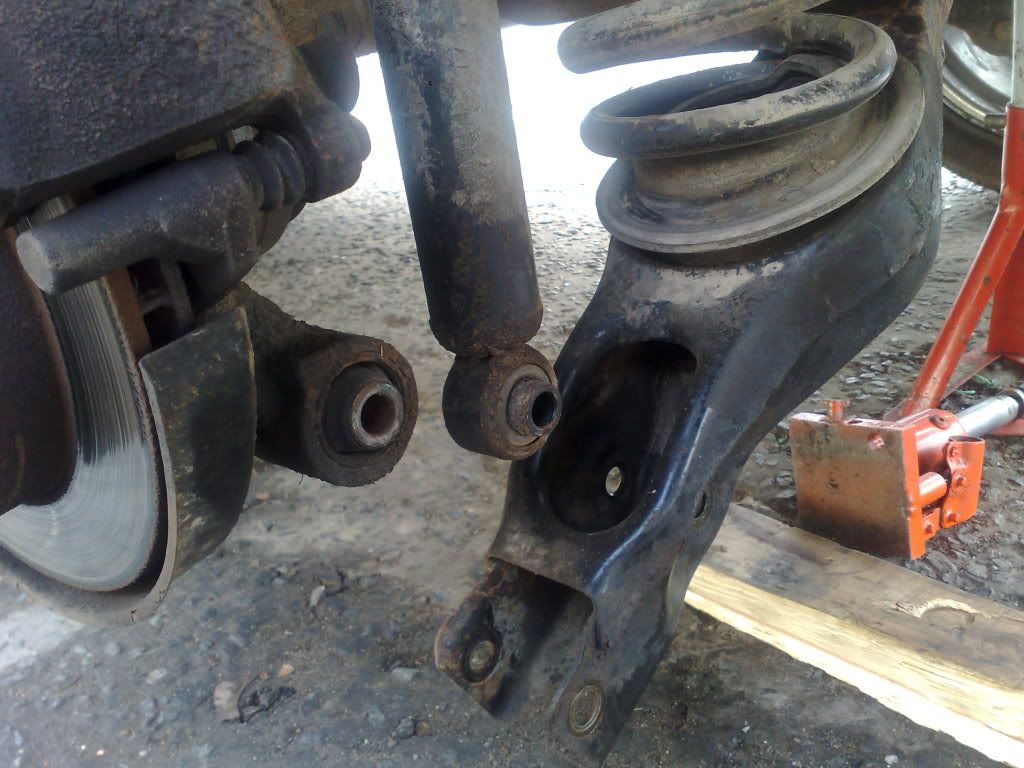
then slowly lower the bottle jack and take out the coil spring
<a href="http://s247.photobucket.com/albums/gg126/mickster2008/?action=view¤t=12032010277.jpg" target="_blank"><img src="http://i247.photobucket.com/albums/gg126/mickster2008/12032010277.jpg" border="0" alt="Photobucket"></a>
place the spacer on the coil spring note the hole in the top of the spacer the bolt on the chassis inside the spring cup goes into this hope
<a href="http://s247.photobucket.com/albums/gg126/mickster2008/?action=view¤t=27062010.jpg" target="_blank"><img src="http://i247.photobucket.com/albums/gg126/mickster2008/27062010.jpg" border="0" alt="Photobucket"></a>
<a href="http://s247.photobucket.com/albums/gg126/mickster2008/?action=view¤t=12032010276.jpg" target="_blank"><img src="http://i247.photobucket.com/albums/gg126/mickster2008/12032010276.jpg" border="0" alt="Photobucket"></a>
aline the spring and spacer in position then slowly jack the arm back up until you can aline the two bolts back into position like so
<a href="http://s247.photobucket.com/albums/gg126/mickster2008/?action=view¤t=27062010001.jpg" target="_blank"><img src="http://i247.photobucket.com/albums/gg126/mickster2008/27062010001.jpg" border="0" alt="Photobucket"></a>
tighten bolts back up replace wheels the you go from this
<a href="http://s247.photobucket.com/albums/gg126/mickster2008/?action=view¤t=12032010269.jpg" target="_blank"><img src="http://i247.photobucket.com/albums/gg126/mickster2008/12032010269.jpg" border="0" alt="Photobucket"></a>
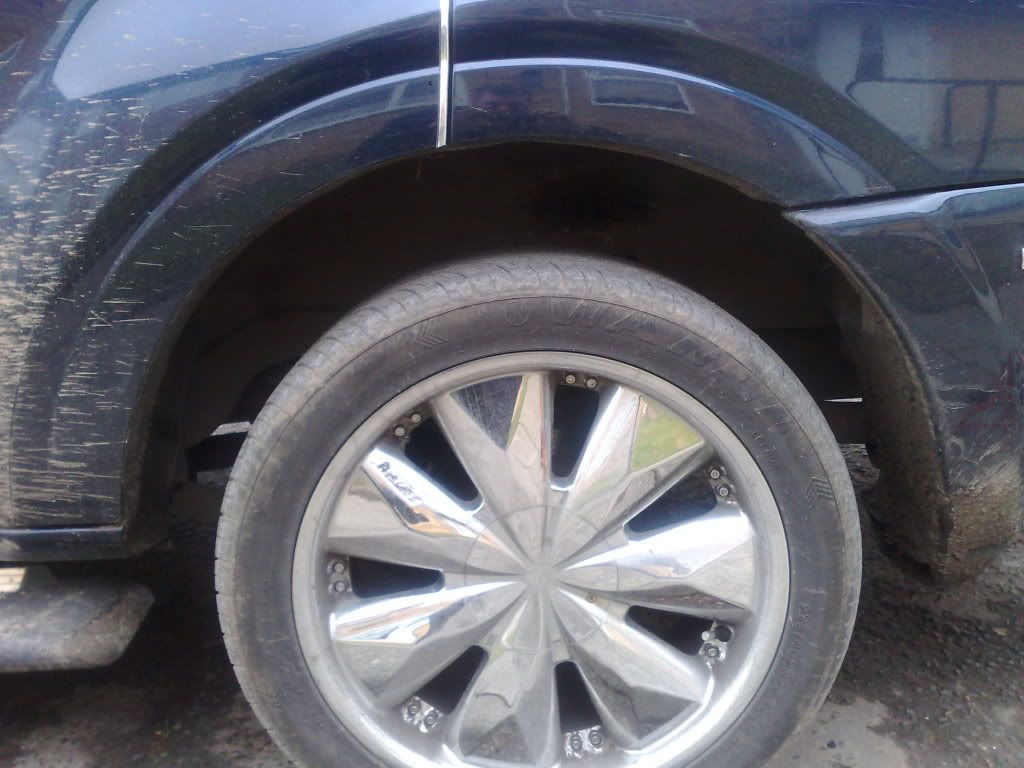
to this
<a href="http://s247.photobucket.com/albums/gg126/mickster2008/?action=view¤t=27062010003.jpg" target="_blank"><img src="http://i247.photobucket.com/albums/gg126/mickster2008/27062010003.jpg" border="0" alt="Photobucket"></a>
<a href="http://s247.photobucket.com/albums/gg126/mickster2008/?action=view¤t=27062010004.jpg" target="_blank"><img src="http://i247.photobucket.com/albums/gg126/mickster2008/27062010004.jpg" border="0" alt="Photobucket"></a>
fronts to follow when i receive them
mick |
|
| Back to top |
|
 |
Google
Sponsor

|
| Posted: Thu Jul 01, 2010 16:50 Post subject: Google Ads keep the POCUK free to join! |
|
|
|
|
| Back to top |
|
|
SHED
LifeTime Member
Age: 50
Zodiac: 
Joined: 28 Sep 2004
Posts: 5495
Location: WEST HULL
|
| Posted: Thu Jul 01, 2010 16:51 Post subject: |
|
|
lol maybe not  |
|
| Back to top |
|
|
mick1969
LifeTime Member
Age: 55
Zodiac:
Joined: 20 Dec 2009
Posts: 2651
Location: redcar by sea,cleveland
|
| Posted: Thu Jul 01, 2010 16:53 Post subject: Re: 2" rear suspension lift on a 3.2 lwb |
|
|
| mick1969 wrote: |
aquired rear coil spring spacers of SUBZERO on here
1st i raised the rear end securely and placed on blocks and jack stands used the trucks bottle jack to raise the bottom camber arm removed the wheel
then remove these 2 bolts below
<a href="http://s247.photobucket.com/albums/gg126/mickster2008/?action=view¤t=12032010271.jpg" target="_blank"><img src="http://i247.photobucket.com/albums/gg126/mickster2008/12032010271.jpg" border="0" alt="Photobucket"></a>
like so
<a href="http://s247.photobucket.com/albums/gg126/mickster2008/?action=view¤t=12032010273.jpg" target="_blank"><img src="http://i247.photobucket.com/albums/gg126/mickster2008/12032010273.jpg" border="0" alt="Photobucket"></a>
then slowly lower the bottle jack and take out the coil spring
<a href="http://s247.photobucket.com/albums/gg126/mickster2008/?action=view¤t=12032010277.jpg" target="_blank"><img src="http://i247.photobucket.com/albums/gg126/mickster2008/12032010277.jpg" border="0" alt="Photobucket"></a>
place the spacer on the coil spring note the hole in the top of the spacer the bolt on the chassis inside the spring cup goes into this hope
<a href="http://s247.photobucket.com/albums/gg126/mickster2008/?action=view¤t=27062010.jpg" target="_blank"><img src="http://i247.photobucket.com/albums/gg126/mickster2008/27062010.jpg" border="0" alt="Photobucket"></a>
<a href="http://s247.photobucket.com/albums/gg126/mickster2008/?action=view¤t=12032010276.jpg" target="_blank"><img src="http://i247.photobucket.com/albums/gg126/mickster2008/12032010276.jpg" border="0" alt="Photobucket"></a>
aline the spring and spacer in position then slowly jack the arm back up until you can aline the two bolts back into position like so
<a href="http://s247.photobucket.com/albums/gg126/mickster2008/?action=view¤t=27062010001.jpg" target="_blank"><img src="http://i247.photobucket.com/albums/gg126/mickster2008/27062010001.jpg" border="0" alt="Photobucket"></a>
tighten bolts back up replace wheels the you go from this
<a href="http://s247.photobucket.com/albums/gg126/mickster2008/?action=view¤t=12032010269.jpg" target="_blank"><img src="http://i247.photobucket.com/albums/gg126/mickster2008/12032010269.jpg" border="0" alt="Photobucket"></a>
to this
<a href="http://s247.photobucket.com/albums/gg126/mickster2008/?action=view¤t=27062010003.jpg" target="_blank"><img src="http://i247.photobucket.com/albums/gg126/mickster2008/27062010003.jpg" border="0" alt="Photobucket"></a>
<a href="http://s247.photobucket.com/albums/gg126/mickster2008/?action=view¤t=27062010004.jpg" target="_blank"><img src="http://i247.photobucket.com/albums/gg126/mickster2008/27062010004.jpg" border="0" alt="Photobucket"></a>
fronts to follow when i receive them
mick |
sorry put thr wrong picture codes on ill redo them |
|
| Back to top |
|
|
mick1969
LifeTime Member
Age: 55
Zodiac:
Joined: 20 Dec 2009
Posts: 2651
Location: redcar by sea,cleveland
|
| Posted: Thu Jul 01, 2010 17:13 Post subject: |
|
|
right think iv sorted it,1st jack up and secure the rear end place a jack under the bottom arm remove the wheel
then remove these two bolts
like so
slowly lower your jack remove the coil spring and drop down the bottom arm like this
place the coil spring spacer on your spring note the hole in the top of the spacer this alines with the bolt that protudes out of the spring cup on the chassis

aline the coil sping in position making sure the bolt on the chassis goes into the hole in the top of the spacer like so

slowly jack the arm back up to aline the two bolts,replace wheels
then from this hight
to this
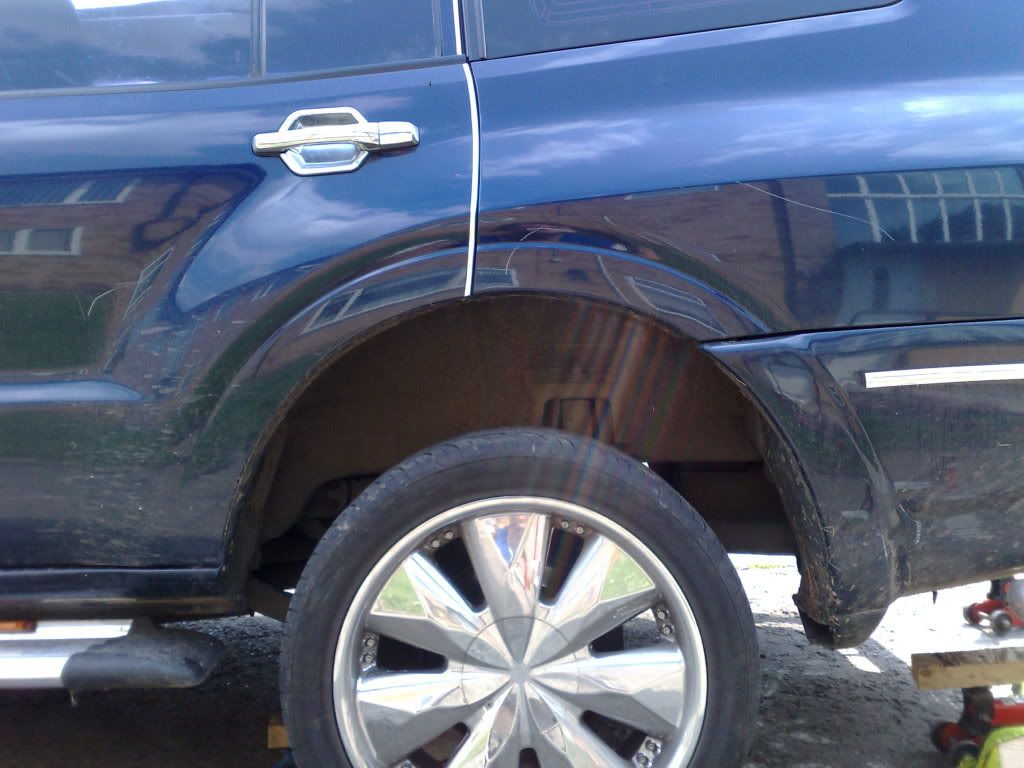
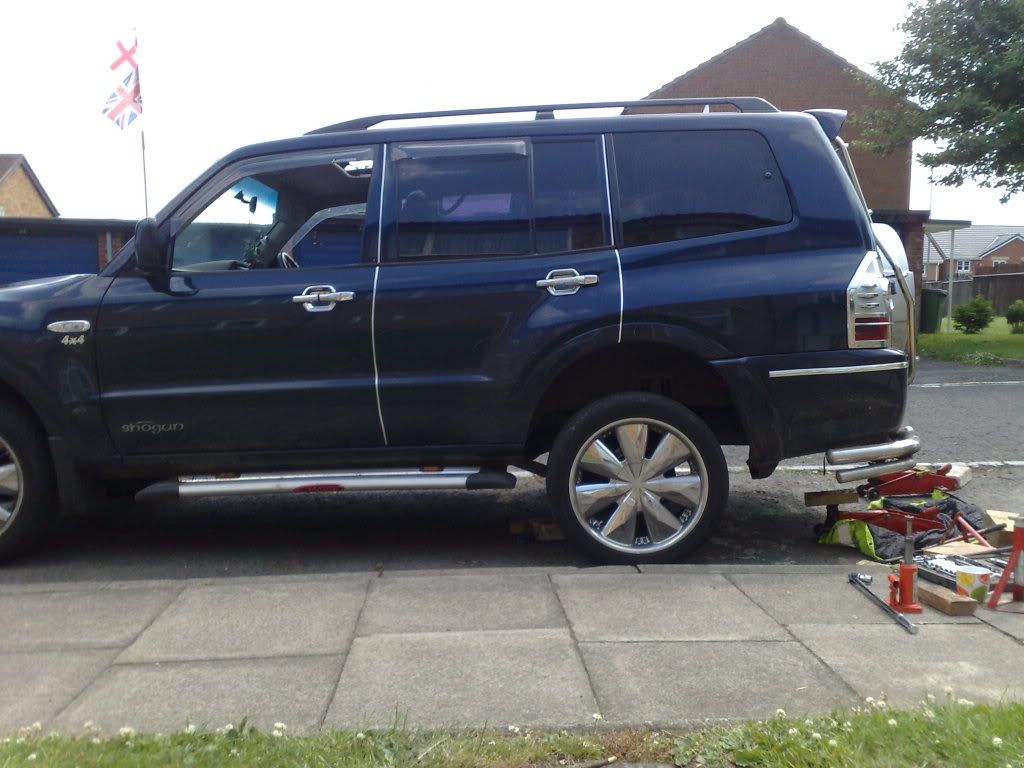
i think i need some bigger rubber now tho
mick |
|
| Back to top |
|
|
mick1969
LifeTime Member
Age: 55
Zodiac:
Joined: 20 Dec 2009
Posts: 2651
Location: redcar by sea,cleveland
|
| Posted: Thu Jul 01, 2010 19:41 Post subject: |
|
|
oh and the front lift to follow when they arrive both from SUBZERO on here
mick |
|
| Back to top |
|
|
d13dkt
***

Age: 47
Zodiac: 
Joined: 27 Mar 2010
Posts: 148
Location: PLYMOUTH
|
| Posted: Thu Jul 01, 2010 22:10 Post subject: |
|
|
| looks good, can he do them for the mk1 and if so how much? |
|
| Back to top |
|
|
jimmyw
LifeTime Member

Age: 32
Zodiac: 
Joined: 30 Dec 2009
Posts: 1954
Location: Cork - Ireland
|
| Posted: Fri Jul 02, 2010 0:27 Post subject: |
|
|
| Never seen a lift on a MK3 before,looks good,makes your wheels look small though . . get some gangsta big ones!! |
|
| Back to top |
|
|
robx1r
***
Age: 37
Zodiac:
Joined: 08 Apr 2010
Posts: 140
Location: meath ireland
|
| Posted: Fri Jul 02, 2010 0:47 Post subject: |
|
|
| d13dkt wrote: |
| looks good, can he do them for the mk1 and if so how much? |
he can indeed i've them on mine search my threads and you'll find it |
|
| Back to top |
|
|
mick1969
LifeTime Member
Age: 55
Zodiac:
Joined: 20 Dec 2009
Posts: 2651
Location: redcar by sea,cleveland
|
| Posted: Fri Jul 02, 2010 0:49 Post subject: |
|
|
| jimmyw wrote: |
| Never seen a lift on a MK3 before,looks good,makes your wheels look small though . . get some gangsta big ones!! |
yeh ano they are 20"wheels aswell iv got a spare set of wheels with brandnew 265/75/16 amazon technic muds on they will fill the arches out more i think
mick |
|
| Back to top |
|
|
sharky1964
LifeTime Member
Age: 59
Zodiac: 
Joined: 23 May 2009
Posts: 493
Location: didcot
|
| Posted: Fri Jul 02, 2010 7:41 Post subject: |
|
|
| Looking good |
|
| Back to top |
|
|
NYRA
LifeTime Member
Age: 57
Zodiac:
Joined: 04 Dec 2009
Posts: 3675
Location: bed and work
|
| Posted: Fri Jul 02, 2010 16:51 Post subject: |
|
|
well done mick mare whens the bigger tyres going on them 20`s look so little ,,but would look good on mine ? wink wink  |
|
| Back to top |
|
|
mick1969
LifeTime Member
Age: 55
Zodiac:
Joined: 20 Dec 2009
Posts: 2651
Location: redcar by sea,cleveland
|
| Posted: Fri Jul 02, 2010 17:04 Post subject: |
|
|
| NYRA wrote: |
| well done mick mare whens the bigger tyres going on them 20`s look so little ,,but would look good on mine ? wink wink |
haha you wich bazza ill mybe put bigger profile tyres on them next time a couple of them are due for a change anyhow i was gunna keep my spare wheels and new tyres till the winter as the tyres are muds wasnt sure if they would last to lond on the road most of the time |
|
| Back to top |
|
|
allymc
*

Age: 43
Zodiac:
Joined: 09 Mar 2013
Posts: 12
Location: eire
|
| Posted: Sun Jan 15, 2017 21:23 Post subject: Rear spacers |
|
|
| Would you have photos or dimensions for the rear spacer plates please |
|
| Back to top |
|
|
kenthepipe
LifeTime Member

Joined: 11 Mar 2005
Posts: 4366
Location: North-East
|
| Posted: Sun Jan 15, 2017 22:56 Post subject: Re: Rear spacers |
|
|
| allymc wrote: |
| Would you have photos or dimensions for the rear spacer plates please |
Mick has'nt been on here for years, and I think he sold his truck, whether he read's this or not I'm not so sure. |
|
| Back to top |
|
|
|


