| View previous topic :: View next topic |
| Author |
Message |
m3crj
*****


Age: 41
Zodiac: 
Joined: 02 Jul 2007
Posts: 612
Location: DONCASTER
|
 Posted: Thu Oct 15, 2009 10:14 Post subject: Challenger / Shogun Sport 2" Body Lift Posted: Thu Oct 15, 2009 10:14 Post subject: Challenger / Shogun Sport 2" Body Lift |
 |
|
right here goes i'll try my best so hold the guns
 Mitsubishi Challenger / shogun sport 2" Body lift Mitsubishi Challenger / shogun sport 2" Body lift 
first job remove lower fan cowling from the radiator in the engine bay should just pull off with force (sorry no pics mine was already removed from doing the head)
(***SHOGUN SPORT ONLY REMOVE FRONT FLEXI BRAKE BRACKETS FROM THE INSIDE OF WHEEL ARCH AS THESE CONNECT TO THE CAB UNLIKE CHALLENGERS WHICH CONNECT TO THE CHASSIS***)
2nd job 1x X-head screwdriver remove rear floor boxes 4x screws in the upmost rear and 4x screws in the forward 1 plus 2x 10mm bolts (floor anchor)

remover the 3 x net hooks on the rear sides of boot unscrew the rear lip from boot
the pull the sides away from the boot (the arfe just press clips and should pull out with persuasion
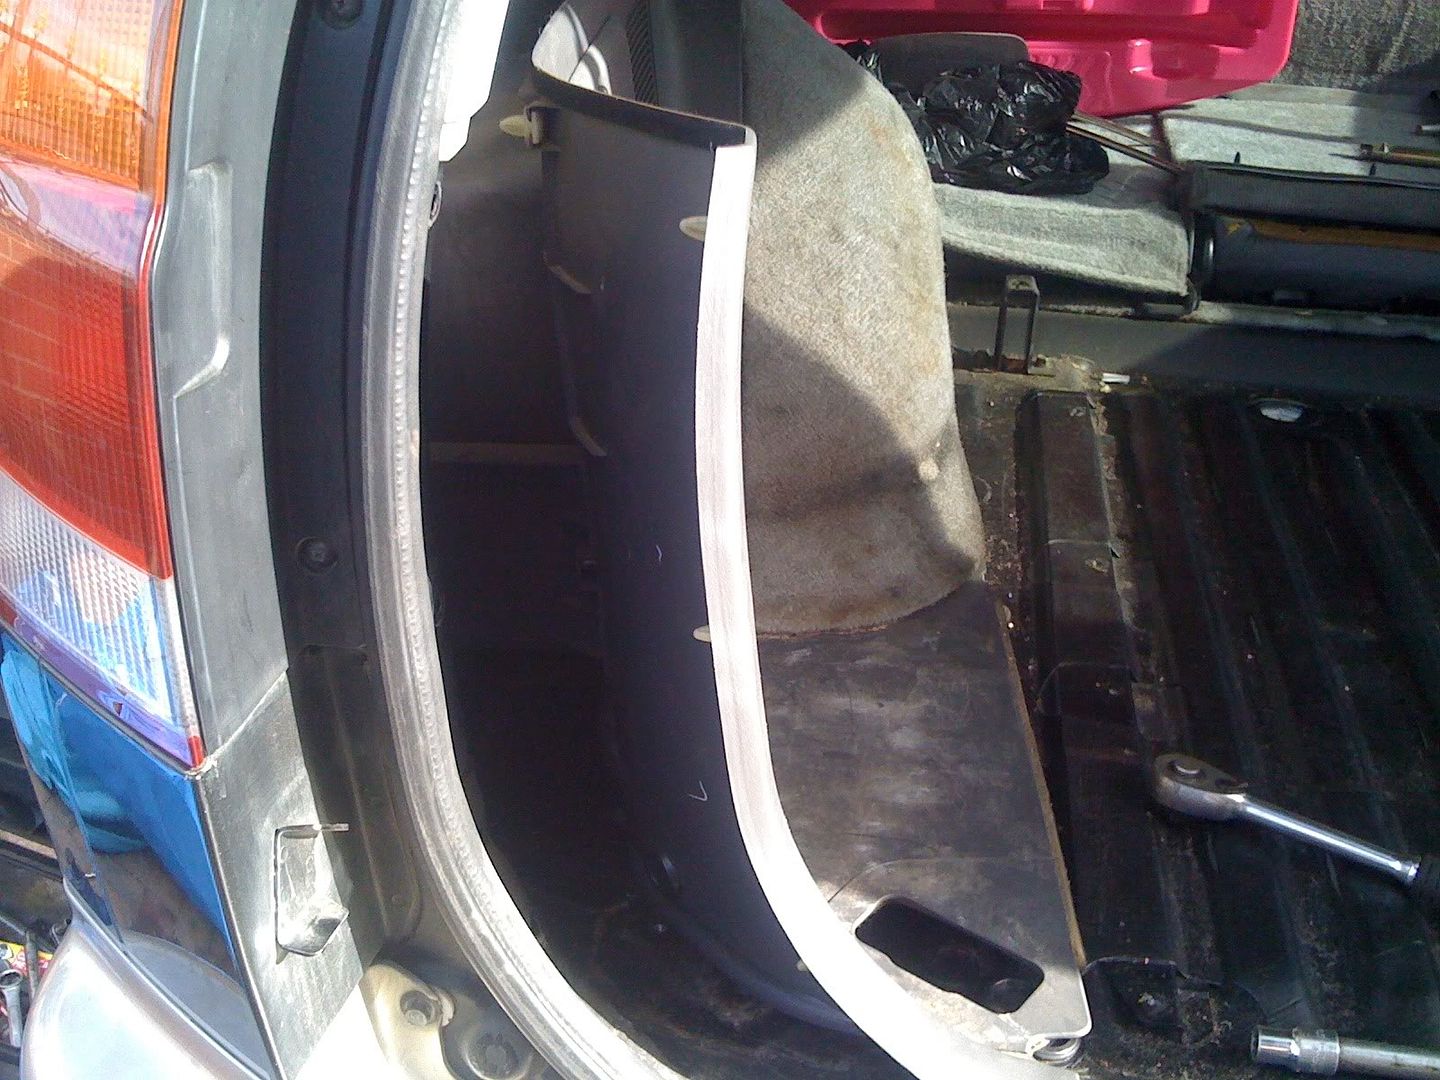
this will reveal the 2 rear mounting bolts 1x each side under a plastic bung
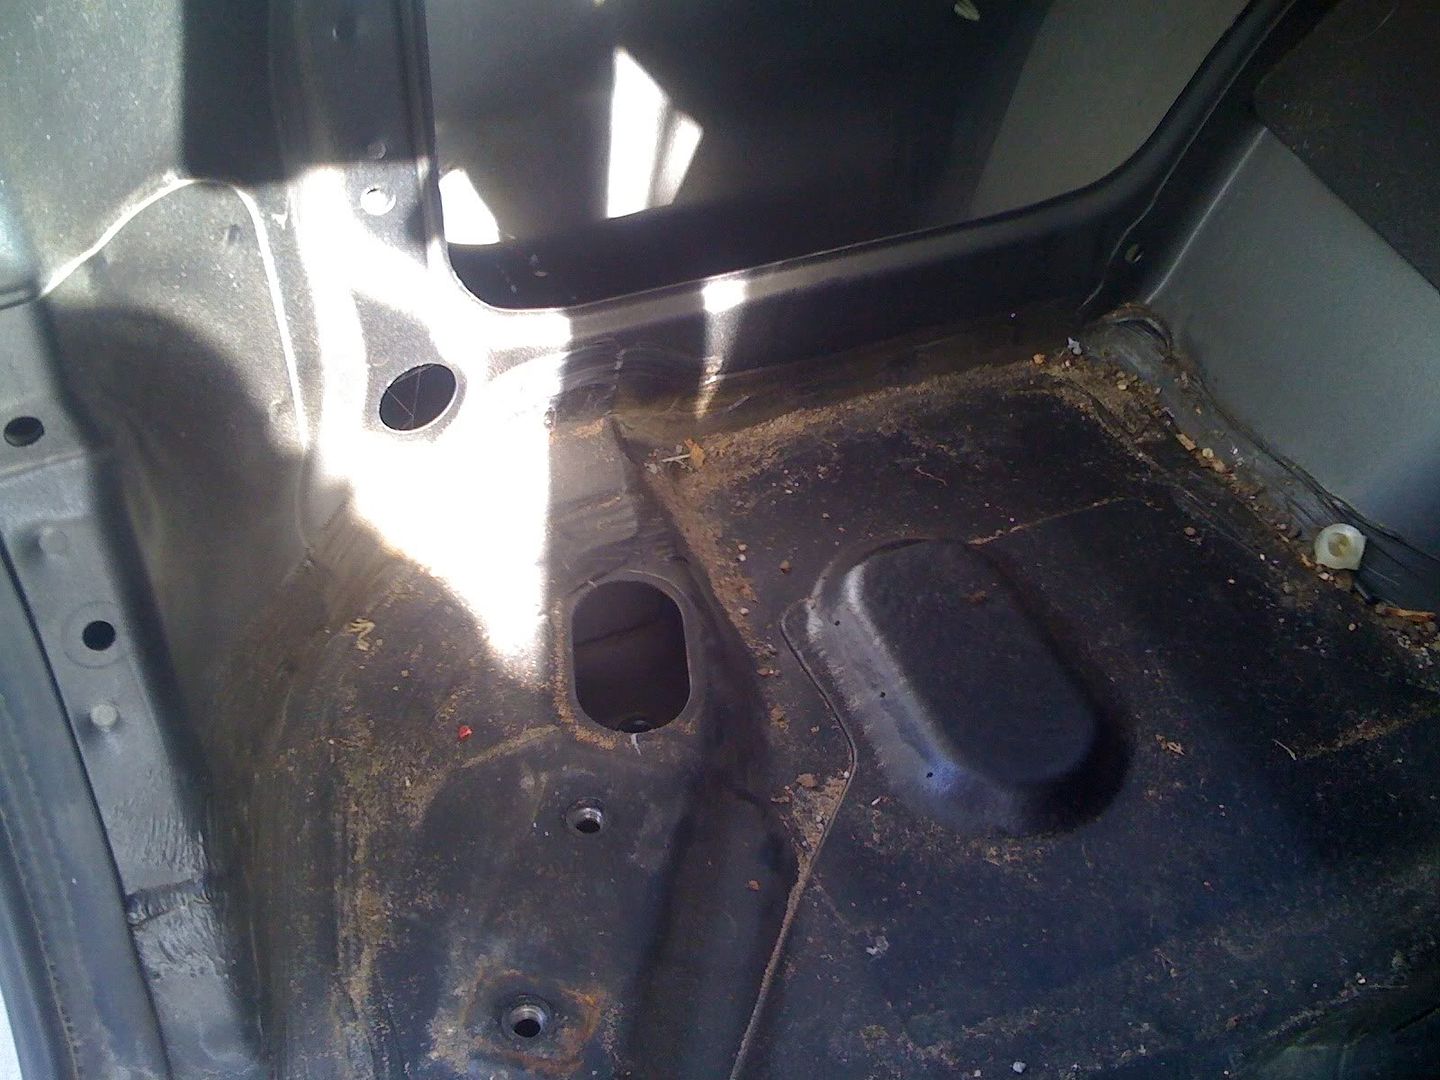
next mounting point is just in front of the rear wheel arch located under the bolt jack again covered by a rubber bung
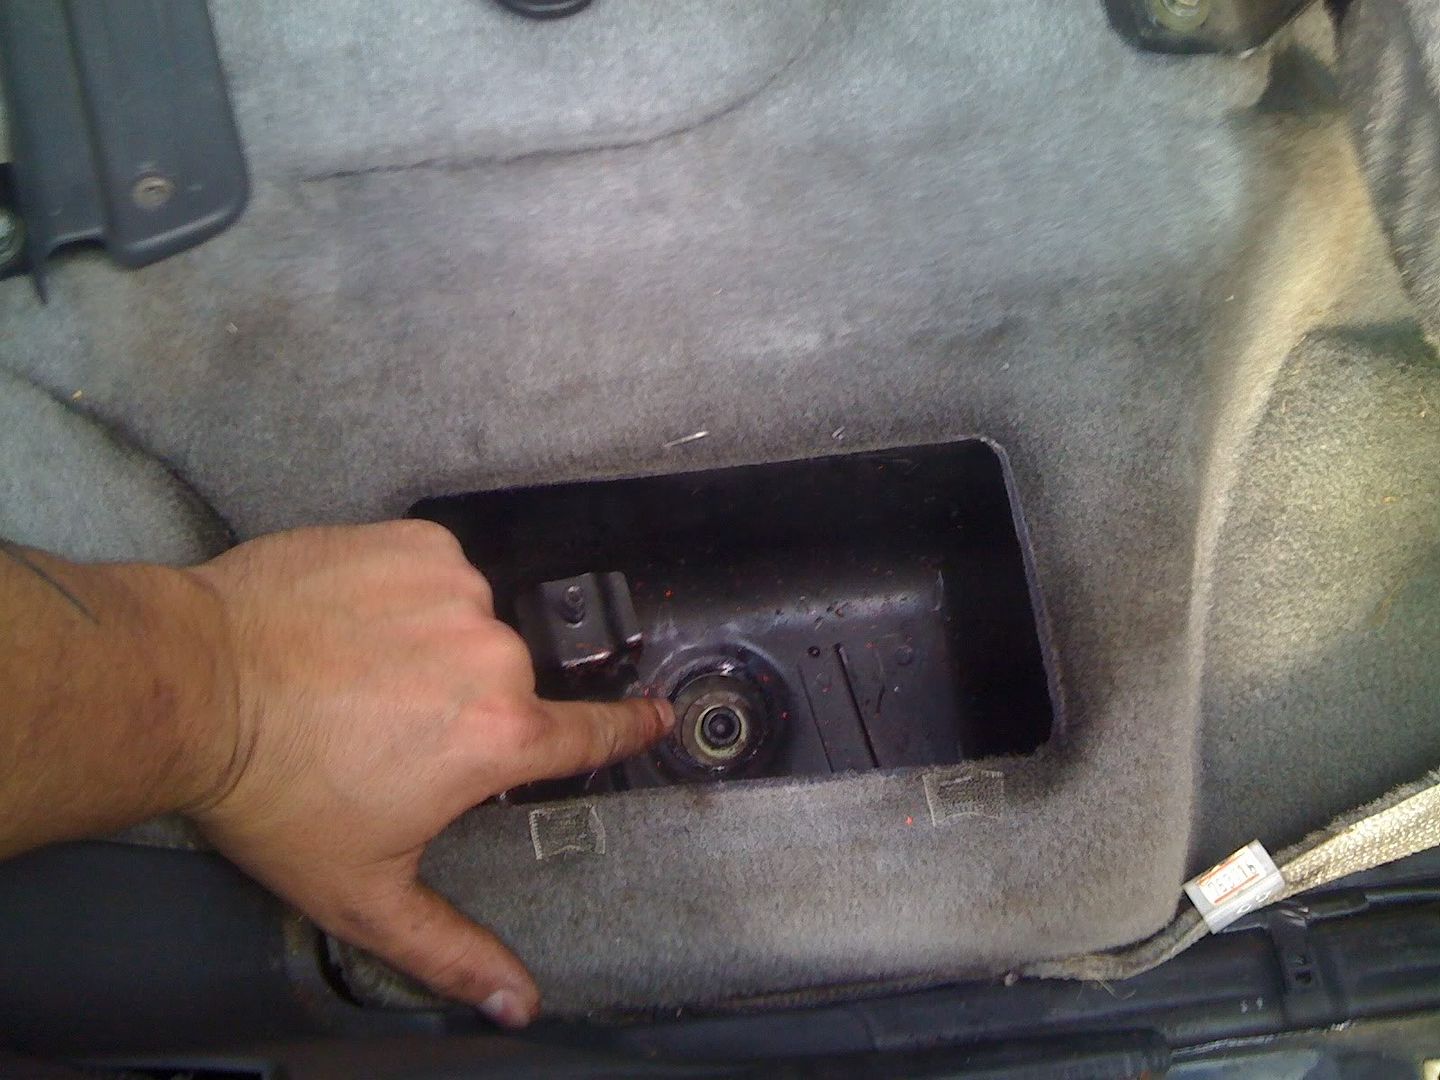
next bolt is just under the carpet behin the front seats you will need to remove the 3 screws that hold down the scuff plate for the door and pull the carpet back
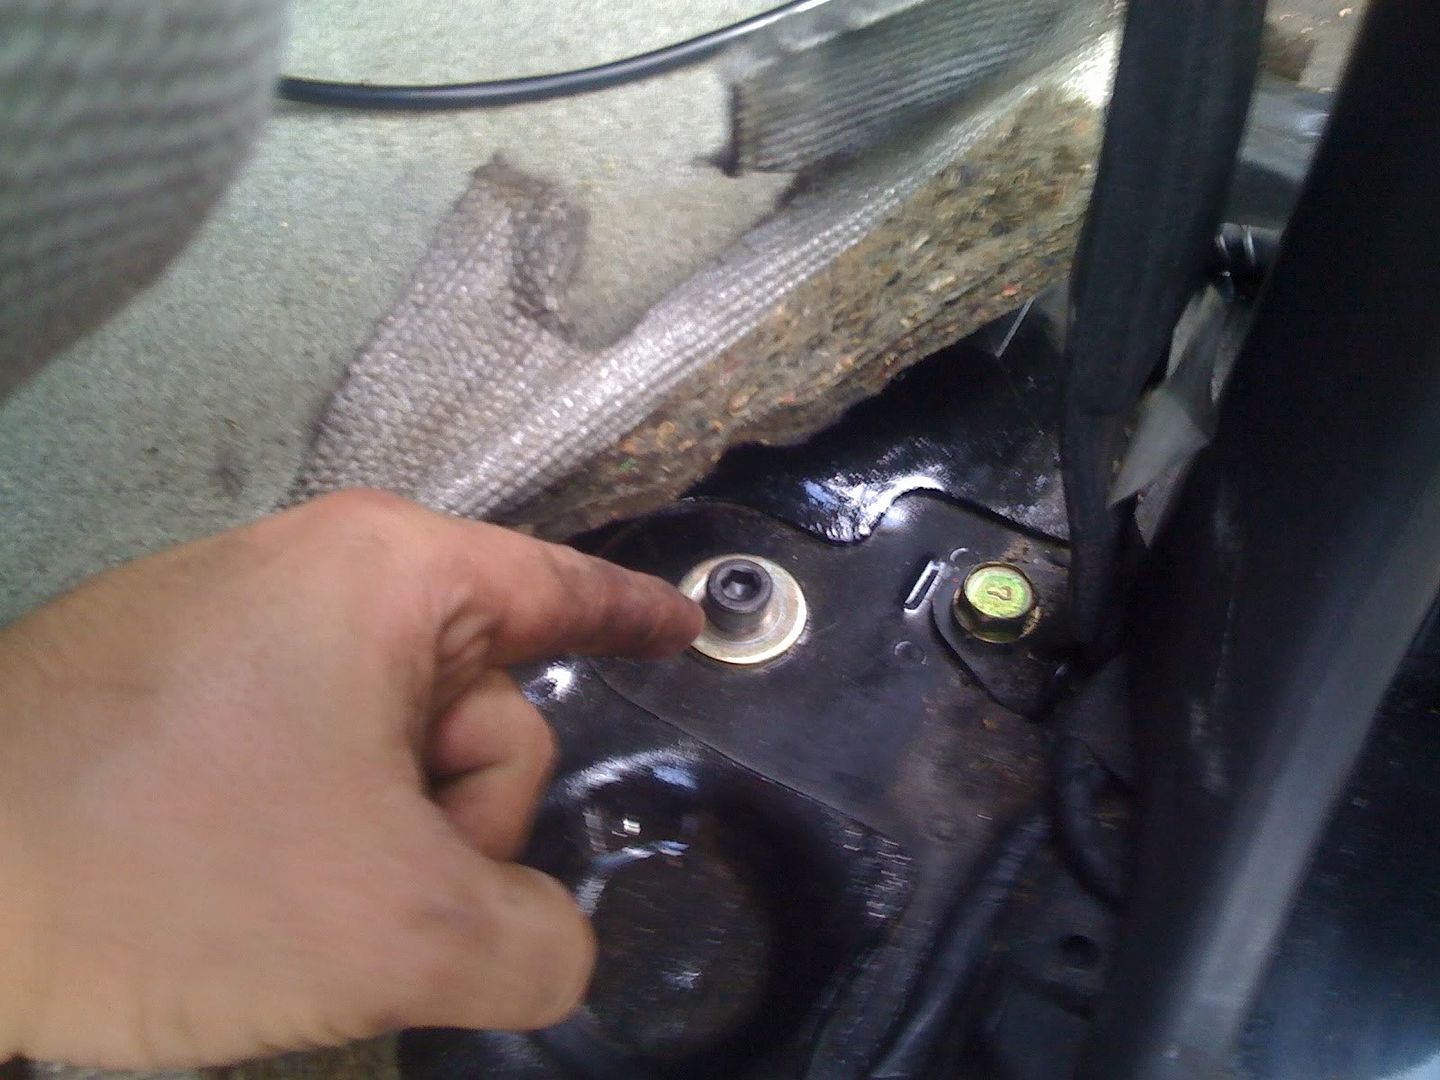
the next bolts is just behind the front wheel arch you will need to remive the 4 screws for the scuff plate again a 2 screws for the side panel in front kickwell (this just pulls away)
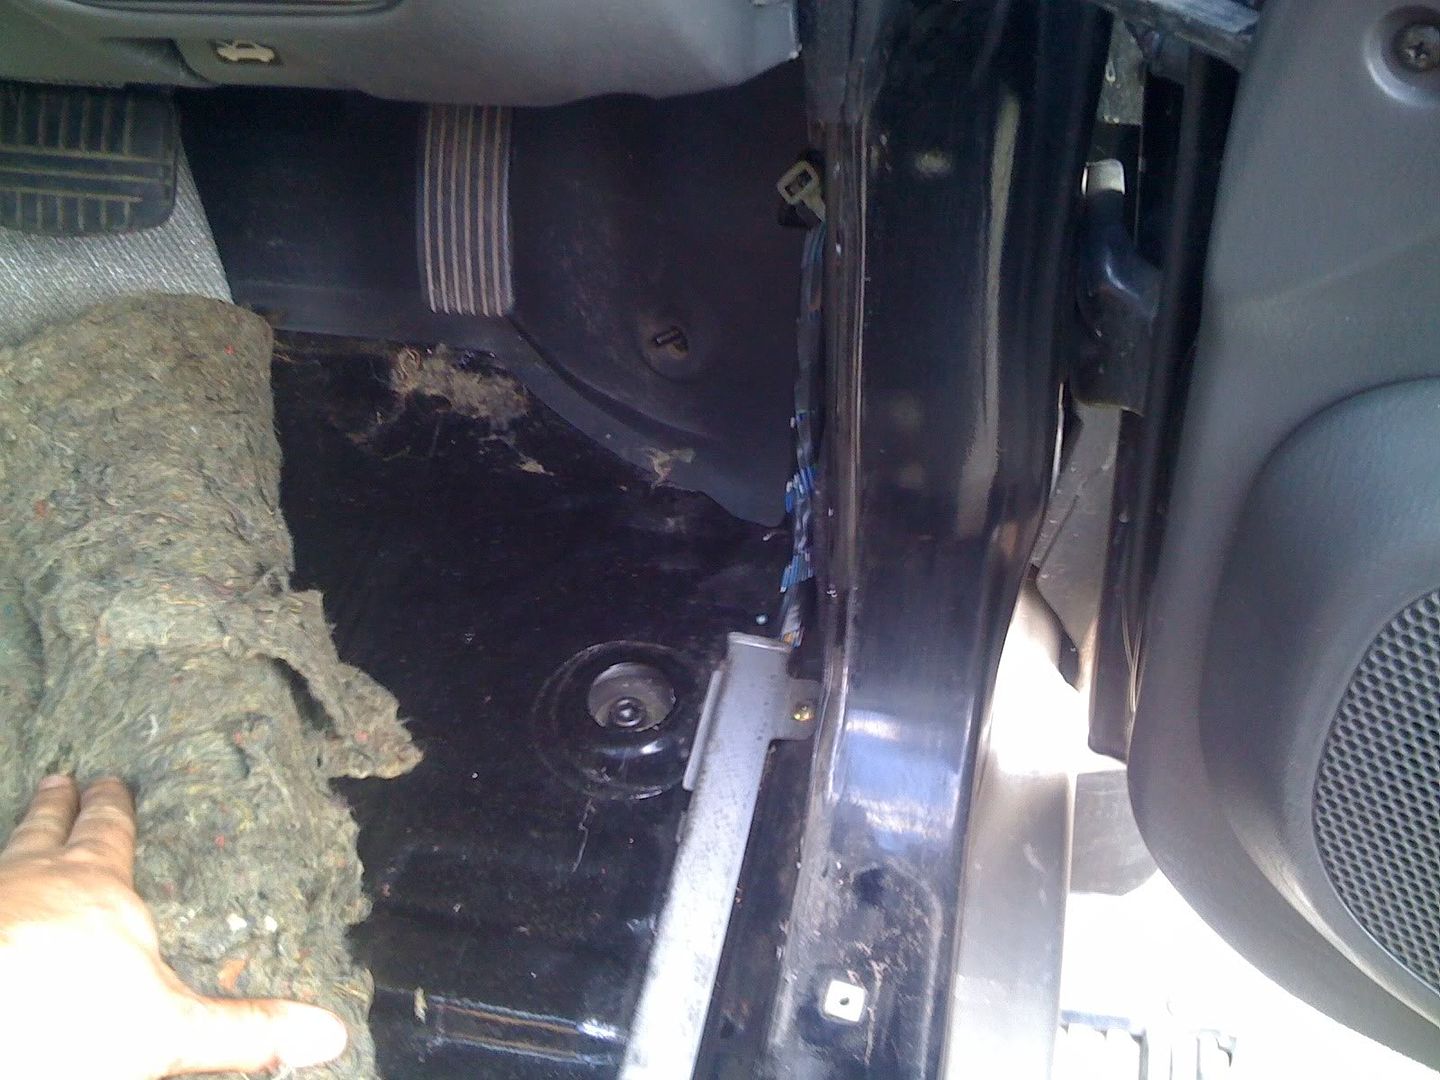
the next bolt is located in the front wheel arch directly above the tydown point or recover hook depending on side
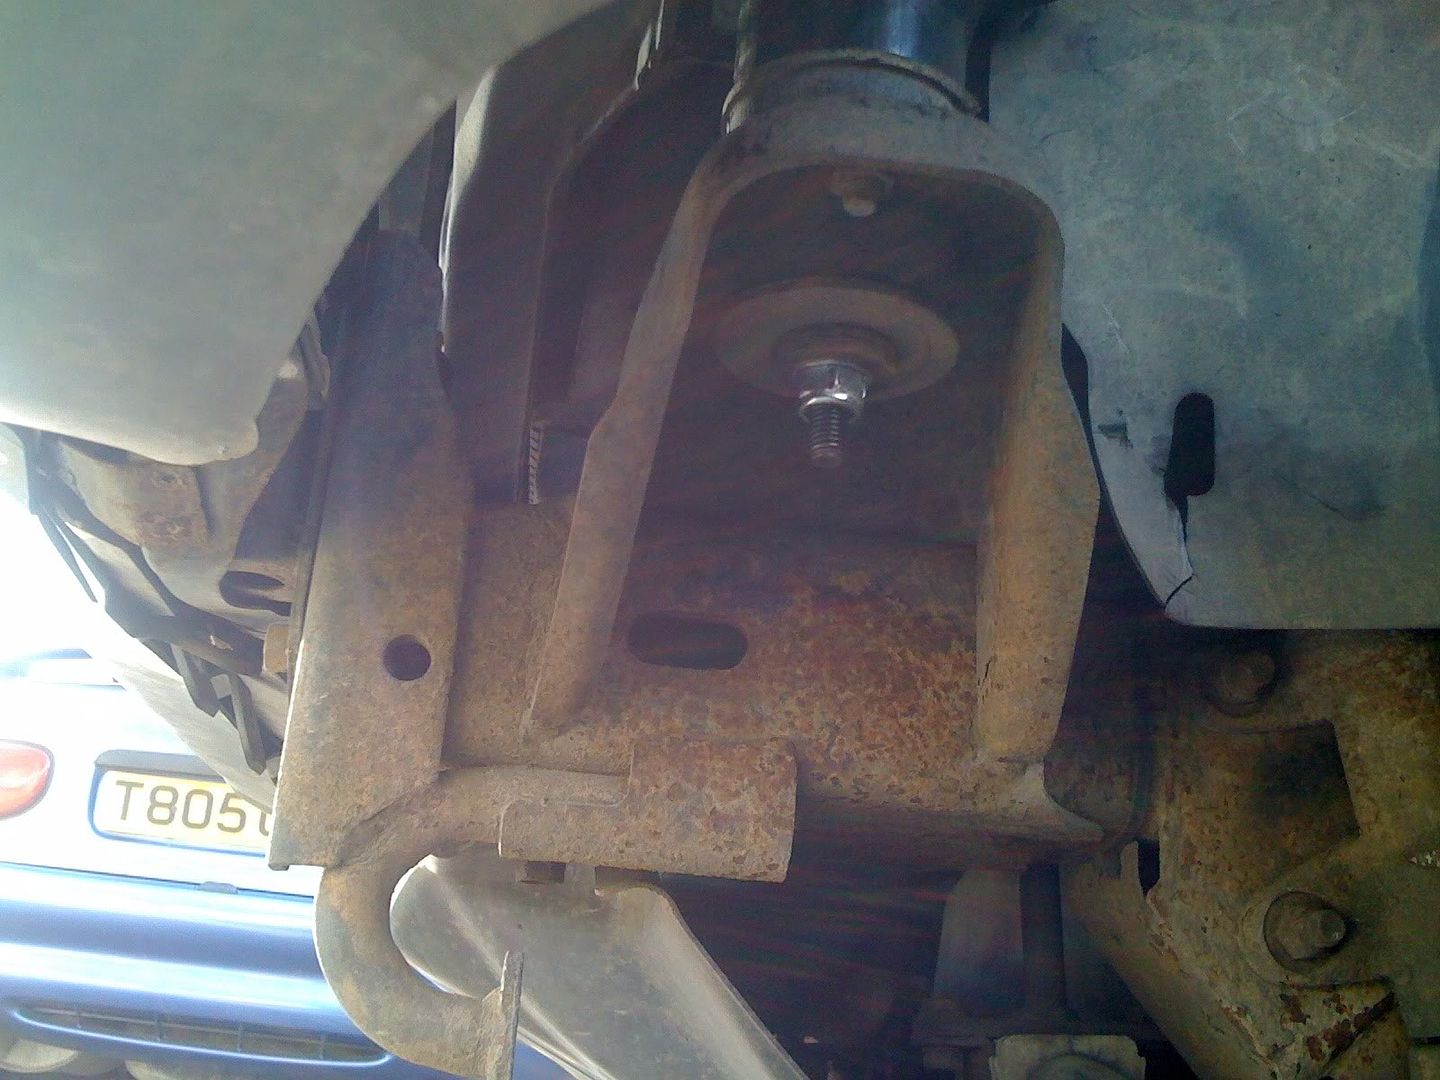
now you know where the bolts are located the next things is a few days before you start the job go round and spray all the mounting points with lubricating spray (wd40 etc...) these can be easily reached without jacking the truck up this part makes it easy come the day you want to remove the bolts
now my procedure involed removing all 5 nuts from the bolts on the drivers side using a length of 3x3 under the cab floor between the sill and chassis (not on the chassis) and using my 6 ton bottle jack on several blocks of wood for height slowly jack the cab continuosly watching for any snagging untill the 2" lifting blocks can be installed (don't lift higher) then starting at the back push each old bolt out and place the lifting blocks and new extended bolts into position once all 5 on drivers side have been put in place then lower the jack untill the cab is seated on the blocks then go along and tighten all the nut's and bolts for the lift (i used 12.8 tensile 150mm length cap head bolts which uses 8mm allen key and 17mm socket for piece of mind stronger tensile) once the drivers side is all done and bolted remove the jack have a final check for cables hoses etc... then proceed to the passnger side all mounting bolts are position parralel to the drivers side so should be easy to identify and follow the same procedure i.e remove nut's jack up the cab remove old bolts install blocks and new extended bolts lower cab tighten new nuts and bolts final check for snagging check front brakes hoses mine just need a tug and push to give the extra length due to them having a coil in the engine bay upper wing
***shogun sport owners follow the same procedure but the front brake FLEXI hoses are attached to the cab and will need disconnecting before the cab is jacked for the lifting blocks***
NOW THIS IS JUST MY OWN EXPERIENCE AND PROCEDURE I'M NOT BEING HELD LIABLE FOR ANY DAMAGES CAUSED BY PEOPLE FOLLOWING MY PROCEDURE |
|
| Back to top |
|
 |
Google
Sponsor

|
| Posted: Thu Oct 15, 2009 10:14 Post subject: Google Ads keep the POCUK free to join! |
|
|
|
|
| Back to top |
|
|
DawnH
LifeTime Member


Age: 56
Zodiac: 
Joined: 08 Sep 2008
Posts: 6828
Location: newport, gwent
|
| Posted: Thu Oct 15, 2009 10:24 Post subject: |
|
|
brilliant write up!!!!!  |
|
| Back to top |
|
|
gunclub
*

Age: 35
Zodiac: 
Joined: 09 May 2011
Posts: 28
Location: Sweden
|
| Posted: Fri Sep 30, 2011 0:08 Post subject: |
|
|
| Great write up:-) im thinking about doing the same on my 2001 pajero sport. Are you sure that i don't have to do anything else than removing that cover from the fan? Im worried about steering axle' brake and gearlever wire and also the pipe that goes from the fuel cap to the gas tank. |
|
| Back to top |
|
|
m3crj
*****
Age: 41
Zodiac:
Joined: 02 Jul 2007
Posts: 612
Location: DONCASTER
|
| Posted: Sat Oct 01, 2011 8:55 Post subject: |
|
|
| As long as you don't go over 2" everything SHOULD reach I've done both vehicles now with no problems just give everything a final check round before you drive the vehicle is the only advise I would give above and beyond what I have already written |
|
| Back to top |
|
|
gunclub
*
Age: 35
Zodiac:
Joined: 09 May 2011
Posts: 28
Location: Sweden
|
| Posted: Sat Oct 01, 2011 9:11 Post subject: |
|
|
| Thanks alot for the reasurence. Went and bought myself an 8t bottlejack today. Gonna try getting my hands on a lift kit from GB since they dont sell em here in sweden. |
|
| Back to top |
|
|
Guvnorrbm
**


Age: 44
Zodiac: 
Joined: 19 May 2011
Posts: 73
Location: Holyhead - Isle of Anglesey
|
| Posted: Sat Oct 01, 2011 9:29 Post subject: |
|
|
| Im planning of lifting my Sport, but its a Auto, does the auto gear stick mount to the top of the gear box or is it a remote cable setup? any one know? |
|
| Back to top |
|
|
gunclub
*
Age: 35
Zodiac:
Joined: 09 May 2011
Posts: 28
Location: Sweden
|
| Posted: Sat Oct 01, 2011 12:17 Post subject: |
|
|
| Pretty sure it's cable. If you check the website selling the liftkits they also sell extensions for manual shiftsticks but not one of em sells for auto. |
|
| Back to top |
|
|
next706
*
Age: 39
Zodiac: 
Joined: 12 Jan 2017
Posts: 16
Location: Warszawa
|
| Posted: Thu Jan 12, 2017 10:14 Post subject: |
|
|
| Wow! Judging from the photos, you have a lot of work! Good luck)) |
|
| Back to top |
|
|
cbriceno82
Newbie

Age: 56
Zodiac: 
Joined: 21 Jan 2014
Posts: 3
Location: Santiago, Chile
|
| Posted: Mon Jan 23, 2017 13:03 Post subject: |
|
|
Few steps not shown though.
From a study I'm making I found:
1) Fuel filler neck to tank hose: it seems this was not touched. I don't thinks this is the case. thishose does not stretch that long , it must be dettached/reattached
2) Front brake lines. The upper half of line must be lenghtened if you want to keep using the backet.
3) Fuel line return hoses. these hoses must be detached from the body.
4) heater core hoses: the hoses cannot stretch.
5) Fender mud flaps: if you want to keep them you must fab them from rubber fabric.
6) poo: The tcase shifter must be addressed.
7) Now my only doubt: The steering column shaft: is it needed to detach it or place an adaptor to lengthen it? |
|
| Back to top |
|
|
next706
*
Age: 39
Zodiac:
Joined: 12 Jan 2017
Posts: 16
Location: Warszawa
|
| Posted: Thu Feb 09, 2017 15:34 Post subject: |
|
|
| Wow! Judging from the photos, you have a lot of work! Good luck)) |
|
| Back to top |
|
|
cbriceno82
Newbie
Age: 56
Zodiac:
Joined: 21 Jan 2014
Posts: 3
Location: Santiago, Chile
|
| Posted: Thu Feb 16, 2017 13:44 Post subject: |
|
|
| cbriceno82 wrote: |
Few steps not shown though.
From a study I'm making I found:
1) Fuel filler neck to tank hose: it seems this was not touched. I don't think this is the case. this hose does not stretch that long , it must be dettached/reattached
2) Front brake lines. The upper half of line must be lenghtened if you want to keep using the backet.
3) Fuel line return hoses. these hoses must be detached from the body.
4) heater core hoses: the hoses cannot stretch.
5) Fender mud flaps: if you want to keep them you must fab them from rubber fabric.
6) poo: The tcase shifter must be addressed.
7) Now my only doubt: The steering column shaft: is it needed to detach it or place an adaptor to lengthen it? |
Work Done.
1) I had to cut the elbow hose and put a piece of tubing with 2 clamps. Done.
2) Yes, the OEM upper lines are not long enough. got spares from other vehicle to keep it bracketed.
3) Fuel line return hose. No issues.
4) No issues. Bear in mind my PA challenger is 4d56 powered.
5) Fabbed ones needed.
6) Tcase shifter must be extended 2 inches, Floorpan must be notched, after the lift the tcase does not shift to 2H.
7) Steering column shaft.. No issues. |
|
| Back to top |
|
|
arrowhead
Newbie
Age: 49
Zodiac: 
Joined: 04 Aug 2020
Posts: 1
Location: hammersmith
|
| Posted: Tue Aug 04, 2020 16:27 Post subject: |
|
|
hi there just seen your description on how to lift shogun sport body lift kit very cool can you tell me if the break lines ( front and rear ) need to be extended
cant seam to find anyone near me that will do the job. so will do myself if I don't have to mess with break lines.
hope you can help
THANKS A |
|
| Back to top |
|
|
|


