
|
The Mitsubishi Pajero Owners Club®
The Mitsubishi Pajero, Shogun, Montero, Challenger, Raider and EVO 4x4 Owner's Club
|
| View previous topic :: View next topic |
| Author |
Message |
paul_c2
******

Joined: 23 Feb 2009
Posts: 1396
Location: Cheshire
|
 Posted: Wed Jul 22, 2009 18:12 Post subject: Posted: Wed Jul 22, 2009 18:12 Post subject: |
 |
|
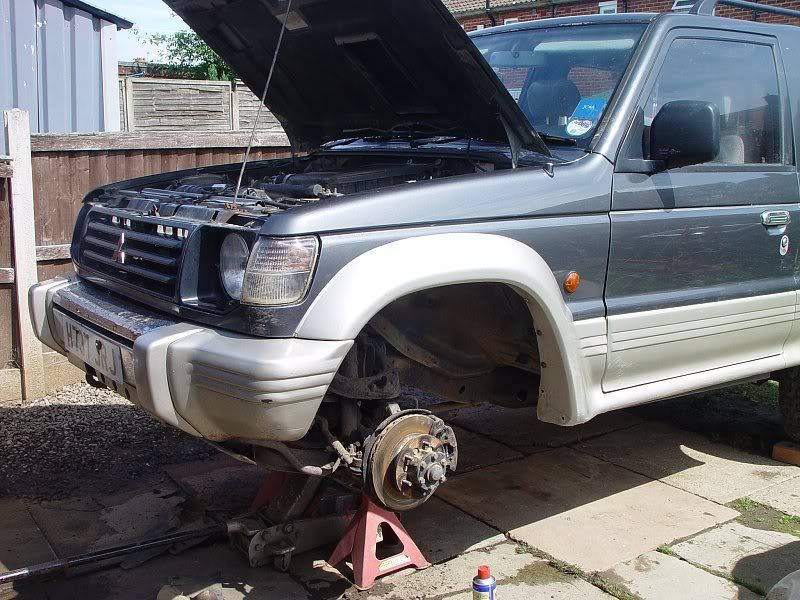
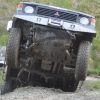
Today I've done the front. Here's the rough procedure:
1. Jack up and support on axle stands
2. Remove wheels. Clean up the area, and remove the rubber flap/sheet which lines the inner wheelarch to provide access:
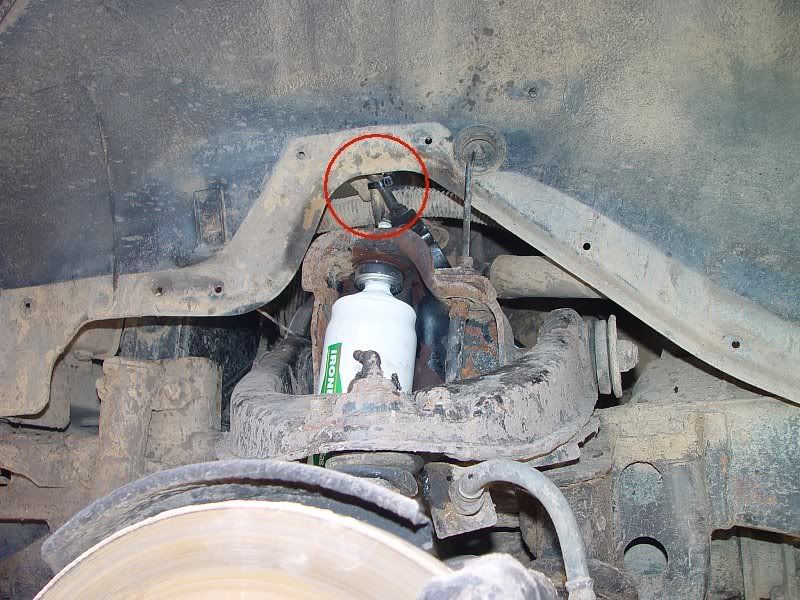
3. Note, the bonnet is up because on the left, one of the bolts holding the electronic adjusting actuator for the damper, is very awkward to reach, the brake pipe gets in the way. So, this bunch of adapters and extensions was used:

4. So, remove the little actuators (8mm nut), then the 2x top bolts for the damper (probably 17mm or 19mm) then the bottom nut and bolt (17mm). On the left, one of the top nuts was impossible to loosen, so it was cut off with a dremel. Then remove the damper.
5. Fit the new damper. I had a real struggle because the new ones were gas filled (the rears were fine though) because the access is awkward and as it takes time to place the damper in the right position, it expands and jams somewhere else. So, eventually I figured I could 'lock' it in the down position with some wire:

6. Fit the new dampers, the bottom bolt is 70Nm and the tops say 15Nm but I used the "squash the bush to half size" method again (since its a nyloc nut).
7. Tie up (if its still there) the electronic adjuster and its wire, so it doesn't catch or bang, etc:
8. Torsion bars: clean up the adjusting thread and undo the nut at the top separate from the other, and remove. Then undo the main nut, if they've been installed correctly then they should become loose (no tension):
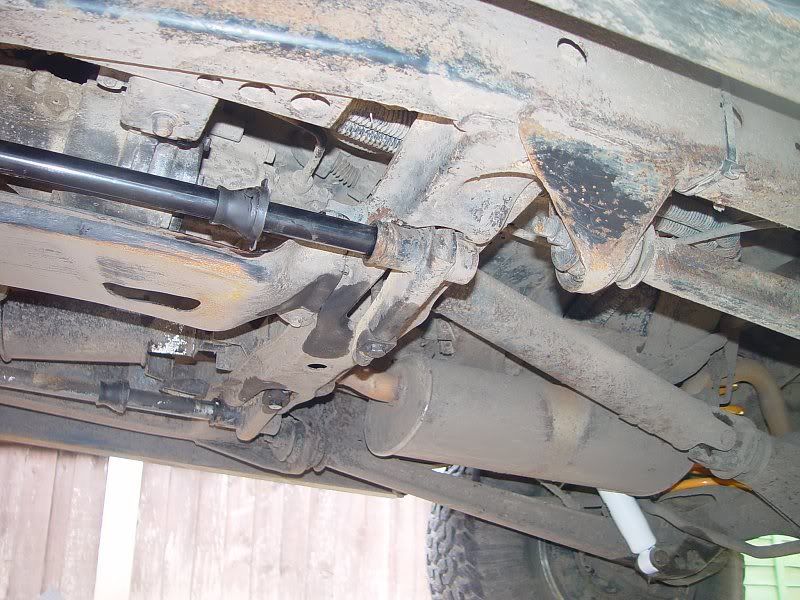
9. Once the tension is removed, unbolt the front bracket:
(Note, right side pictured):

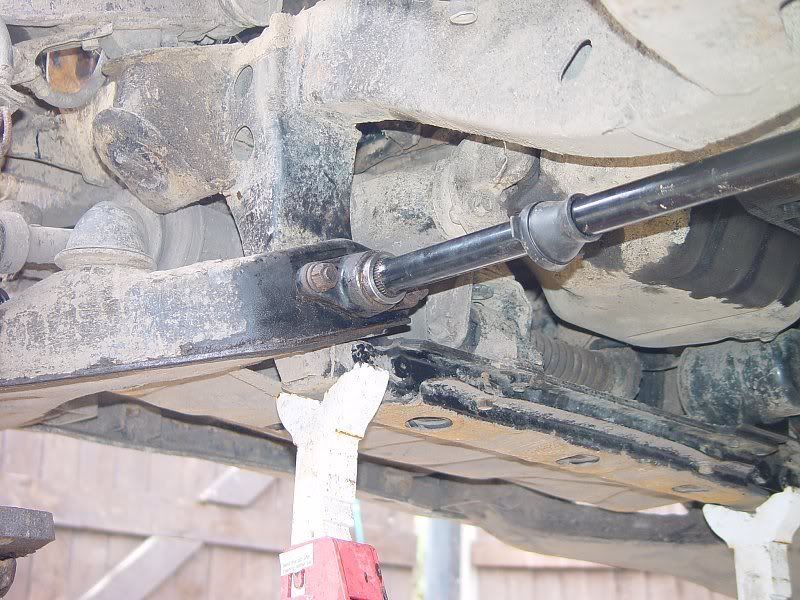
10. Detach both end brackets, slide off the boots, maneuvre out the old torsion bar.
11. Clean everything up (bolts, boots, brackets etc) and slide in the new torsion bar noting that you use the one for the correct side, and observe the markings to get it the right way round. Refit the boots and loosely fit the brackets, the front one can be slid beyond and used to do the coarse adjustment. I did the coarse adjustment to allow fitting the large adjust nut at the back, easily enough.
12. Do a guess first adjustment (helpful to base it on previous approx position).
13. Repeat all the above for the other side.
14. Refit wheels, put back on the ground and measure ride height. I used wheelarch to centre of wheel as a reference.
15. Raise to take the weight off the wheels, and tighten/loosen adjustment as needs be. Lower off jack, bounce the suspension a few times to let it settle, then measure. Repeat as needed.
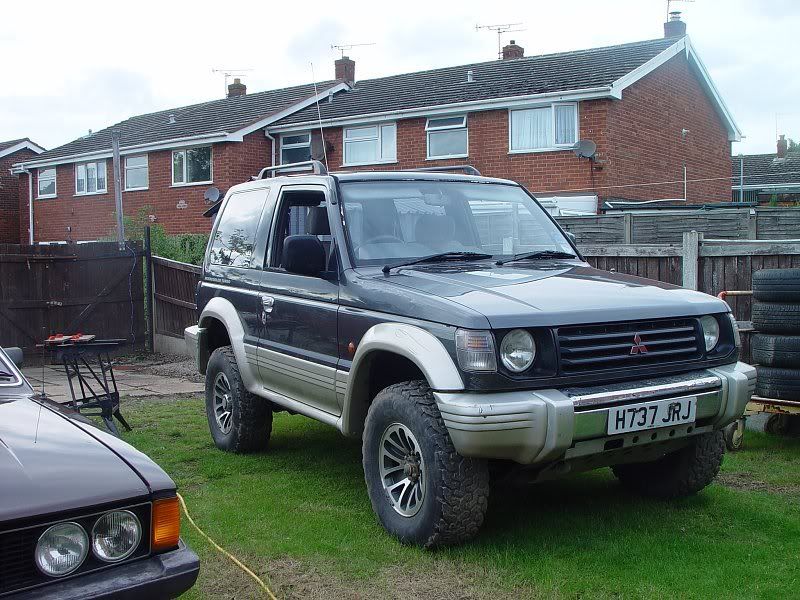
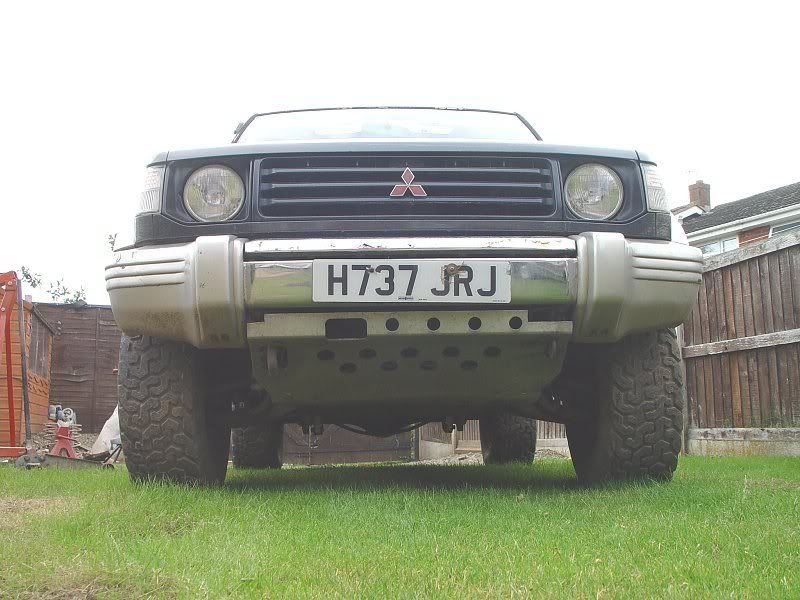

I also took a measurement of the clearance at the lowest point of the underside bash plate. Previously it was 220mm, now its 274mm (+54mm height increase), obviously allowing a little error for the rough ground.
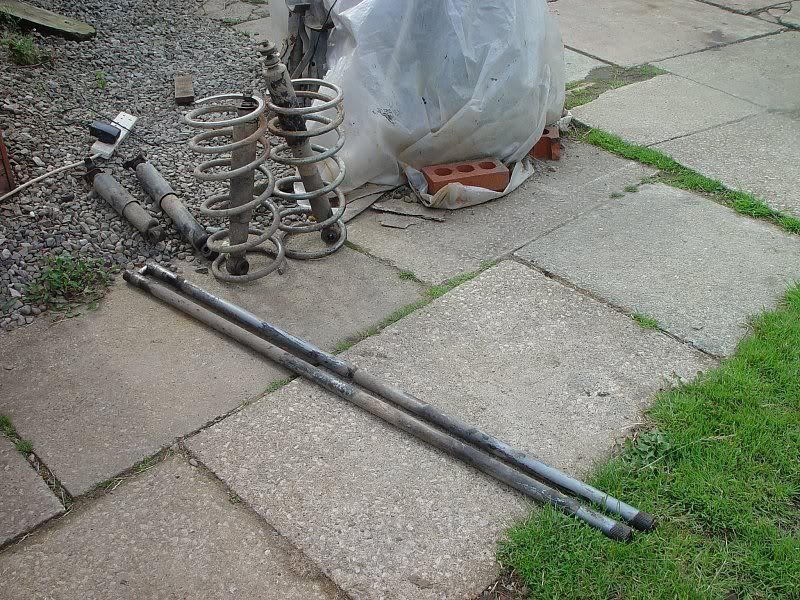
This is the old suspension I'd removed:
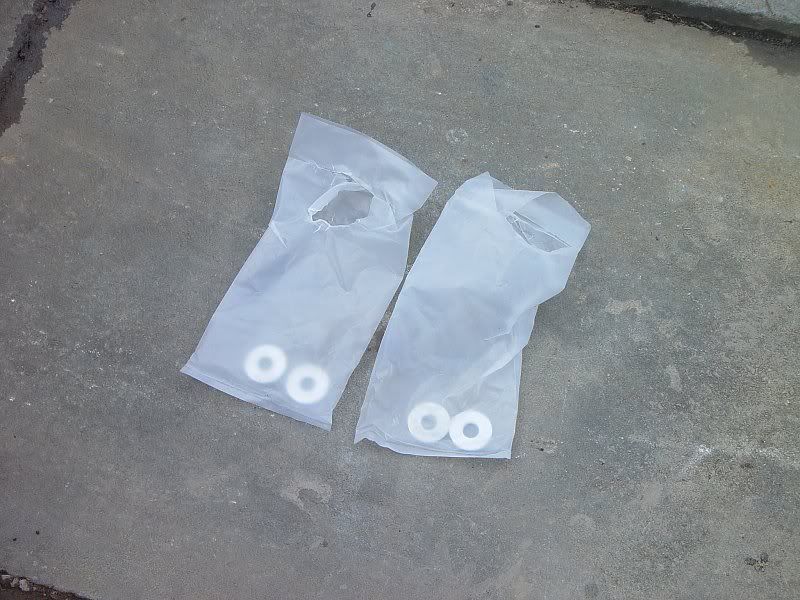
And I seem to be left with only a handful of unfitted parts (any suggestions?):
 |
|
| Back to top |
|
 |
Google
Sponsor

|
| Posted: Wed Jul 22, 2009 18:12 Post subject: Google Ads keep the POCUK free to join! |
|
|
|
|
| Back to top |
|
|
bing
**

Joined: 15 Dec 2005
Posts: 83
Location: south manchester
|
| Posted: Wed Jul 22, 2009 19:36 Post subject: |
|
|
they are the mandatory spare bits put in, to confuse and irratate   |
|
| Back to top |
|
|
jetskidavid
*****


Age: 54
Zodiac: 
Joined: 13 Nov 2008
Posts: 756
Location: FOLKESTONE
|
| Posted: Wed Jul 22, 2009 21:53 Post subject: |
|
|
nice photos well written
looks much better  |
|
| Back to top |
|
|
paul_c2
******
Joined: 23 Feb 2009
Posts: 1396
Location: Cheshire
|
| Posted: Thu Jul 23, 2009 16:30 Post subject: |
|
|
| NJV6 wrote: |
Good work, I hope you don't run into driveline vibrations. The cross bar you talk of that mounts to the chassis is called the Panhard bar.
Why did you opt for new torsion bars and did you do any rear suspension travel measurements without the rear anti roll bar on to see if you have gained any? |
Apologies for the confusion, I didn't mean sway bar, I meant the panhard bar.
I've now road tested it and indeed, I now have a driveline vibration! I guess this is because the diff is no longer at the same angle as the transfer box, so the UJs aren't running quite how they should be. Is it possible to adjust the way the axle bolts to the trailing arms to make it sit flat once again? Would I need to remove the arms and file out the hole, or is there adjustment built in (which would be much easier).
Also on the fronts, I'm really close to the bump stops (the upper ones), meaning I don't have an awful lot of upwards suspension travel. I know others have trimmed them. How much is it recommended, or safe, to trim them by? The main limiting factor before would have been the shock absorbers, obviously I have long travel ones now so that's not the issue but the next concern will be the driveshafts, and also would anything else rub or scrape that shouldn't, if the bump stop was trimmed too much? I am leaving the bottom one untouched, I don't want any more upwards travel because I have an eye on maybe getting larger tyres later on down the road. |
|
| Back to top |
|
|
haylands
LifeTime Member

Age: 60
Zodiac: 
Joined: 22 Feb 2009
Posts: 1517
Location: North Ferriby
|
| Posted: Thu Jul 23, 2009 17:39 Post subject: |
|
|
Hi
I chopped off about 1/2 the front bump stops, and the rears, seems alright to me.... I'd check your rear prop u/j's as mine has no vibration and the back of mine has gone up about 70mm...
Pete |
|
| Back to top |
|
|
NJV6
******

Age: 102
Zodiac: 
Joined: 20 Feb 2008
Posts: 1355
Location: New Zealand
|
| Posted: Thu Jul 23, 2009 22:11 Post subject: |
|
|
| paul_c2 wrote: |
I've now road tested it and indeed, I now have a driveline vibration! I guess this is because the diff is no longer at the same angle as the transfer box, so the UJs aren't running quite how they should be. Is it possible to adjust the way the axle bolts to the trailing arms to make it sit flat once again? Would I need to remove the arms and file out the hole, or is there adjustment built in (which would be much easier).
Also on the fronts, I'm really close to the bump stops (the upper ones), meaning I don't have an awful lot of upwards suspension travel. I know others have trimmed them. How much is it recommended, or safe, to trim them by? The main limiting factor before would have been the shock absorbers, obviously I have long travel ones now so that's not the issue but the next concern will be the driveshafts, and also would anything else rub or scrape that shouldn't, if the bump stop was trimmed too much? I am leaving the bottom one untouched, I don't want any more upwards travel because I have an eye on maybe getting larger tyres later on down the road. |
With regards to the upper bump stops, if you ahve a look at them there is a line in the rubber about half way up them, I cut mine just a bit closer to the bolts than that then put low profile bolts in to get the most from it.

With your vibrations, it is pretty common on a shorty with a lift. Your idea of filing the holes could work. There is no built in adjustment.you could also hope it settles after a few weeks. Tyr putting a few bags of cement in the back and measuring the drop and see at what level the vibrations stop. You could try new UJ's but I doubt that would help. |
|
| Back to top |
|
|
idratherbesurfing
LifeTime Member

Age: 39
Zodiac:
Joined: 27 Mar 2008
Posts: 3807
Location: France/Belgium/Holland/Switzerland and sometimes Italy
|
| Posted: Thu Jul 23, 2009 22:13 Post subject: |
|
|
I just removed all my bumpstops  though most would not like the idea though most would not like the idea |
|
| Back to top |
|
|
subzero
*******


Age: 48
Zodiac:
Joined: 24 Sep 2006
Posts: 2687
Location: folkestone
|
| Posted: Thu Jul 23, 2009 23:27 Post subject: |
|
|
| you shouldnt have any vibration from that small a lift check the uj's like said |
|
| Back to top |
|
|
paul_c2
******
Joined: 23 Feb 2009
Posts: 1396
Location: Cheshire
|
| Posted: Fri Jul 24, 2009 15:46 Post subject: |
|
|
| NJV6 wrote: |
| paul_c2 wrote: |
I've now road tested it and indeed, I now have a driveline vibration! I guess this is because the diff is no longer at the same angle as the transfer box, so the UJs aren't running quite how they should be. Is it possible to adjust the way the axle bolts to the trailing arms to make it sit flat once again? Would I need to remove the arms and file out the hole, or is there adjustment built in (which would be much easier).
Also on the fronts, I'm really close to the bump stops (the upper ones), meaning I don't have an awful lot of upwards suspension travel. I know others have trimmed them. How much is it recommended, or safe, to trim them by? The main limiting factor before would have been the shock absorbers, obviously I have long travel ones now so that's not the issue but the next concern will be the driveshafts, and also would anything else rub or scrape that shouldn't, if the bump stop was trimmed too much? I am leaving the bottom one untouched, I don't want any more upwards travel because I have an eye on maybe getting larger tyres later on down the road. |
With regards to the upper bump stops, if you ahve a look at them there is a line in the rubber about half way up them, I cut mine just a bit closer to the bolts than that then put low profile bolts in to get the most from it.
With your vibrations, it is pretty common on a shorty with a lift. Your idea of filing the holes could work. There is no built in adjustment.you could also hope it settles after a few weeks. Tyr putting a few bags of cement in the back and measuring the drop and see at what level the vibrations stop. You could try new UJ's but I doubt that would help. |
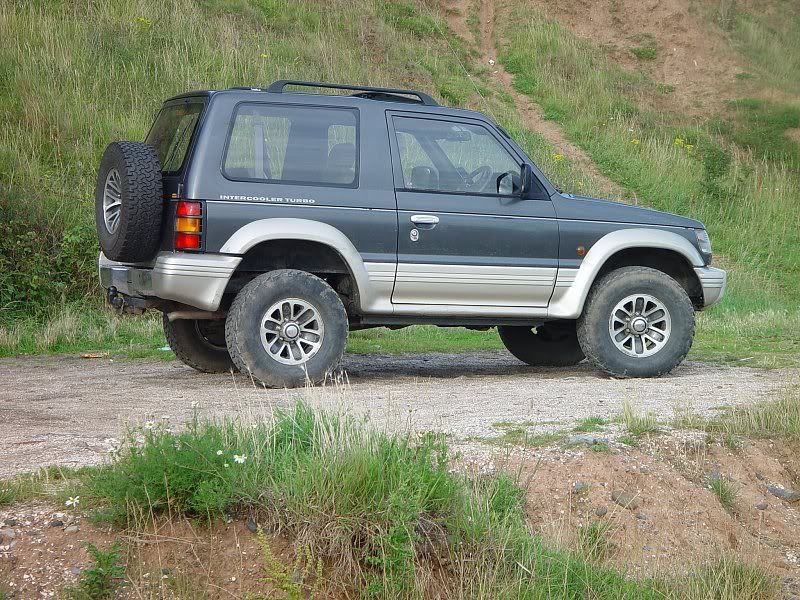
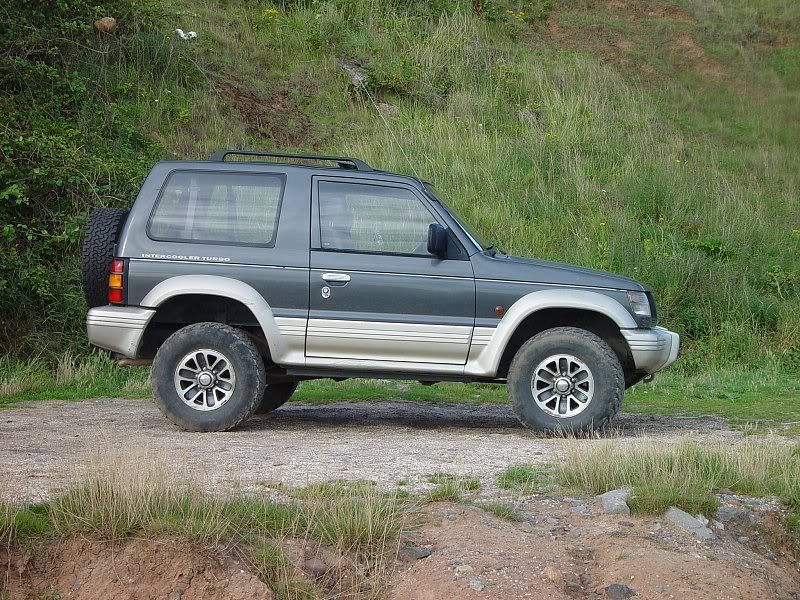
Many thanks. If you've removed that much from the bump stops with no ill effects, then I'm happy enough to cut a little off mine (won't go too mad though). I guess the main restriction is the extension length of the dampers, which I've now solved with aftermarket off road ones. So the next restriction is the bump stops on the wishbone itself, rather than the driveshaft rubbing or something else like that.
I probably need to tweak the front up a little more (maybe ½"-1"?), as you can see its definitely adopted a nose down stance, however I'm probably best waiting for it to settle now that weight is applied to the new suspension? I'll need to adjust the torsion bars to make the room to access the bump stops anyway, so I'll do both tasks in one session:
 |
|
| Back to top |
|
|
Nomadsz
LifeTime Member

Age: 52
Zodiac: 
Joined: 27 Apr 2009
Posts: 66
Location: Bournemouth
|
| Posted: Sat Jul 25, 2009 23:24 Post subject: |
|
|
Just fitted the full Ironman kit to my Mark One, fronts torsion bars and rear coil springs. After they sent the right rear shocks as they sent the same as in the picture at the beginning of this thread rather than the Eye at each end i needed.
I have find i am getting noise form the rear end, I have replaced the UJs with one from Milner and stil getting vibrations. The lift is about 75mm form the old tired springs, but these were bouncing off the bump stops with only light loads in the back. I think i was supplied with LWB spring sas i intend to tow some heavy trailers and for loading up the rear. Will post some pictures later.
Any suggestions? on how i drop or angle the transfer box to lessen the angle of attack on the rear prop shaft. or could i be putting stain on something else with such a large lift?
Don't mean to hijack the thread but any help appreciated. |
|
| Back to top |
|
|
fritz
*

Age: 38
Zodiac: 
Joined: 06 Oct 2009
Posts: 31
Location: Plymouth
|
| Posted: Fri Oct 09, 2009 17:40 Post subject: |
|
|
Just fitted rear Ironman Springs & Desert Fox Torsion bars to my lwb v6 & wanted to say thank you for the guide, it prepped me really well & knew exactly what I was up too! Very handy with the pictures. Got just over a 2" lift all round.
Took about 45mins to get the rears changed over and about the same for the fronts although did faff a bit marking them up the same as the regular mitsi ones.
Thanks again, good work!
Fritz |
|
| Back to top |
|
|
m3crj
*****

Age: 41
Zodiac: 
Joined: 02 Jul 2007
Posts: 612
Location: DONCASTER
|
| Posted: Fri Oct 09, 2009 20:15 Post subject: |
|
|
you could do the ball jopint flip which involves removing the upper ball joint and mounting it on the bottom of the upper arm rather than on the top of the upper arm this will give the equivilant to trimming the bump stops you just need 3 new bolts for each side (not sure what length) i'm planning on doing the same to mine
just an idea for ya to stew over this way you still get the standard progression of the bump stop not a harsh jolt (which is what you get by trimming the point off)
p:s more pics which ever ya decide looking good fella |
|
| Back to top |
|
|
map-man
**
Age: 53
Zodiac:
Joined: 26 Sep 2009
Posts: 110
Location: rugby
|
| Posted: Sat Oct 10, 2009 5:38 Post subject: |
|
|
| m3crj wrote: |
you could do the ball jopint flip which involves removing the upper ball joint and mounting it on the bottom of the upper arm rather than on the top of the upper arm this will give the equivilant to trimming the bump stops you just need 3 new bolts for each side (not sure what length) i'm planning on doing the same to mine
just an idea for ya to stew over this way you still get the standard progression of the bump stop not a harsh jolt (which is what you get by trimming the point off)
p:s more pics which ever ya decide looking good fella |
you can re-use the same bolts to flip the ball joints but with a smallish lift like this I wouldn't bother as it'll put too much positive camber on the wheels unless you re-shim the top wishbones. |
|
| Back to top |
|
|
icomefromlanddownunder
*****

Age: 34
Zodiac:
Joined: 27 Jul 2007
Posts: 927
Location: Perth, WA, Australia
|
| Posted: Mon Oct 12, 2009 15:02 Post subject: |
|
|
| m3crj wrote: |
you could do the ball jopint flip which involves removing the upper ball joint and mounting it on the bottom of the upper arm rather than on the top of the upper arm this will give the equivilant to trimming the bump stops you just need 3 new bolts for each side (not sure what length) i'm planning on doing the same to mine
just an idea for ya to stew over this way you still get the standard progression of the bump stop not a harsh jolt (which is what you get by trimming the point off)
p:s more pics which ever ya decide looking good fella |
beware, as this is a common after math of the BJ flip
http://www2.pajeroclub.com.au/forum/showthread.php?t=7183&highlight=ball+joint
as the BJ is no longer supported by the upper control arm |
|
| Back to top |
|
|
idratherbesurfing
LifeTime Member
Age: 39
Zodiac:
Joined: 27 Mar 2008
Posts: 3807
Location: France/Belgium/Holland/Switzerland and sometimes Italy
|
| Posted: Mon Oct 12, 2009 16:22 Post subject: |
|
|
^^^^^
FAIL
|
|
| Back to top |
|
|
|
|
|
You cannot post new topics in this forum
You cannot reply to topics in this forum
You cannot edit your posts in this forum
You cannot delete your posts in this forum
You cannot vote in polls in this forum
You cannot attach files in this forum
You cannot download files in this forum
|
|

