| View previous topic :: View next topic |
| Author |
Message |
MudRaiderUS
**

Age: 61
Zodiac: 
Joined: 03 Aug 2010
Posts: 112
Location: Jacksonville, Florida, U.S. of A
|
 Posted: Wed Aug 25, 2010 20:46 Post subject: Posted: Wed Aug 25, 2010 20:46 Post subject: |
 |
|
| Hope you think imitation is the highest form of flattery cause the girl likes the front bumper on your ride and wants me to put it on her Raider/Shogun we're building. Have some 4" aircraft landing lights I think i can incorporate into it too! Will post pics |
|
| Back to top |
|
 |
Google
Sponsor

|
| Posted: Wed Aug 25, 2010 20:46 Post subject: Google Ads keep the POCUK free to join! |
|
|
|
|
| Back to top |
|
|
haylands
LifeTime Member

Age: 60
Zodiac: 
Joined: 22 Feb 2009
Posts: 1517
Location: North Ferriby
|
| Posted: Wed Aug 25, 2010 21:47 Post subject: |
|
|
Mmmmm sounds interesting, I thought about putting some of those little bug eye type spots in mine but I'd just smash them up... I have a habit of driving into things when off roading.... can't understand why!!!!
Good luck with it, to be honest mines probably a bit over the top at 10mm (3/8" to you!) thick... thinner would be fine.... |
|
| Back to top |
|
|
irmscher
**
Age: 67
Zodiac: 
Joined: 26 Aug 2010
Posts: 73
Location: stockport
|
| Posted: Tue Aug 31, 2010 8:47 Post subject: |
|
|
enjoyed reading this brilliant truck a credit to you  |
|
| Back to top |
|
|
haylands
LifeTime Member
Age: 60
Zodiac:
Joined: 22 Feb 2009
Posts: 1517
Location: North Ferriby
|
| Posted: Tue Sep 07, 2010 21:51 Post subject: |
|
|
| irmscher wrote: |
| enjoyed reading this brilliant truck a credit to you |
Thanks for that....
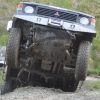
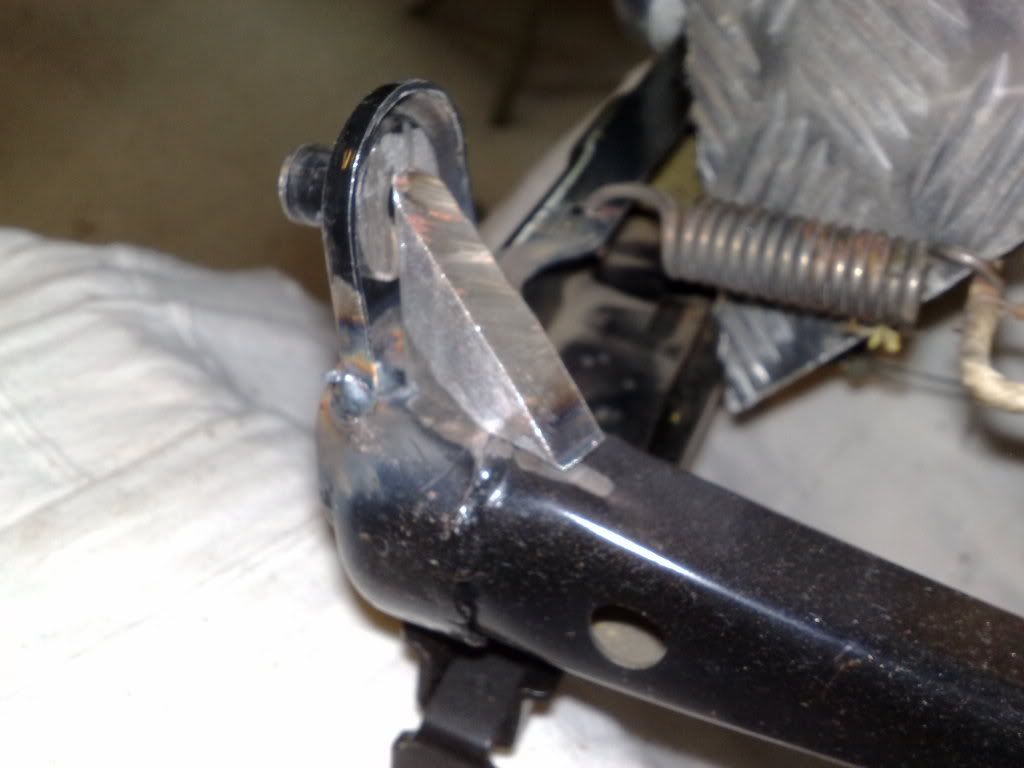
I fitted a new steering idler in March as the original one had signs of wear... well the new one didn't last long... got rather bent... anyway I have now fitted one from a Mk2, got it local for £15, the holes line up ok it's also much tougher than the original...
Here they are side by side, pretty good bend in it... it still worked though, just put the tracking out a bit!!!
 |
|
| Back to top |
|
|
Paul83c
LifeTime Member

Age: 40
Zodiac:
Joined: 20 Feb 2009
Posts: 2731
Location: LIVERPOOL
|
| Posted: Tue Sep 07, 2010 22:22 Post subject: |
|
|
| Has it bent due to the usage you've pit it through? |
|
| Back to top |
|
|
idratherbesurfing
LifeTime Member

Age: 39
Zodiac: 
Joined: 27 Mar 2008
Posts: 3807
Location: France/Belgium/Holland/Switzerland and sometimes Italy
|
| Posted: Tue Sep 07, 2010 22:26 Post subject: |
|
|
mine got bent after launching it up a quarry  theyre not happy after the front wheels come back to earth after a 5ft jump theyre not happy after the front wheels come back to earth after a 5ft jump  |
|
| Back to top |
|
|
haylands
LifeTime Member
Age: 60
Zodiac:
Joined: 22 Feb 2009
Posts: 1517
Location: North Ferriby
|
| Posted: Tue Sep 07, 2010 22:31 Post subject: |
|
|
| Paul83c wrote: |
| Has it bent due to the usage you've pit it through? |
Oh yes... offroad it as much as I do and sooner or later you bend something........ it's now replaced with a stronger one so when it happens again we will find out the next weakest part..... |
|
| Back to top |
|
|
MudRaiderUS
**
Age: 61
Zodiac:
Joined: 03 Aug 2010
Posts: 112
Location: Jacksonville, Florida, U.S. of A
|
| Posted: Tue Sep 07, 2010 23:00 Post subject: |
|
|
haylands Posted: ........ it's now replaced with a stronger one so when it happens again we will find out the next weakest part.....
It's fun to get to this state of mind, isn't it? |
|
| Back to top |
|
|
Daniel90
**
Age: 34
Zodiac: 
Joined: 28 Feb 2010
Posts: 106
Location: Romania
|
| Posted: Thu Sep 09, 2010 22:39 Post subject: |
|
|
About that...
I've been searching for solutions about it. Turns out it's better to keep the original steering idler cause it has a tendenceny to flex more. Due to the big bushing. The Mk II one will break sooner than the MK I's.
One night i had nothing to do and so,i've decided to find new ways to reinforce the steering idler. One thing you could to,to make sure it doesn't bend anymore is to weld an ear below the steering idler so that the main shaft will go through it and locked with the factory nut below. So far i think it's the best thing you can do.
These are only suggestions,i appreciate your work so far and i admire your ingeniosity. DIY rulz! |
|
| Back to top |
|
|
pajerojonas
**

Age: 51
Zodiac:
Joined: 10 Nov 2009
Posts: 63
Location: Linköping, Sweden
|
| Posted: Sun Sep 12, 2010 9:31 Post subject: |
|
|
| Daniel90 wrote: |
About that...
I've been searching for solutions about it. Turns out it's better to keep the original steering idler cause it has a tendenceny to flex more. Due to the big bushing. The Mk II one will break sooner than the MK I's.
One night i had nothing to do and so,i've decided to find new ways to reinforce the steering idler. One thing you could to,to make sure it doesn't bend anymore is to weld an ear below the steering idler so that the main shaft will go through it and locked with the factory nut below. So far i think it's the best thing you can do.
These are only suggestions,i appreciate your work so far and i admire your ingeniosity. DIY rulz! |
Do you have a photo or 2 on that??
Would be great to see how it looks. |
|
| Back to top |
|
|
Daniel90
**
Age: 34
Zodiac:
Joined: 28 Feb 2010
Posts: 106
Location: Romania
|
| Posted: Fri Sep 17, 2010 13:36 Post subject: |
|
|
| Unfortunately not. I've done the trick to a friend. A 1989 LWB Pajero on 33x15tires. He done the same thing,swapped the steering idler with a mk II one and cracked it. In the end,my solution worked and stiil works. |
|
| Back to top |
|
|
venn105
LifeTime Member

Age: 49
Zodiac: 
Joined: 15 May 2008
Posts: 13103
Location: Lancashire
|
| Posted: Fri Oct 08, 2010 21:19 Post subject: |
|
|
| Just spent last couple of hours reading through your write up and pics AWESOME.Love it,must admit that i would have it in a big glass case after all that hard work,fantastic Pete well done.One day hopefully i will see it in the metal at a meet |
|
| Back to top |
|
|
haylands
LifeTime Member
Age: 60
Zodiac:
Joined: 22 Feb 2009
Posts: 1517
Location: North Ferriby
|
| Posted: Sat Oct 09, 2010 15:12 Post subject: |
|
|
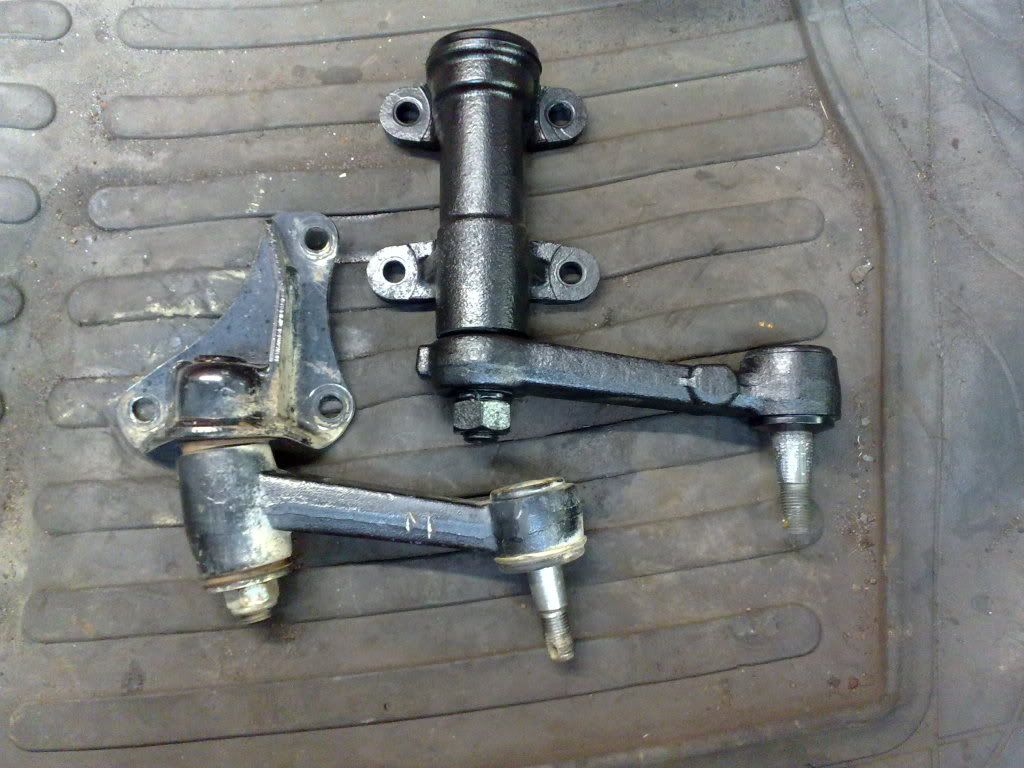
Venn105, thanks for that. it's next outing is PITP in two weeks so......... just got round to looking at the drivers seat that broke last time out.... something to do with a fat ba$tard sat in it for too long
Took it out and got it apart to find this
Severe case of metal fatigue... the passenger seat was like it when I got the car.
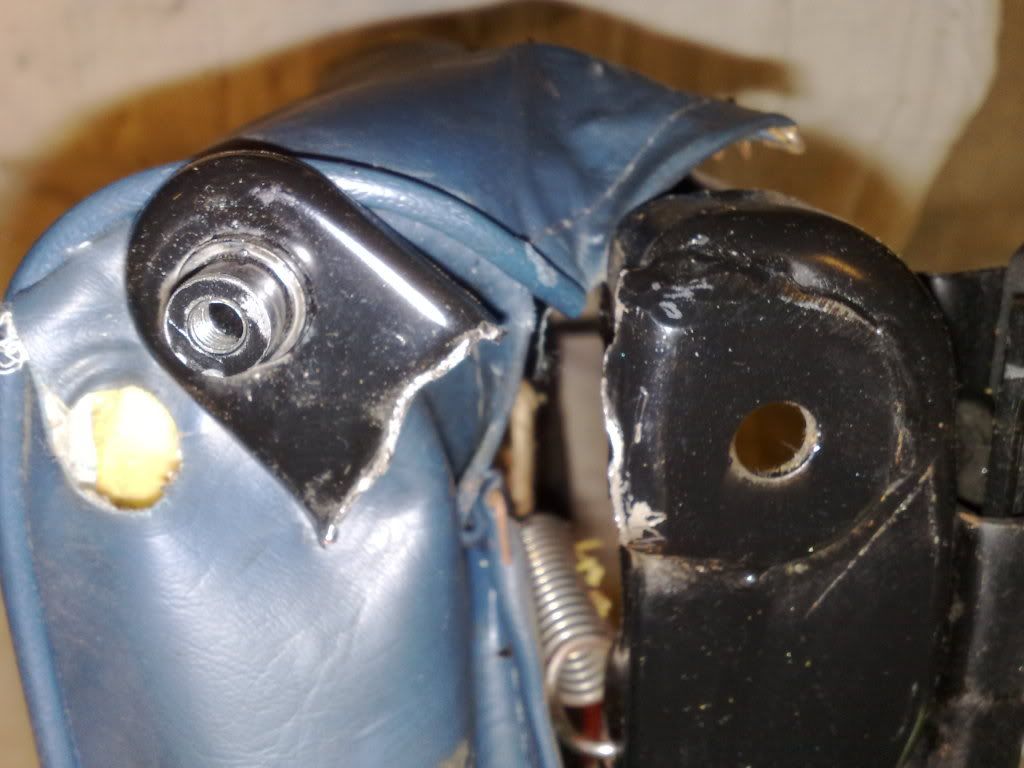
Cleaned it up and welded it back on... used a piece of treadplate to hold the seat cover and foam out the way, had to partially strip the seat and get those darn hog rings off...
I don't think it would last long just welded as the fatigue will have weakend the metal all around there so I used a small scrap piece of 10mm plate to fillet the back, this sits under the seatfoam so can't be seen when back together
Welded it on... good and strong now....
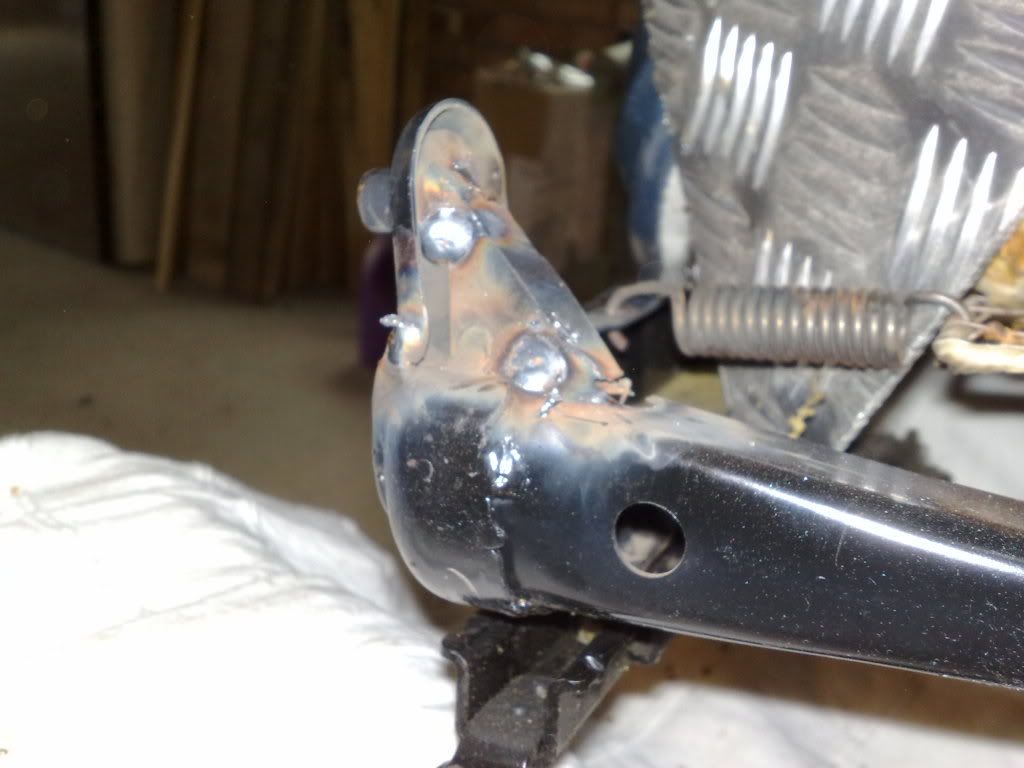
Cleaned it up and gave it a coat of paint and then refitted it.... works great... another cheap fix |
|
| Back to top |
|
|
NYRA
LifeTime Member
Age: 57
Zodiac:
Joined: 04 Dec 2009
Posts: 3675
Location: bed and work
|
| Posted: Sat Oct 09, 2010 16:02 Post subject: |
|
|
good job pete and love the word cheap fixs  |
|
| Back to top |
|
|
haylands
LifeTime Member
Age: 60
Zodiac:
Joined: 22 Feb 2009
Posts: 1517
Location: North Ferriby
|
| Posted: Wed Oct 20, 2010 22:56 Post subject: |
|
|
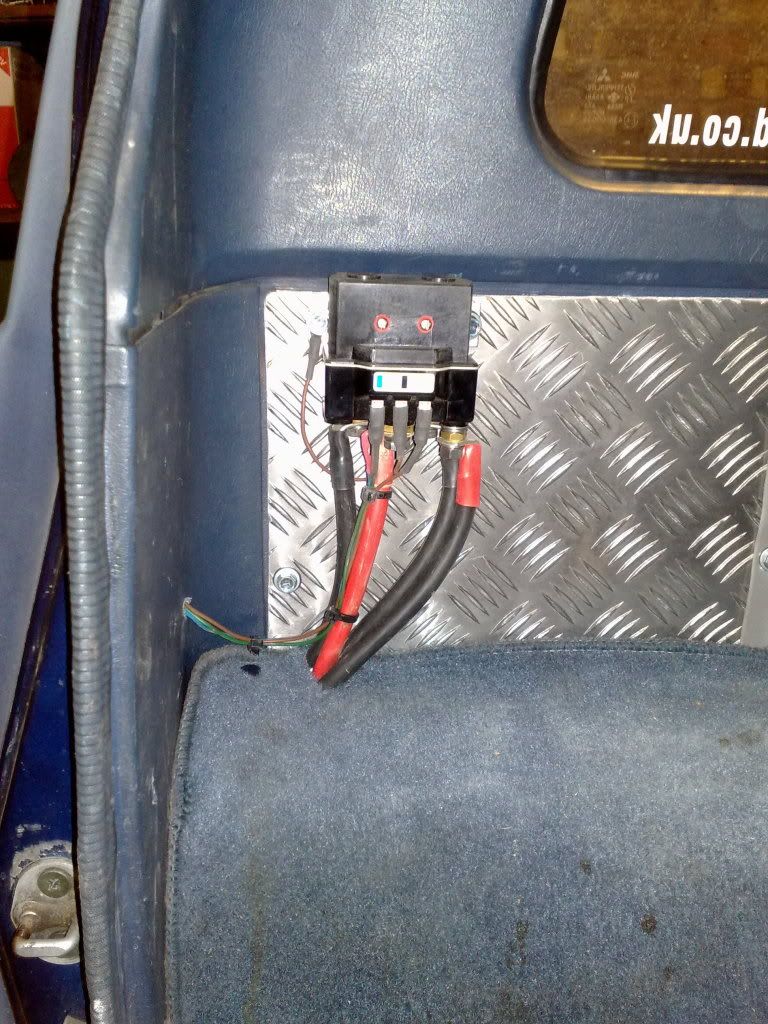
My rear winch packed up a while ago now and I hadn't got around to sorting it... well thought I might need it on Saturday for PITP greenlaning
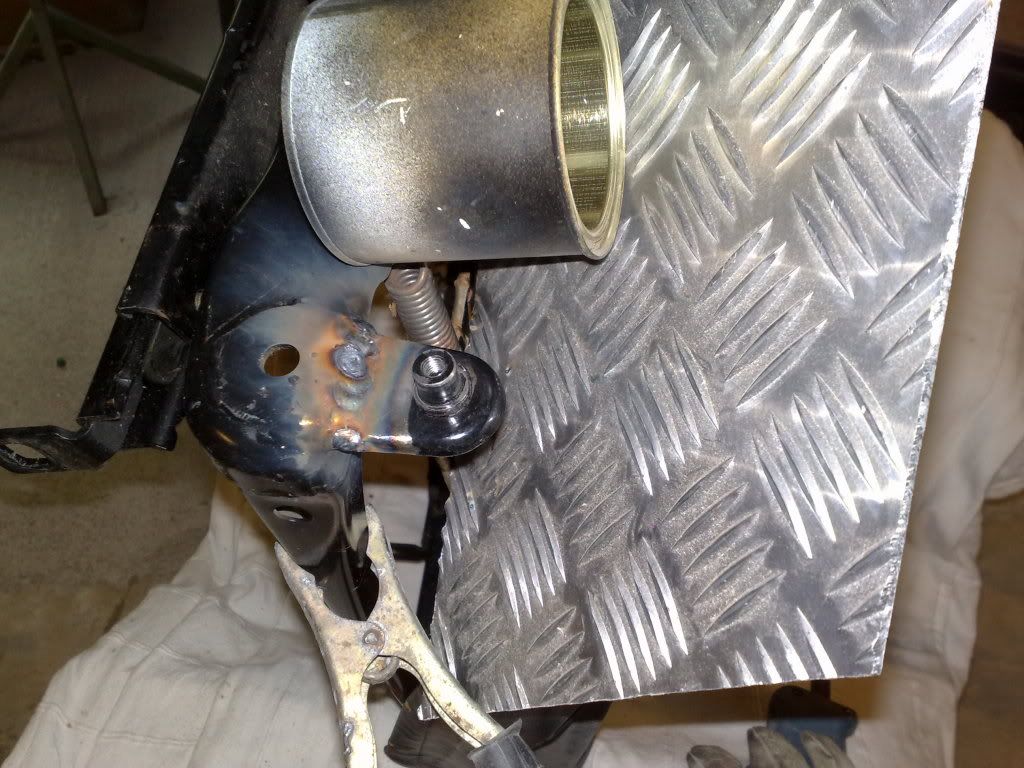
When I first did it I didn't have the money to get longer cables so I used the short ones it came with and mounted the solenoid under the rear bumper, I did seal it up as best I could with silicon but I guess it didn't work too well....
Looked like this when I got the bumper off
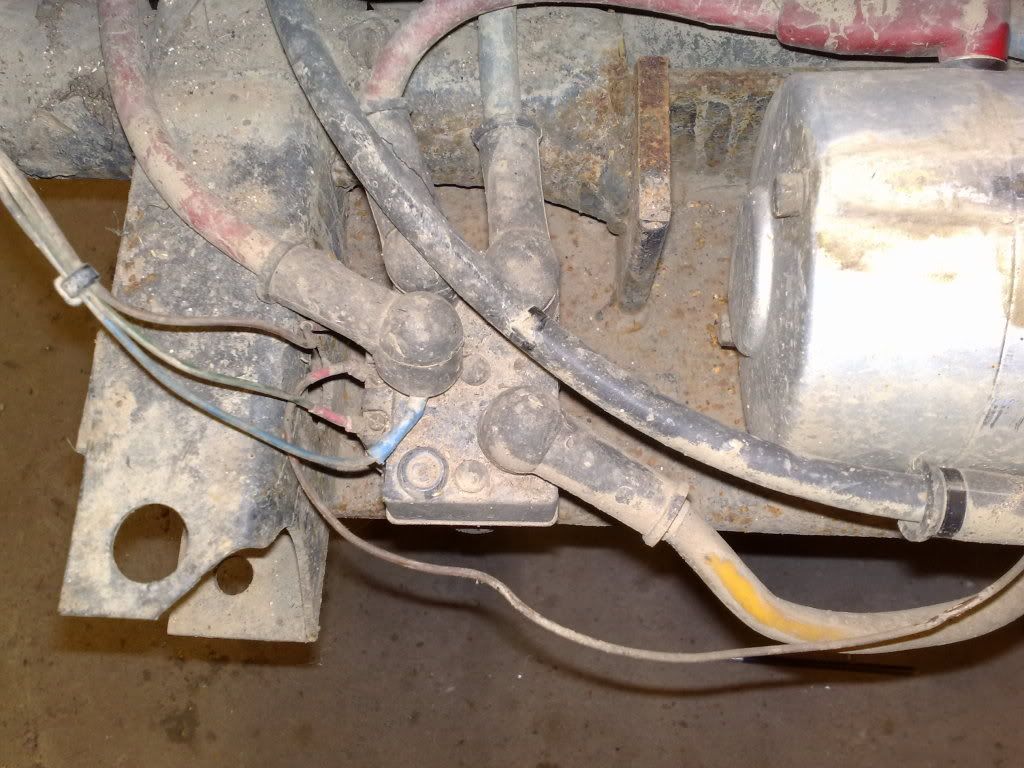
Opened it up to find just a small amount of rust 
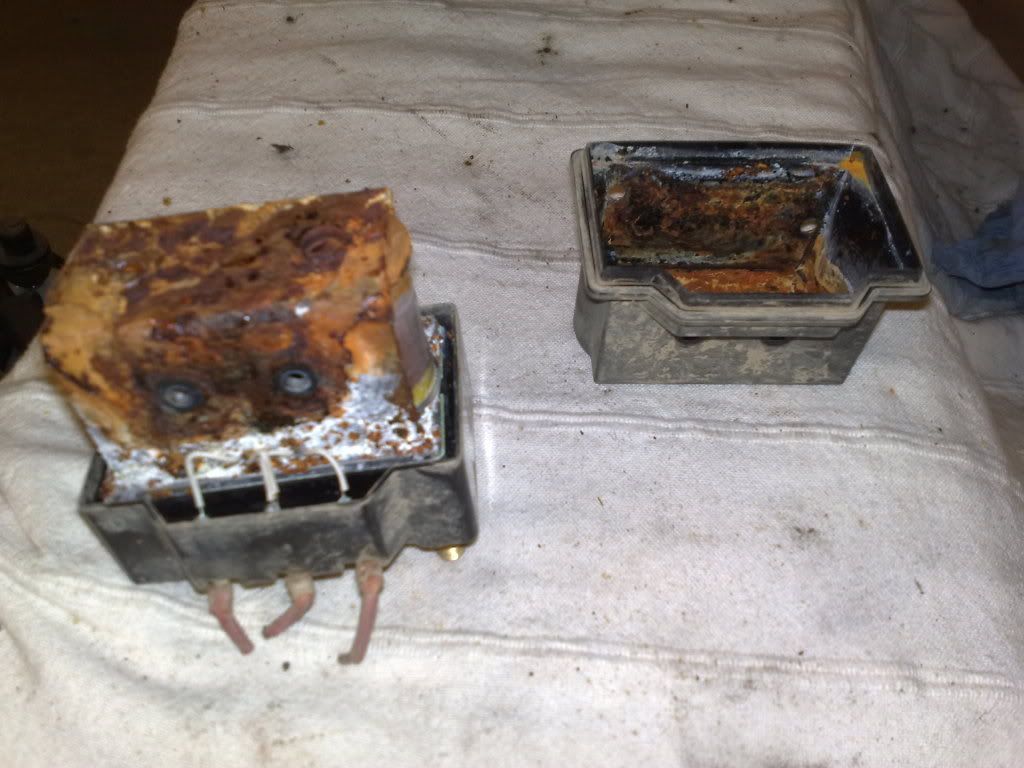
Anyway, longer cables put on and I've moved it into the boot... should be OK now, the front one is just behind the grille and it's been washed by wading dozens of times, but it's still working fine.... silicon must have worked on that one.....
 |
|
| Back to top |
|
|
|


