| View previous topic :: View next topic |
| Author |
Message |
Skipper Jolly
LifeTime Member


Age: 68
Zodiac: 
Joined: 21 Mar 2010
Posts: 46
Location: Isle of Wight
|
 Posted: Tue Aug 17, 2010 11:33 Post subject: Upper Wishbone 1991 2.5 TD Exceed LWB Posted: Tue Aug 17, 2010 11:33 Post subject: Upper Wishbone 1991 2.5 TD Exceed LWB |
 |
|
Upper wishbone replacement; 1991 LWB 2.5 TD Exceed.
READ ALL OF THIS BEFORE ATTEMPTING THE JOB!
O.K. Forget the Haynes manual as its pretty much pants. This job can be done in a morning but set aside a complete day and make sure you have a friend around to curse, scream at and to make the tea. They will also be needed to hold things, grunt, and occasionally put in a bit of effort!.
For the week or so preceding your attack on the wishbone drench the nuts and things you are going to undo with WD40 or a similar product; it will make life a lot easier. Dont forget the brake hose and pipe couplings (and bleed nipple), Ball joint nut, Shock Absorber nuts and the bump-stop bolts under the wishbone (clever little trap those!)
Please look after all the nuts, bolts, washers and shims as they will be needed later.
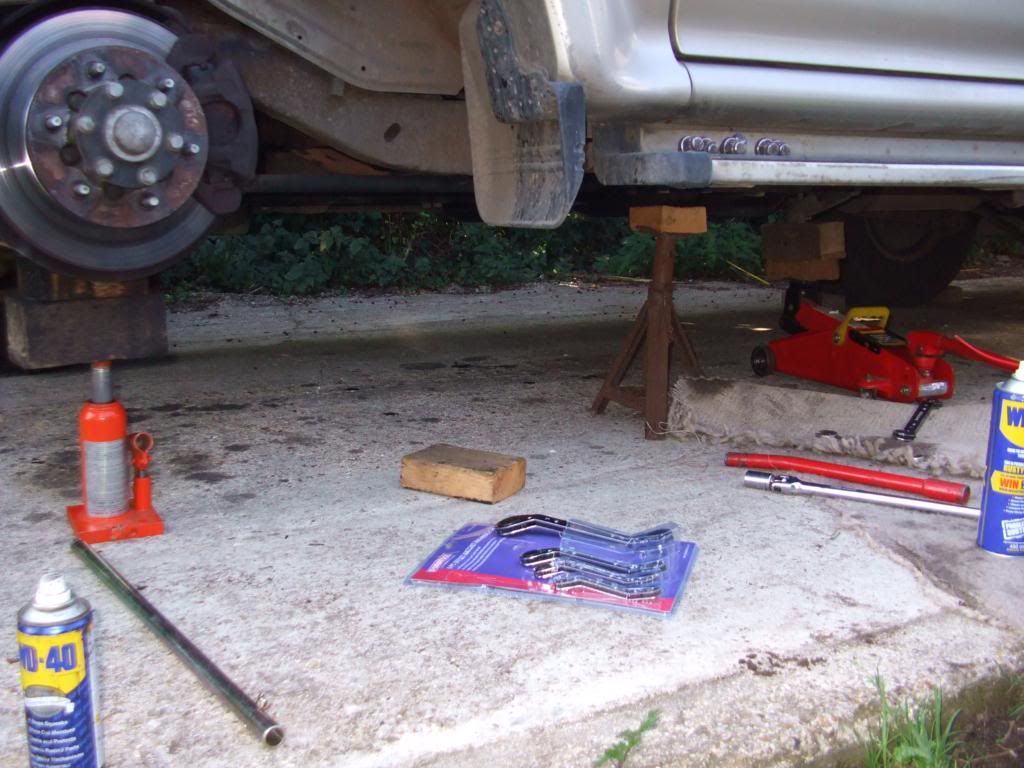
First thing is to get the car up on an axle stand and the wheel off. If you cant do this then dont go any further get a grown-up to help you.size][img]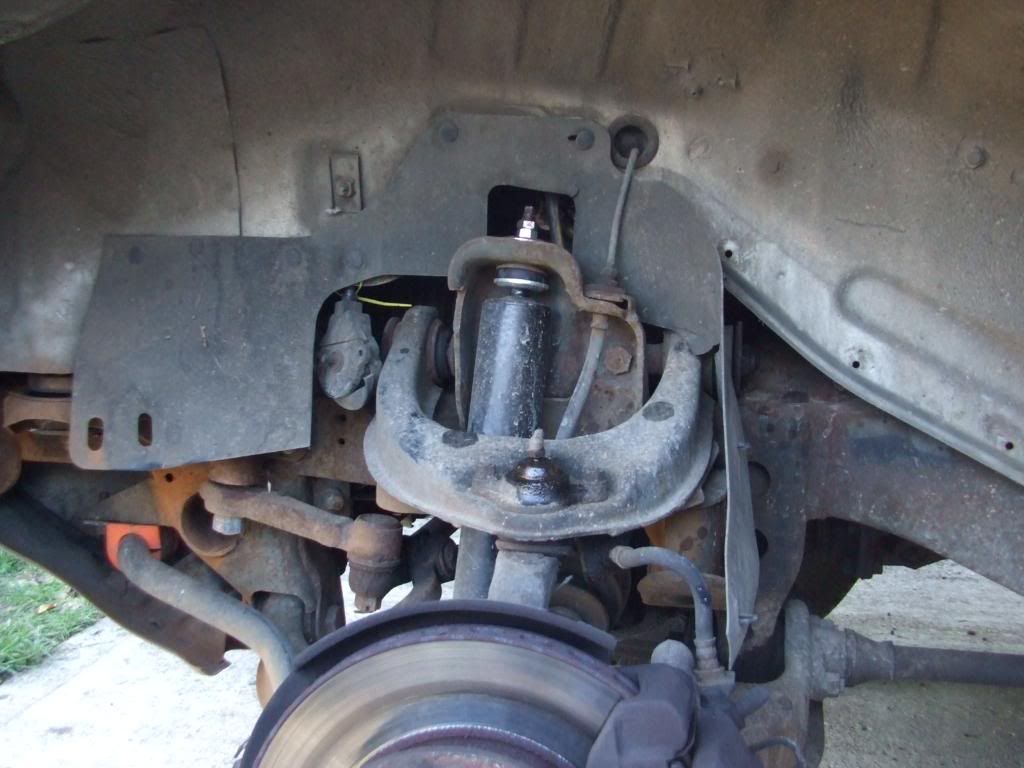 [/img] [/img]
With the wheel removed take off the rubber side-skirt on the inner wing; take care to remove the plastic press studs with care as you will want to use them again later.
[img]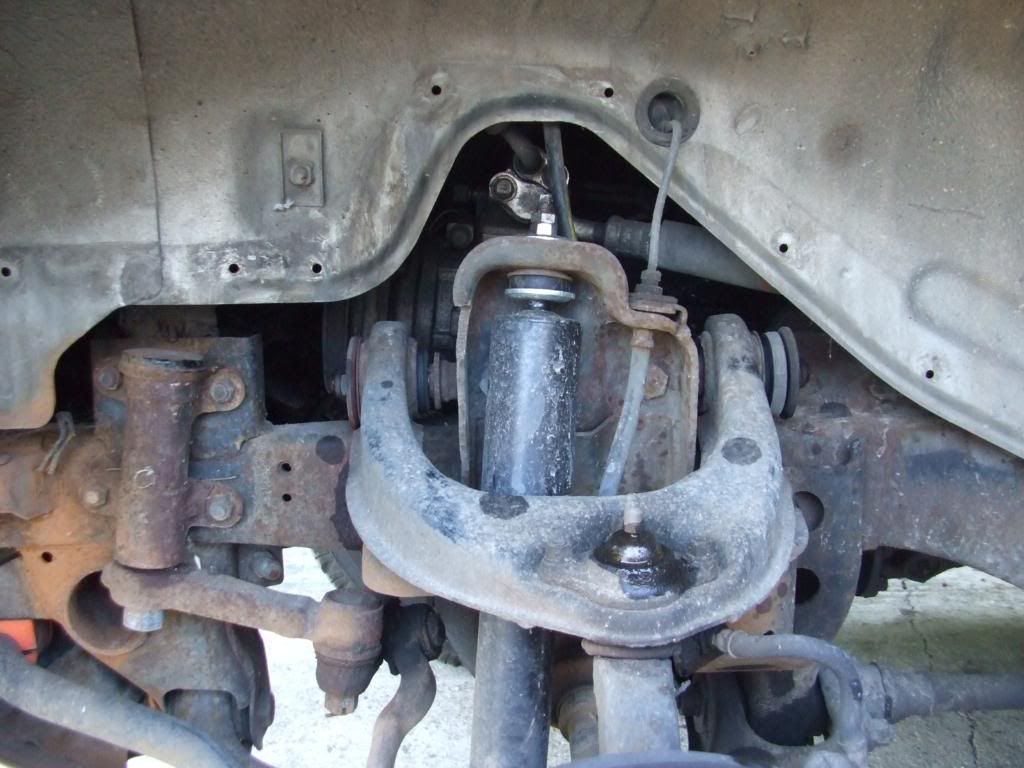 [/img] [/img]
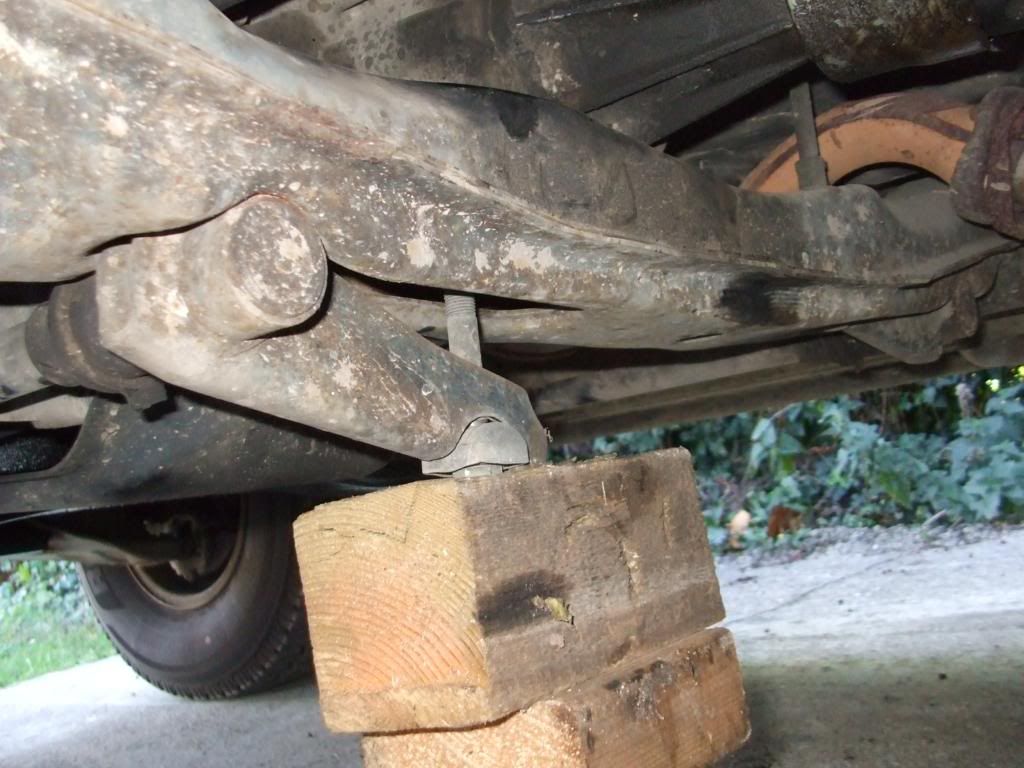
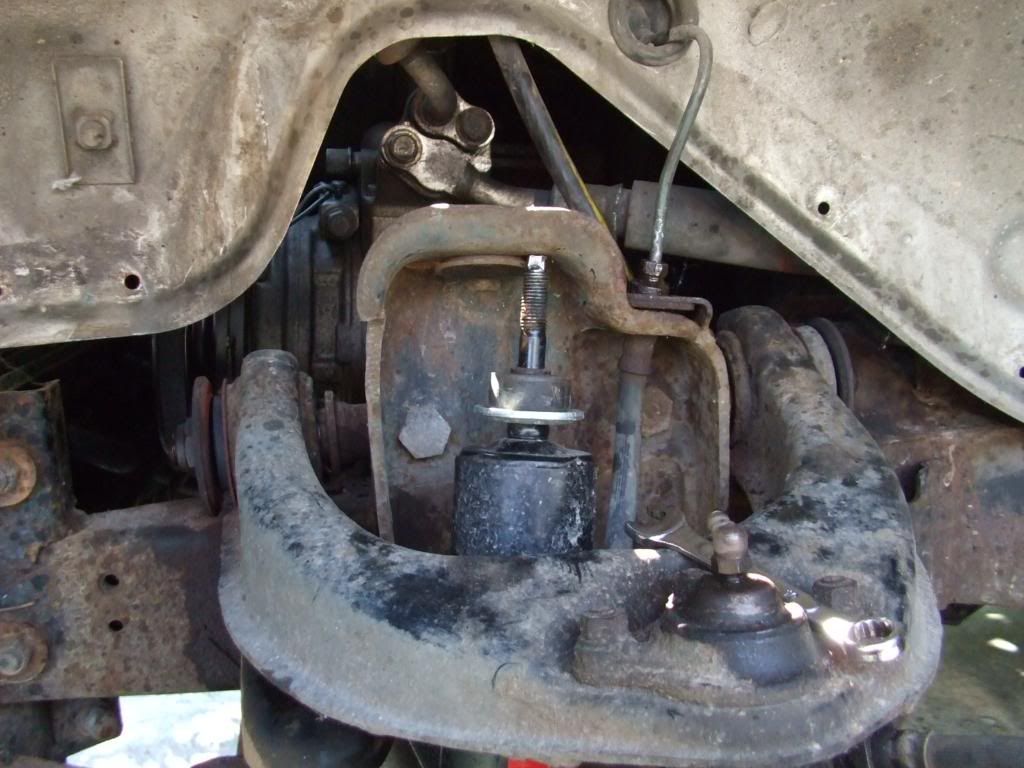
Place a jack under the lower ball joint on the bottom wishbone to support the hub assembly and have a bit of strong cord available as a tie-back to prevent it all falling out when you remove the top wishbone!
Mark the end of the Torsion Bar by scratching a line across the end and its mount so that you can do it back up to the same state afterwards.
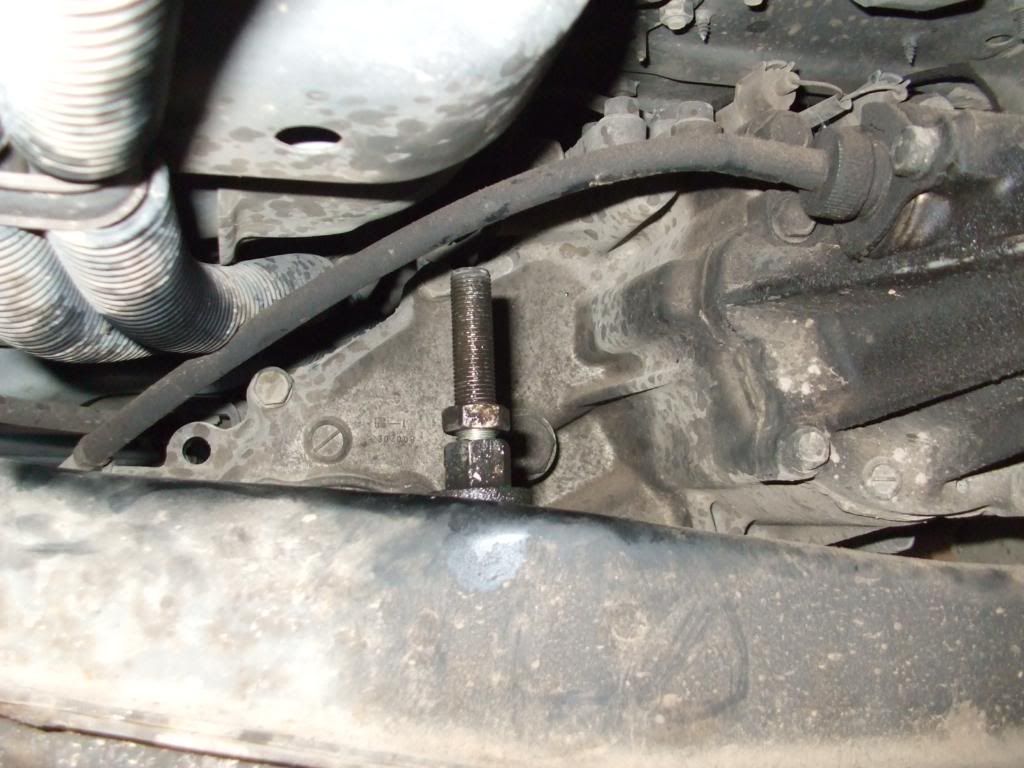
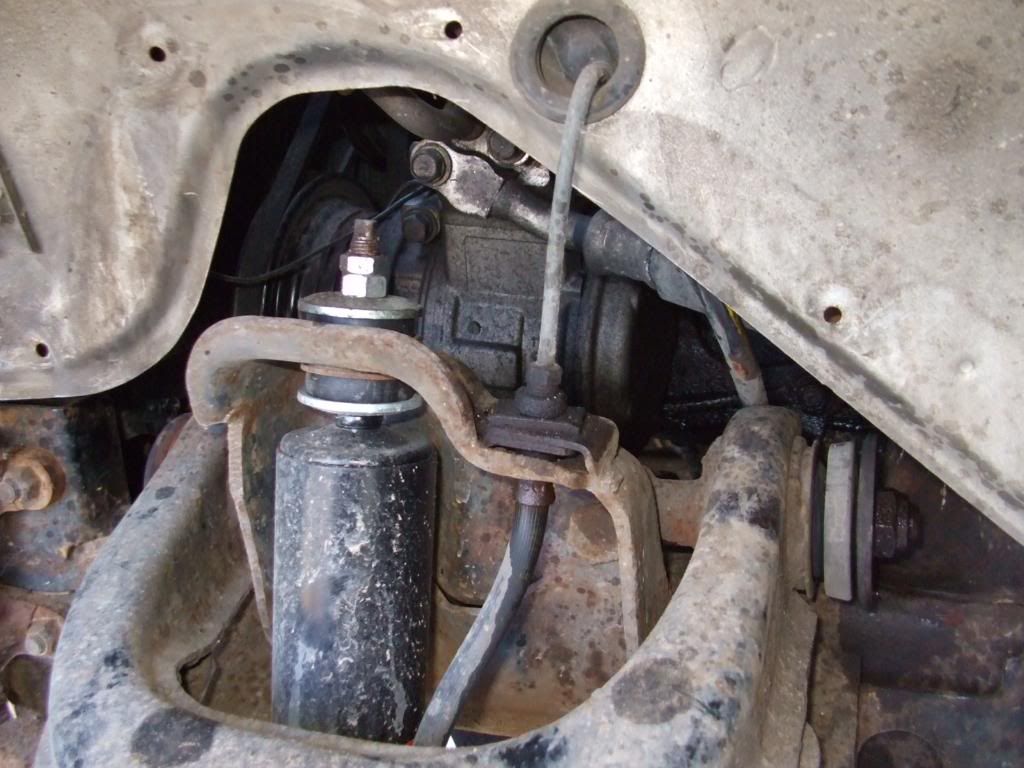
Locate the Torsion Bar adjusting nuts and stud; slacken and remove the top lock-nut putting it somewhere safe. You will need two 17mm AF spanners here. I suggest one of them is an offset ratchet spanner as it will pay dividends later.
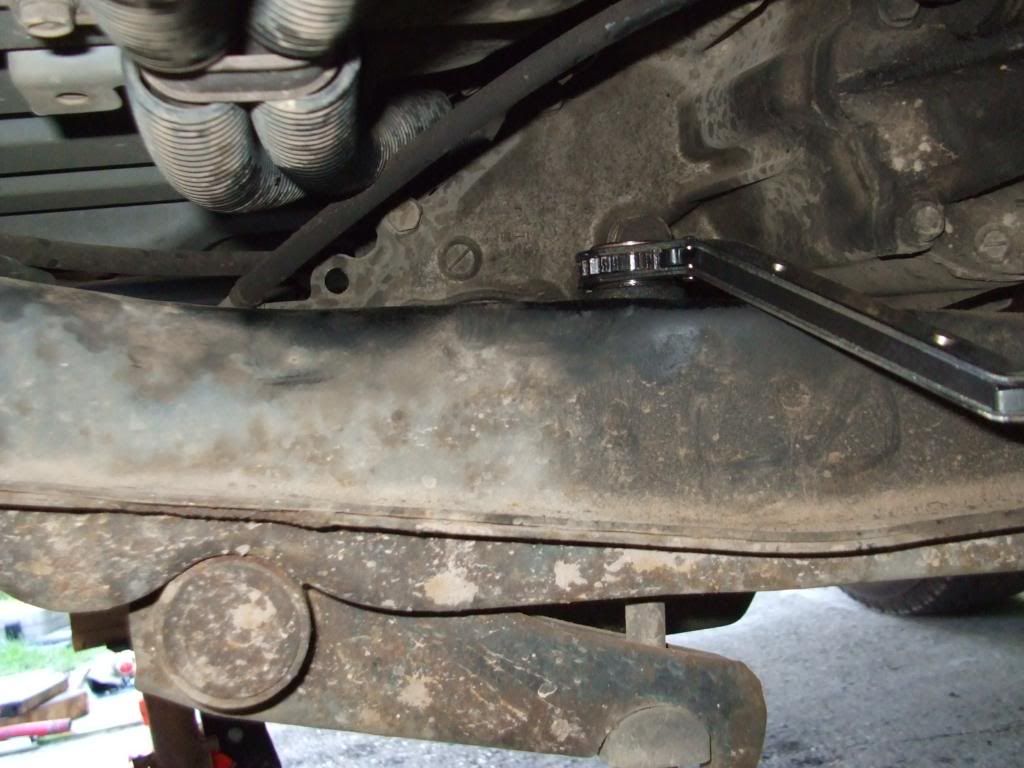
Also put a jack under the torsion bar; it takes weight off the main nut and thrust spacer and makes them much easier to undo as does cleaning the thread with a wire brush lots of WD40.
Once the nuts are undone and the thrust washer removed gently release the pressure on the Torsion bar by lowering the jack.
Behind the chassis rail where the wishbone is fitted there are two nuts that will have to be undone (theyre absolute pigs!) and they are the other end of two retaining bolts with shims; plenty of lubricant at this time will help in half an hour when you get there!
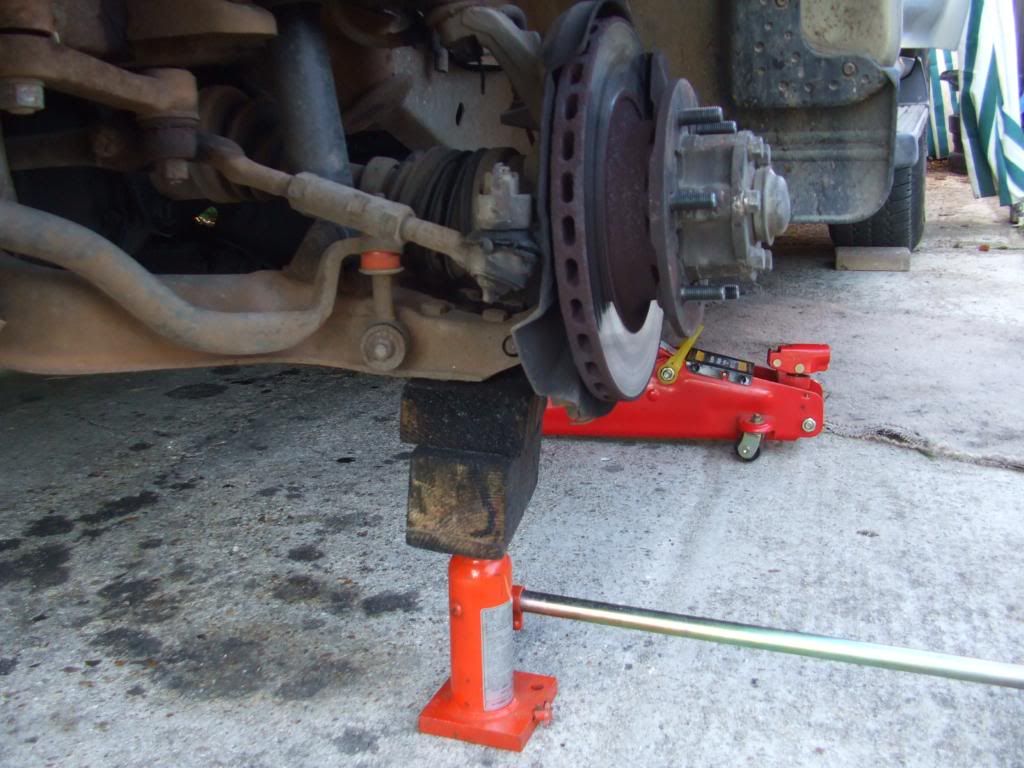
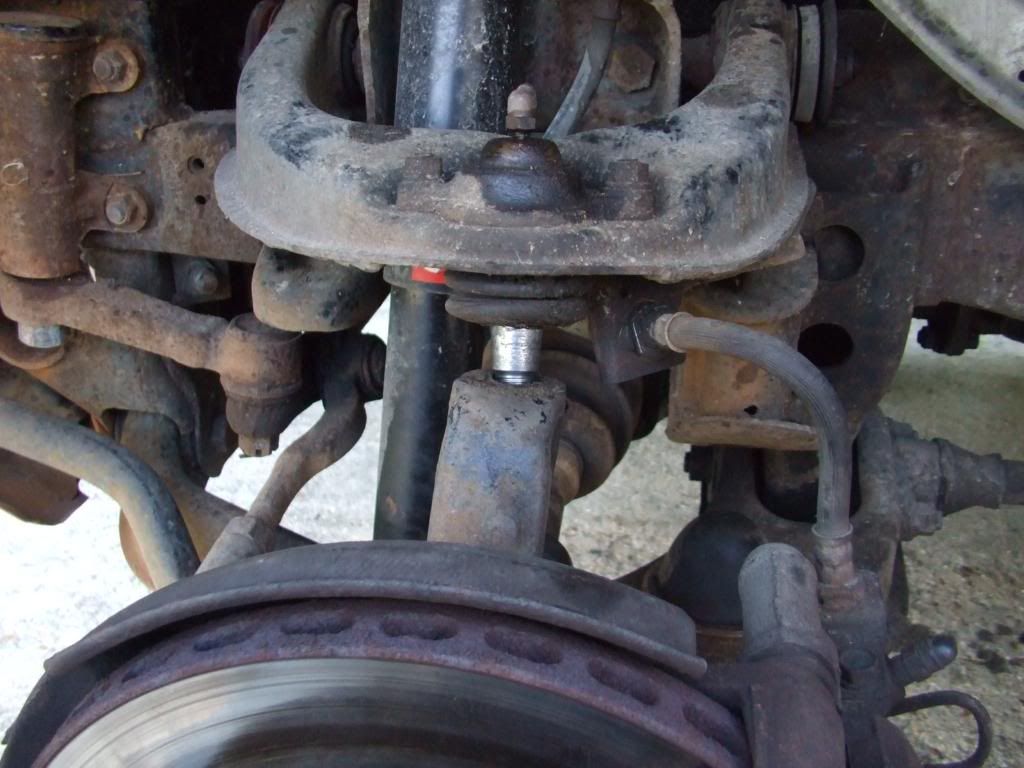
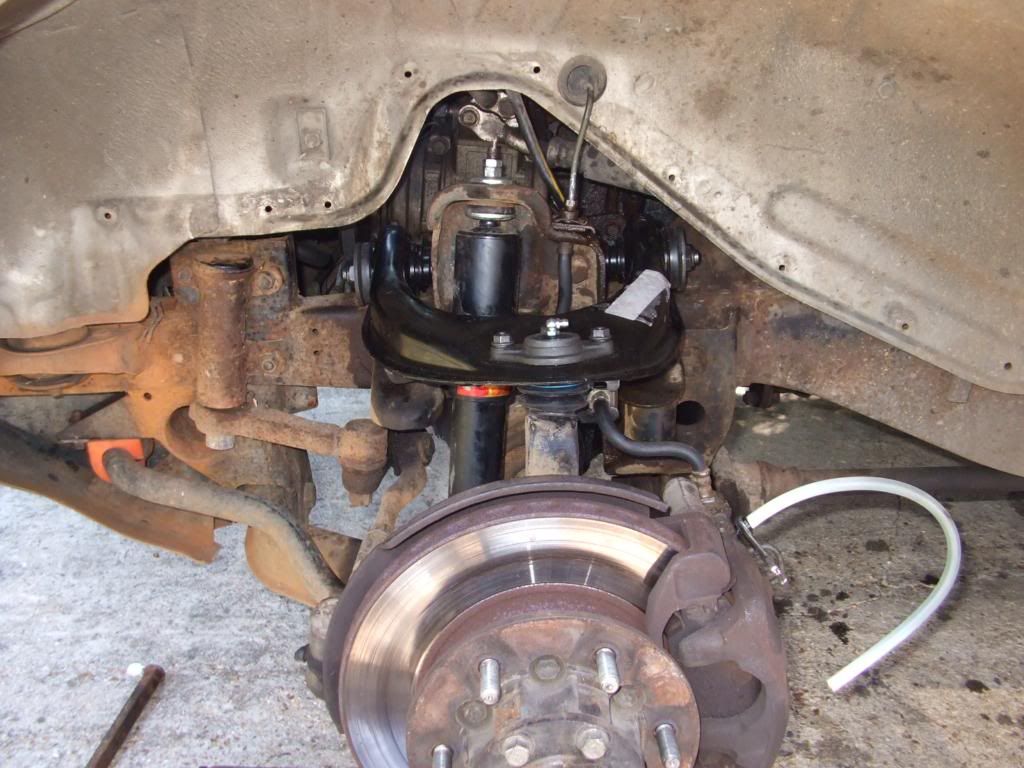
Hopefully your car may look something like this one! Note jack under hub, Axle stand under chassis and jack under torsion bar.
This is as far as the Haynes manual will get you!
Remove the split pin from the Ball joint castellated nut (carefully as you may need to re-use it I did!) and unwind the nut most of the way off but do not remove it completely; you will want about 5mm of nut still on the thread to receive the bolt of the Ball-joint splitter in a moment! Tie the cord around the top of the hub and onto the lower wishbone to stop the hub falling out when you remove the ball joint. Insert the Ball joint splitter onto the assembly and insert the bolt end into the castellated nut which will stop it slipping off!
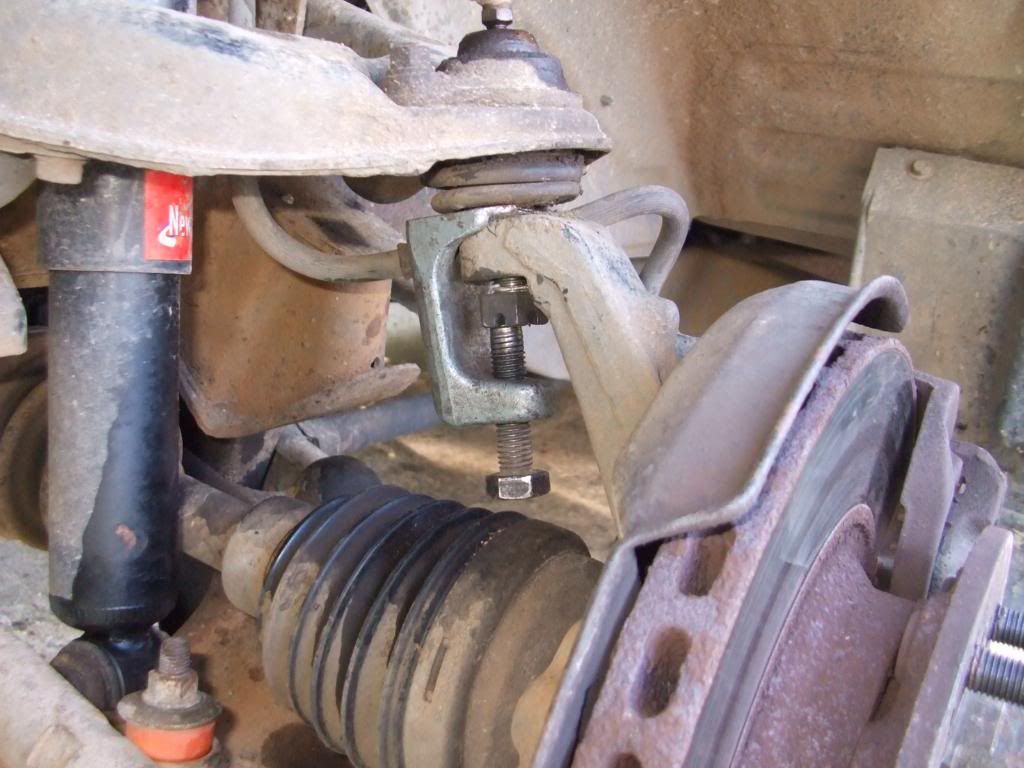
Once loosened remove the Ball joint splitter but dont remove the nut at this stage it is much easier to deal with everything with the hub attached!
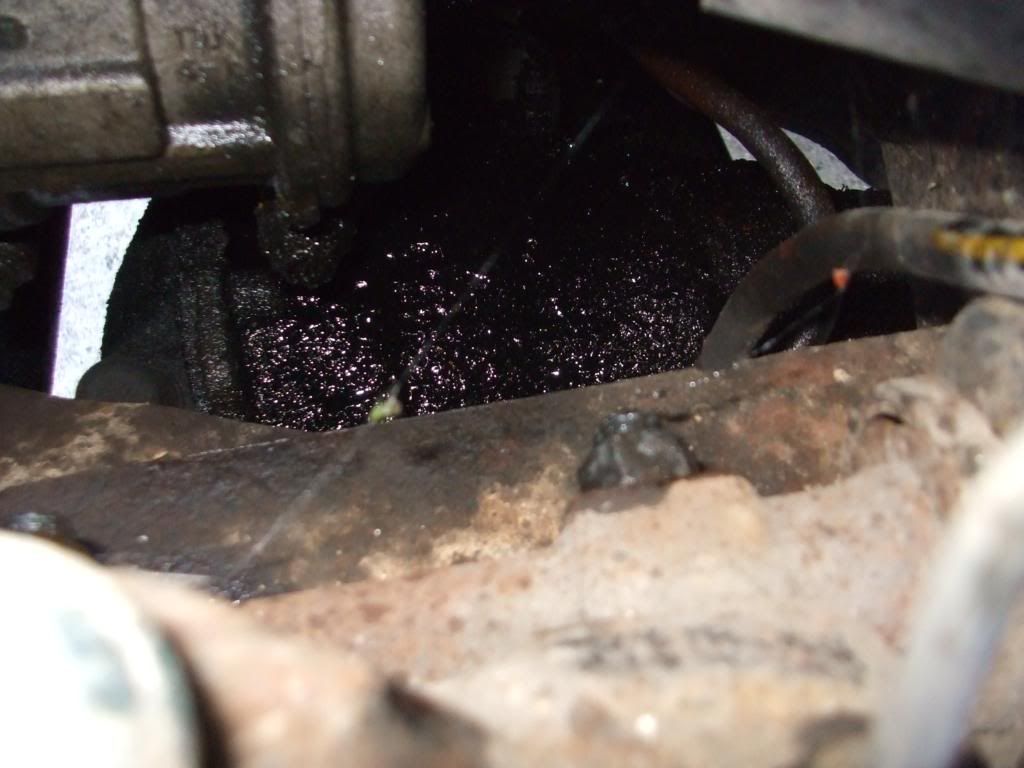
You will have to undo the union between the metal brake pipe and the flexi-hose beside the wishbone; this needs a 10mm A/F spanner and make sure its a good one once I had rounded off the nut it was a small pair of Mole grips that saved my bacon.
Also you will need to remove the flexi-hose assembly (two hoses joined together) where they are fixed under the wishbone. If you are unlucky (like me) then be prepared to strip the hoses out completely!
You will need some flexible pipe and something to clamp it with to stop all the brake fluid from covering all your work, the hub, the ground under the car and your clothes. As soon as you have undone the metal pipe at the top slip the rubber pipe over the end, cable tie it in place and clamp it off (fold the end over and fix it back with a cable tie!).
Be careful when removing the pipe retaining clips for the flexi-hoses; flattish strips of metal with a groove in them. These fly like the devil when levered off and are ready coated in camouflage mud to make them impossible to find afterwards.
Undo the two nuts on top of the shock-absorber; remember to hold the screw shaft still (mole grips help here) whilst you undo the nuts to prevent the top section from turning. The shock will push down with a bit of effort from you and only needs to be moved to the side to enable you to get at the bolt head behind.
Hopefully you have the brake hoses out of the way, ball joint loose, torsion bar loose and the whole thing supported. Undoing the two fixing bolts that go through the chassis rail takes grunt, persistence and pain (knuckles and elbows Im afraid!).
You will need to get a ring spanner on one of the nuts on the other side of the chassis rail; position the ring as horizontal as you can whilst still being able to get a crow-bar or tyre lever under it as you will be levering it upwards.
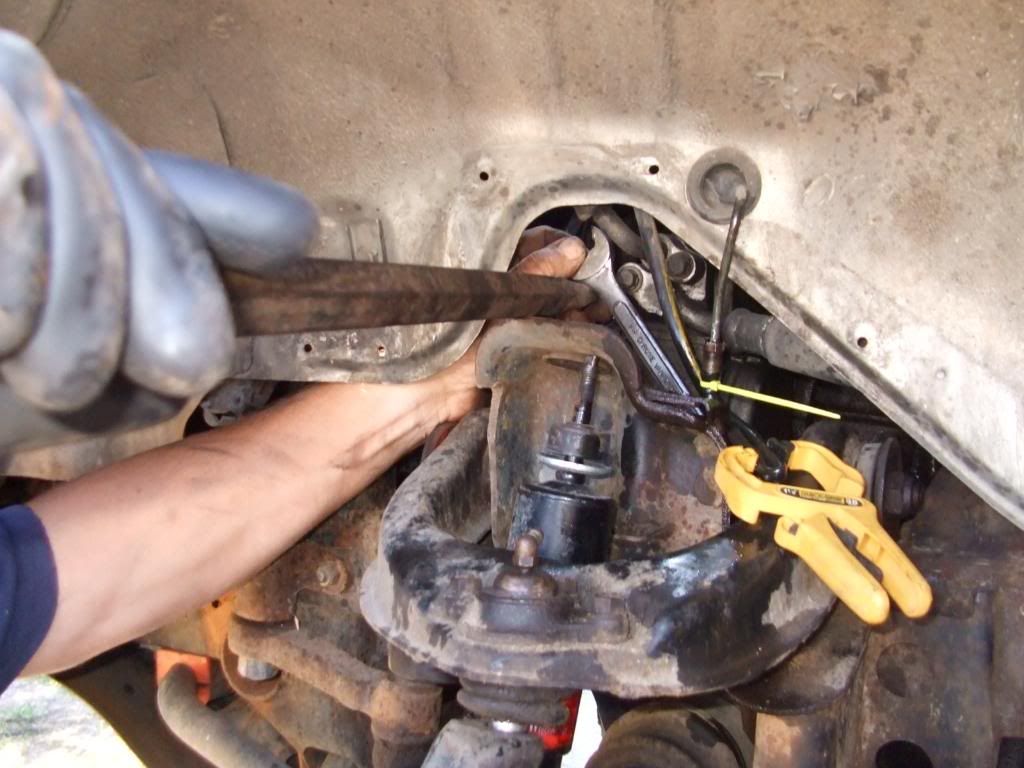
Get your charming assistant to get a socket and Breaker bar onto the corresponding bolt head to hold it steady.
This is where it gets painful as the crowbar slips off the spanner, traps your hand holding the spanner and then the elbow on the same arm hits the wing of the car.
Go and have a cup of tea!
After a couple of goes the nut should be loose enough for you to put a ratchet on the head of the bolt to undo the nut almost all the way BUT DONT TAKE IT RIGHT OFF! There may well be some shim plates between the wishbone and the chassis rail and you dont want to upset them! Get the second nut cracked and undone to the same stage.
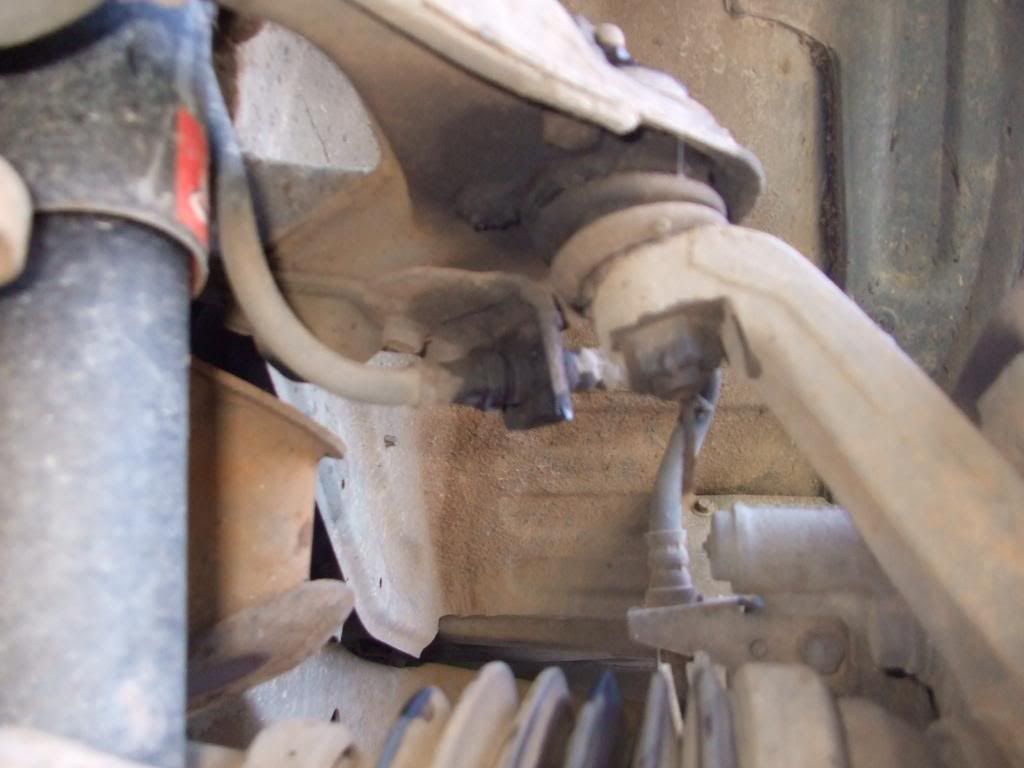
Now remove the nut from the ball joint and ease the ball joint spigot out of the casting and let the hub drop away slightly (provided you have remembered to tie it on!)
Now the wishbone is very loose. Feel over the top of the chassis rail between it and the wishbone for any shims; lift them away and put them safely somewhere.
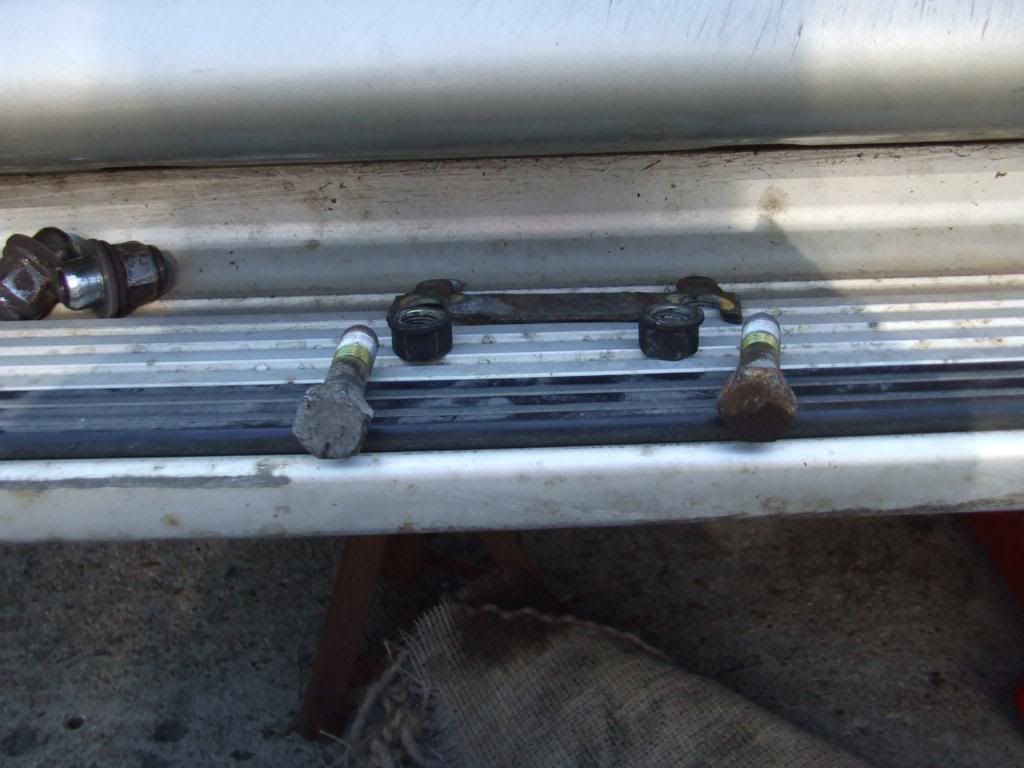
I removed the bolts and put them in correct relationship with the shims so it could all go back together the same way!
By twisting the wishbone (back end up and around) you should be able to extract the old wishbone.
Have a cup of tea.
I bought my replacement wishbone from Milners; it came with everything I needed but check the split pin for the ball joint as mine didnt fit so I had to re-use the old one until I could get one of the right size! Put some tape over the hole for the grease nipple to stop dirt going in; dont put the grease nipple in yet as it could get damaged by the heavy work to come.
When putting it all back together things should go pretty quickly as all the nuts and bolts want to work now and you know where they came from!
Remove the bump-stops from under the old wishbone and put them on the new one.
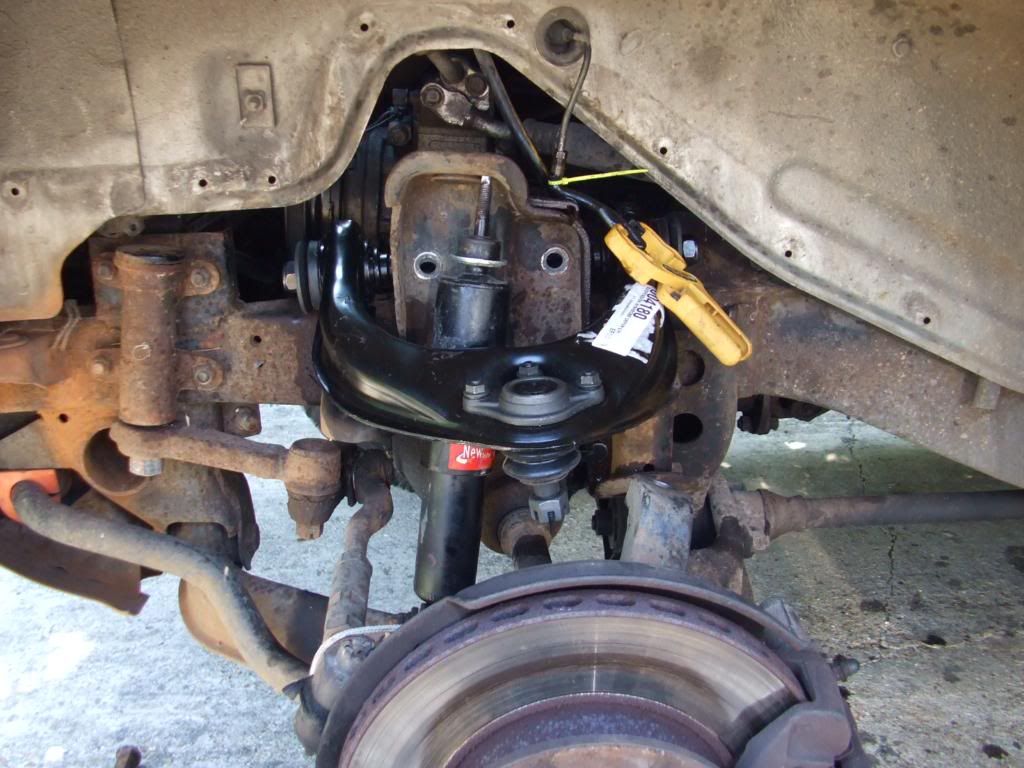
Refit the wishbone to the chassis rail complete with old shims in the same orientation and way up as they came off. Doing up the two mounting bolts is hard work but you do need to get these TIGHT!
Put the two cup washers (one on each end) onto the wishbone bolts and then thread on the Nylock nuts. Handy to have a big 22mm A/F Ring spanner here to get some serious grunt on them; tighten up
Ease the shock absorber back into position, replace the rubber and cap washer and re-fasten the two nuts.
Offer up the hub to the ball joint and re-assemble it doing up the nut carefully to ensure you get a good alignment with the hole for the split pin and the castellated nut. Once you have done that remove the retaining cord you had put on.
Now go back under the car and replace the Torsion bar Thrust washer and the big nut; tighten it back down until the marks you made on the end of the bar line up again. You will be very glad you bought that 17mm offset ratchet spanner now!
Re-fit the lock-nut and get out from underneath remembering to take the jack with you.
Re-fit the brake pipes taking care not to cross-thread the connectors and making sure each union is clean. Bleed the brakes ensuring there are no leaks at the unions.
DO NOT OVERTIGHTEN the new grease nipple when you fit it to the top of the Ball joint! Fill the ball joint with grease it will come out from around the rubber bellows when there is enough in there.
Replace the rubber skirt to the inner wing.
Put the wheel back on. Do up the wheel nuts.
Let the car back onto the ground and tighten up the wheel nuts correctly. Dont worry if she looks a bit lop-sided at this stage! Drive around for a couple of miles to allow everything to settle and then have another look; if she is still lop-sided then you can raise or lower the side by doing up the Torsion bar (raise the front) or slacken it off (lower the front) but remember to drive around to resettle everything between each adjustment.
Go and have a Beer! |
|
| Back to top |
|
 |
Google
Sponsor

|
| Posted: Tue Aug 17, 2010 11:33 Post subject: Google Ads keep the POCUK free to join! |
|
|
|
|
| Back to top |
|
|
haylands
LifeTime Member
Age: 60
Zodiac: 
Joined: 22 Feb 2009
Posts: 1517
Location: North Ferriby
|
| Posted: Tue Aug 17, 2010 14:12 Post subject: |
|
|
Hi
Nice writeup... great pics... just a couple of point if you don't mind...
Firstly your track rod end is in dier need of replacement, the rubber boot has really had it, and two, it's not a good idea to fold the end over on a flexi brake pipe, they get damaged internally and can fail, you should use a proper brake pipe clamp. |
|
| Back to top |
|
|
Skipper Jolly
LifeTime Member
Age: 68
Zodiac:
Joined: 21 Mar 2010
Posts: 46
Location: Isle of Wight
|
| Posted: Tue Aug 17, 2010 14:48 Post subject: A couple of points |
|
|
Cheers for those - yes I did know about the Track Rod end and well spotted! I agree about the brake pipes; as mentioned in the text "You will need some flexible pipe and something to clamp it with" I suggest that anybody trying this gets some rubber pipe that fits over the end of the steel brake pipe and grips it with a cable tie; something I doubt can be done with brake hose but surely somebody will try it!
Once again thanks for giving me the chance to clarify that point! |
|
| Back to top |
|
|
seppie
****

Age: 58
Zodiac:
Joined: 30 Dec 2009
Posts: 419
Location: Luton, Beds
|
| Posted: Tue Aug 17, 2010 19:31 Post subject: |
|
|
| great write up mate! one question I would like to ask if you dont mind. is it necessary to undo the torsion bars??? |
|
| Back to top |
|
|
Skipper Jolly
LifeTime Member
Age: 68
Zodiac:
Joined: 21 Mar 2010
Posts: 46
Location: Isle of Wight
|
| Posted: Tue Aug 17, 2010 20:49 Post subject: Wishbones and Torsion bars |
|
|
hi Seppie
It makes it a great deal easier as nothing is under tension and it is all less likely to 'bite' you; believe me when I say there are plenty of opportunities for bleeding knuckles on this one!
It also gives you a great opportunity to re-adjust the front wheel ride height as the Torsion bars can raise the front end by half an inch (12 mm in new money) at no cost!
It isn't hard and it saves a lot of effort - believe me as I've just done it!
Have fun
Skipper Jolly |
|
| Back to top |
|
|
haylands
LifeTime Member
Age: 60
Zodiac:
Joined: 22 Feb 2009
Posts: 1517
Location: North Ferriby
|
| Posted: Tue Aug 17, 2010 21:06 Post subject: |
|
|
You can raise it by more than that... mine is raised 2 1/2 inches at the front by cranking the bars, I've cut the bump stops right down to maintain droop and as such it rides just as it did before... just higher...
I'm pretty sure you can do 2 inches without any mods... |
|
| Back to top |
|
|
seppie
****
Age: 58
Zodiac:
Joined: 30 Dec 2009
Posts: 419
Location: Luton, Beds
|
| Posted: Tue Aug 17, 2010 21:45 Post subject: |
|
|
thanks for the reply . what was the symptoms why you change the wishbone  |
|
| Back to top |
|
|
Skipper Jolly
LifeTime Member
Age: 68
Zodiac:
Joined: 21 Mar 2010
Posts: 46
Location: Isle of Wight
|
| Posted: Tue Aug 17, 2010 21:50 Post subject: Nearside front wishbone |
|
|
Hi again Seppie
The firstb thing was noise when going over uneven roads; worn shock bushes are very 'clonky' but I was getting a distinctly higher 'clink' type noise and, having just put new front shocks on the bus I knew it wasn't them!
A determined examination showed discolouration and rust around the rubbers and, when using a tyre lever, I found 'play' in the front of the two bushes where the rubber had worn. There was also a degree of wheel wobble not expected after I had just put two new front tyres on and had the tracking checked. However, when that was done, the Track-rod end was founf to be slightly worn and to be replaced but the tyre guys agreed with me and said the wishbone bushes were 'toast' - not their words but made better for public display!
Hope this helps |
|
| Back to top |
|
|
seppie
****
Age: 58
Zodiac:
Joined: 30 Dec 2009
Posts: 419
Location: Luton, Beds
|
| Posted: Tue Aug 17, 2010 22:27 Post subject: |
|
|
the reason I ask is I have replaced all ball joints, track rod ends inner and outer and still got loads of play in the steering. the box has also been adjusted to the max. you can see the bushes on the wishbone on my truck are worn just thinking if this would give that amount of play in the steering. as there not that much left to replace  |
|
| Back to top |
|
|
Skipper Jolly
LifeTime Member
Age: 68
Zodiac:
Joined: 21 Mar 2010
Posts: 46
Location: Isle of Wight
|
| Posted: Tue Aug 17, 2010 22:43 Post subject: Play in the steering |
|
|
The steering on Pajero's, I have been advised, is similar to older Land Rovers and never as precise as a road car.
With all the linkages there is always the chance for more 'slack' than a standard vehicle. I've got used to mine but there are many on the forums who know much more than me. All I can do is work on my wagon when the funds allow.
Another contributor on this post knows far more than me so why not PM 'Haylands' for his advise? |
|
| Back to top |
|
|
haylands
LifeTime Member
Age: 60
Zodiac:
Joined: 22 Feb 2009
Posts: 1517
Location: North Ferriby
|
| Posted: Tue Aug 17, 2010 23:10 Post subject: |
|
|
| MEOW................... |
|
| Back to top |
|
|
pajero-russ
*


Age: 41
Zodiac: 
Joined: 23 Oct 2010
Posts: 26
Location: Rowley Regis
|
| Posted: Sun Oct 24, 2010 12:59 Post subject: |
|
|
Thanks for this great writeup, I changed mine yesterday & your post did help me out thanks again.
I didn't release any tension off the bars though I just placed a trolley jack under the lower arm in a secure position |
|
| Back to top |
|
|
Skipper Jolly
LifeTime Member
Age: 68
Zodiac:
Joined: 21 Mar 2010
Posts: 46
Location: Isle of Wight
|
| Posted: Sun Oct 24, 2010 15:56 Post subject: Upper wishbone |
|
|
Hi Russ
I'd never attempted anything like this before so felt caution was the best way but by not releasing the tension (as you did) it was probably a quicker job and you didn't have the fiddle of getting the ride-height back to match the other side. Thanks for the compliment and glad it was of help - I wasn't looking forward to the job when I started and at the end was delighted it was done! I don't want to go back there again! |
|
| Back to top |
|
|
seppie
****
Age: 58
Zodiac:
Joined: 30 Dec 2009
Posts: 419
Location: Luton, Beds
|
| Posted: Sun Oct 24, 2010 19:24 Post subject: |
|
|
that post will help out alot of members  it must of taken a lot of time and effort .jollyskipper you should be in the hall of fame got my vote it must of taken a lot of time and effort .jollyskipper you should be in the hall of fame got my vote  |
|
| Back to top |
|
|
pajero-russ
*
Age: 41
Zodiac:
Joined: 23 Oct 2010
Posts: 26
Location: Rowley Regis
|
| Posted: Sun Oct 24, 2010 20:18 Post subject: |
|
|
Hi again, yes I agree its better to be safe than sorry especially with so many things that can bite you doing a job like this (I do have a few wounds from the job!) I definately don't want to be going there again but thanks to you skipper I got through it successfully.
I do agree with seppie you should be in the hall of fame! You can count my vote too.. |
|
| Back to top |
|
|
|


