| View previous topic :: View next topic |
| Author |
Message |
Big S
***

Age: 64
Zodiac: 
Joined: 05 Sep 2009
Posts: 201
Location: West Yorkshire
|
 Posted: Tue Jul 31, 2012 22:29 Post subject: Double DIN into Mk3. Step by step guide anybody? Posted: Tue Jul 31, 2012 22:29 Post subject: Double DIN into Mk3. Step by step guide anybody? |
 |
|
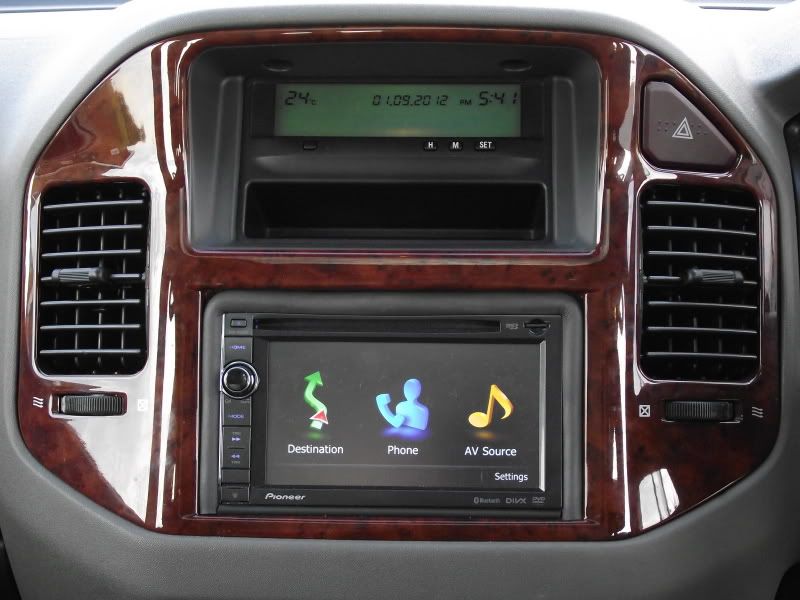
I'm going to be installing a double DIN Pioneer AVIC unit in my Mk3 3.2 very soon which will involve moving the heater controls to where a coin tray thing is fitted. Would anybody be interested in me making a step by step photo guide? Or has it already been done? If so, somebody please point me in the right direction 'cos I'm going to be making it up as I go along!
Cheers
Simon H |
|
| Back to top |
|
 |
Google
Sponsor

|
| Posted: Tue Jul 31, 2012 22:29 Post subject: Google Ads keep the POCUK free to join! |
|
|
|
|
| Back to top |
|
|
Nathe
Newbie

Joined: 09 Sep 2012
Posts: 6
Location: Essex, United Kingdom
|
| Posted: Tue Sep 11, 2012 0:14 Post subject: |
|
|
Hi,
How did you get on with this? I'm considering doing the same.
Have you lost the "Display" button functions? Has anyone found a way round this? |
|
| Back to top |
|
|
Big S
***
Age: 64
Zodiac:
Joined: 05 Sep 2009
Posts: 201
Location: West Yorkshire
|
| Posted: Tue Sep 11, 2012 9:08 Post subject: |
|
|
I got it installed OK. I kinda made it up as I went along so didn't feel up to doing a guide as I didn't really know what I was going to do next... or if I was going to have to go back and re do something...
Any questions, just ask!
Cheers
Big S |
|
| Back to top |
|
|
Nathe
Newbie
Joined: 09 Sep 2012
Posts: 6
Location: Essex, United Kingdom
|
| Posted: Wed Sep 12, 2012 18:15 Post subject: |
|
|
| Thanks for the reply, I've decided to go for a Parrot kit for the time being, but I will be back with a few more questions I'm sure! |
|
| Back to top |
|
|
kenscbr
***
Age: 55
Zodiac: 
Joined: 18 Apr 2012
Posts: 231
Location: northern ireland
|
| Posted: Sat Jan 26, 2013 0:31 Post subject: |
|
|
just found this thread big s ! i'm thinking of doing this too , can you give me any pointers,ideas,pitfalls etc please
thanks |
|
| Back to top |
|
|
Big S
***
Age: 64
Zodiac:
Joined: 05 Sep 2009
Posts: 201
Location: West Yorkshire
|
| Posted: Sun Jan 27, 2013 19:55 Post subject: |
|
|
The difficult bit is moving the heater controls. It's fairly basic mechanicing, just fiddly if you've got hands like shovels... Once the heater controls are relocated you have s space that is just a bit bigger than double DIN (unless the Pioneer Avic is a bit smaller than double DIN). I had to cut a couple of packing pieces from some scrap hardboard to make a snug fit for the Pioneer mounting cage. One thing is for sure, if you intend using your vehicle whilst going about this job you will become quite a dab hand at removing and refitting the centre dash surround...
Good luck
Big S |
|
| Back to top |
|
|
kenscbr
***
Age: 55
Zodiac:
Joined: 18 Apr 2012
Posts: 231
Location: northern ireland
|
| Posted: Mon Jan 28, 2013 0:08 Post subject: |
|
|
Thanks Big s !
one thing annoying me is ,,, why have you had to make up a packing on the 2 sides and along the top ? did you lose the trim or what as double din is exactly double single din or is your sterio a non standard size ?
thanks |
|
| Back to top |
|
|
Big S
***
Age: 64
Zodiac:
Joined: 05 Sep 2009
Posts: 201
Location: West Yorkshire
|
| Posted: Mon Jan 28, 2013 0:46 Post subject: |
|
|
OK.... The Pioneer Avic was supplied with a proper bezel or surround or whatever you want to call it. Unfortunately it didn't fit into the space that was left. I didn't have the confidence to cut the centre dash console to fit so I bought some neoprene cord (cheapest option being a tight assed Yorkshieman) to fill the gap.
Big S |
|
| Back to top |
|
|
kenscbr
***
Age: 55
Zodiac:
Joined: 18 Apr 2012
Posts: 231
Location: northern ireland
|
| Posted: Mon Jan 28, 2013 1:29 Post subject: |
|
|
| Big S wrote: |
OK.... The Pioneer Avic was supplied with a proper bezel or surround or whatever you want to call it. Unfortunately it didn't fit into the space that was left. I didn't have the confidence to cut the centre dash console to fit so I bought some neoprene cord (cheapest option being a tight assed Yorkshieman) to fill the gap.
Big S |
got you now ! thanks |
|
| Back to top |
|
|
kenscbr
***
Age: 55
Zodiac:
Joined: 18 Apr 2012
Posts: 231
Location: northern ireland
|
| Posted: Fri Feb 08, 2013 0:10 Post subject: |
|
|
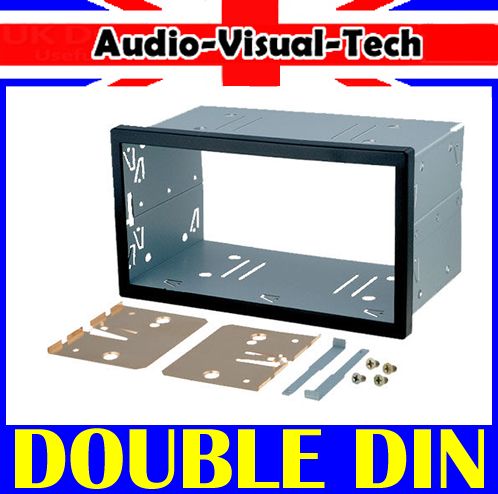
my headunit arrived today but there is no cage with it , there is 2 small brackets a kind of like angle brackets (50mm long with the 90* angle about 10mmx10mm) so i wonder should i source a cage or make up something like you did ?
thanks |
|
| Back to top |
|
|
Big S
***
Age: 64
Zodiac:
Joined: 05 Sep 2009
Posts: 201
Location: West Yorkshire
|
| Posted: Sat Feb 09, 2013 0:14 Post subject: |
|
|
The Pioneer came with a cage. The packing pieces I used were to make the cage a comfortable fit in the space behind the centre dash console. I wouldn't know where to begin without a cage...
Big S |
|
| Back to top |
|
|
kenscbr
***
Age: 55
Zodiac:
Joined: 18 Apr 2012
Posts: 231
Location: northern ireland
|
| Posted: Sat Feb 09, 2013 2:02 Post subject: |
|
|
| Big S wrote: |
The Pioneer came with a cage. The packing pieces I used were to make the cage a comfortable fit in the space behind the centre dash console. I wouldn't know where to begin without a cage...
Big S |
cheers ! i went ahead and ordered a cage on the bay last nite as i think it will be easier to mount it. |
|
| Back to top |
|
|
kenscbr
***
Age: 55
Zodiac:
Joined: 18 Apr 2012
Posts: 231
Location: northern ireland
|
| Posted: Sat Feb 16, 2013 0:12 Post subject: |
|
|
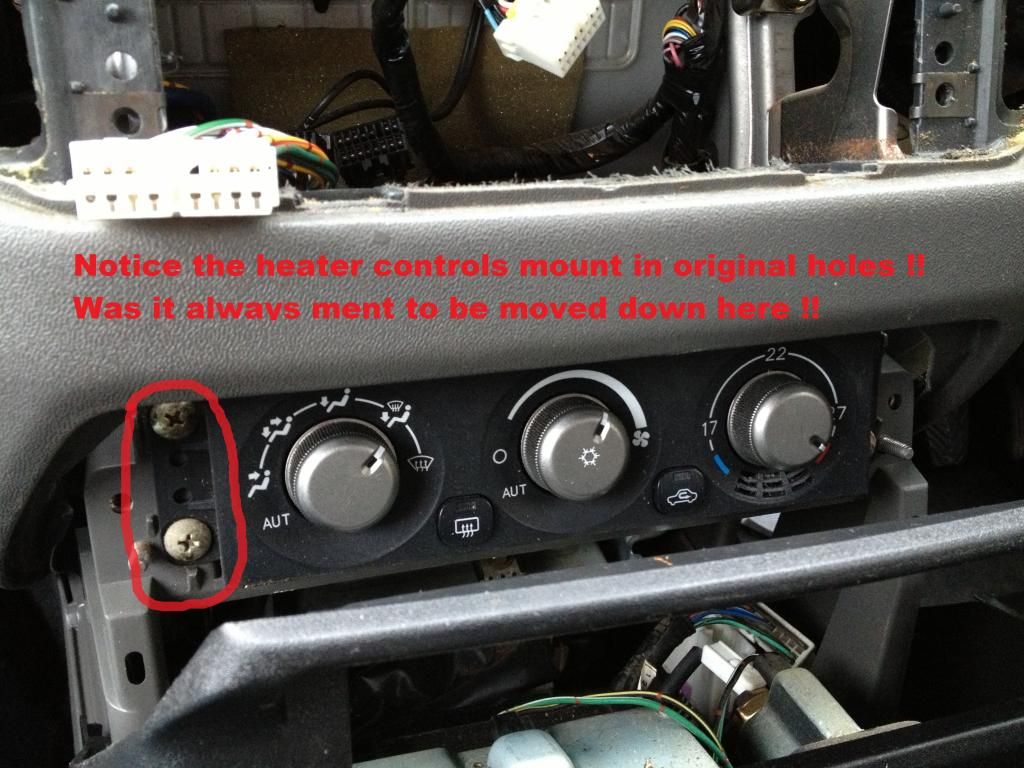
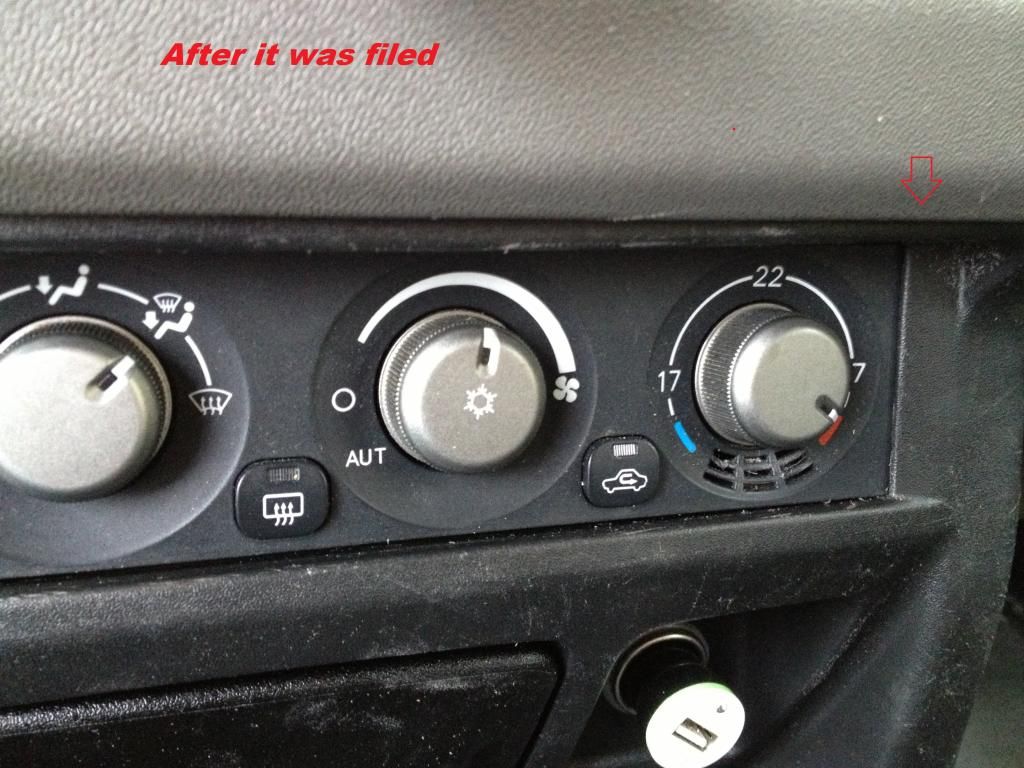
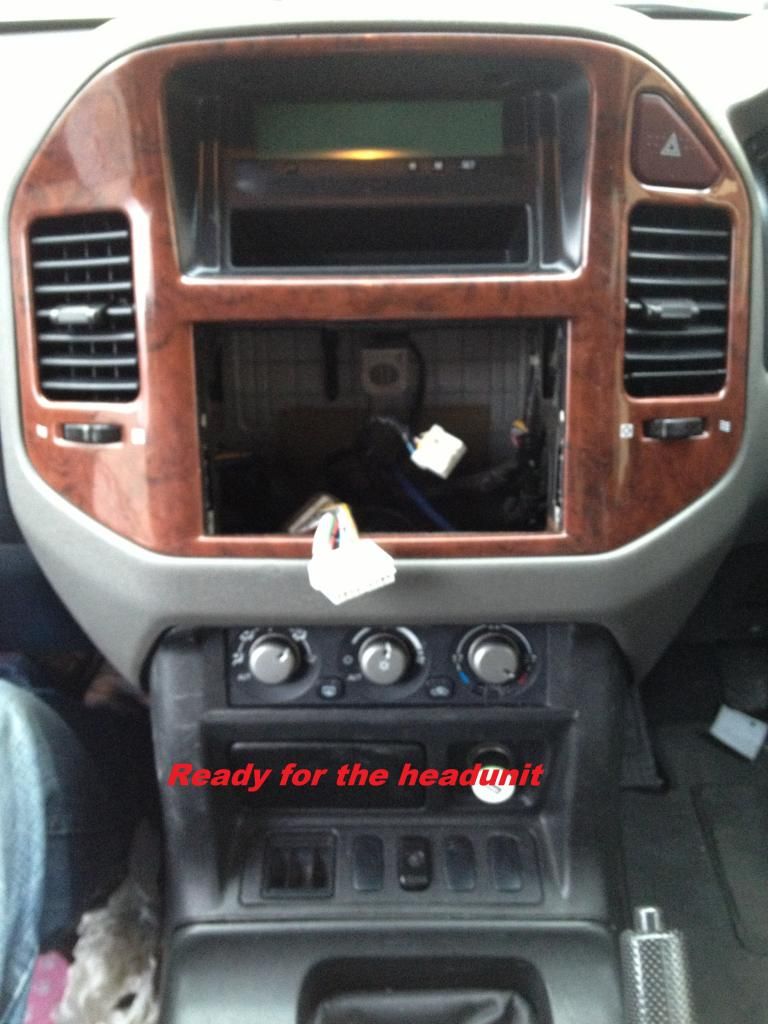
| well i have my heater controls moved down , easy job and no cutting or modding involved , well pleased i was waiting on the cage and i needed an adapter for the iso cable but they came during the week so hopfuly over the weekend i have a new radio fitted ! i might add a few photos incase other members want ideas , btw big s !!! i have the same problem conserning the doubledin hole ? the trim doesnt fitt so i';m going to have to do something (jigsaw lol) |
|
| Back to top |
|
|
kenscbr
***
Age: 55
Zodiac:
Joined: 18 Apr 2012
Posts: 231
Location: northern ireland
|
| Posted: Sun Feb 17, 2013 0:50 Post subject: |
|
|
i hope you dont mind me carring on your thread BIG S ?
here goes

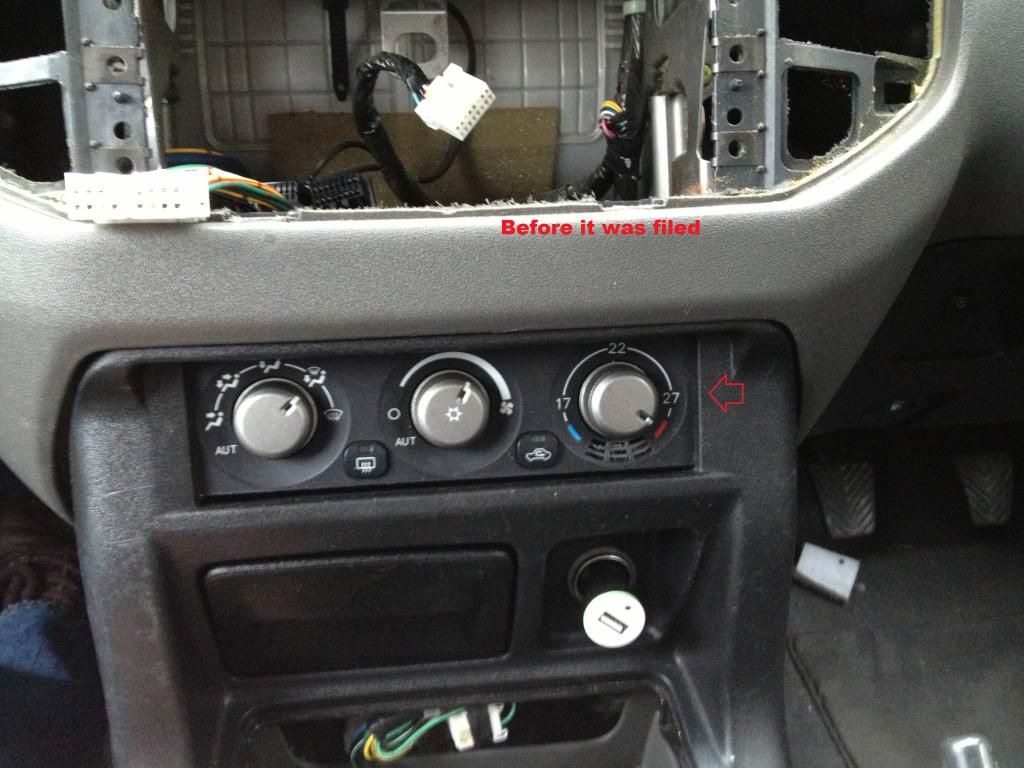
you will need one of both of these

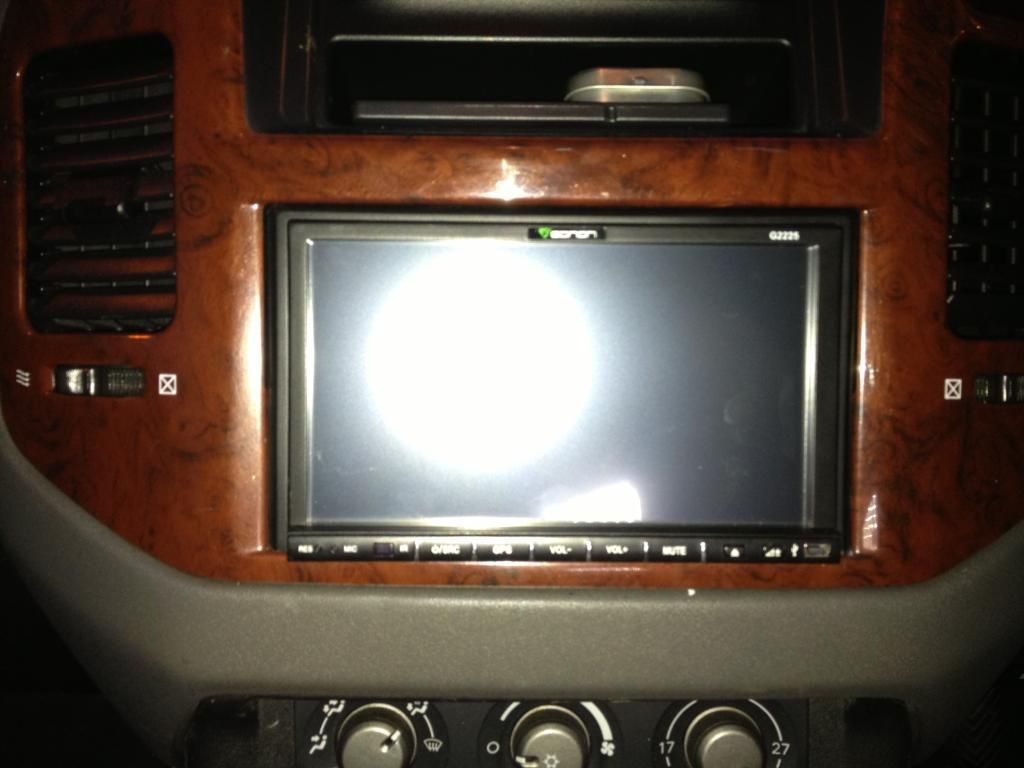
sorry for the poor quality of the last 2 photos as light was failing badly when i got it all fitted so i'll take a few more of the display tomorrow
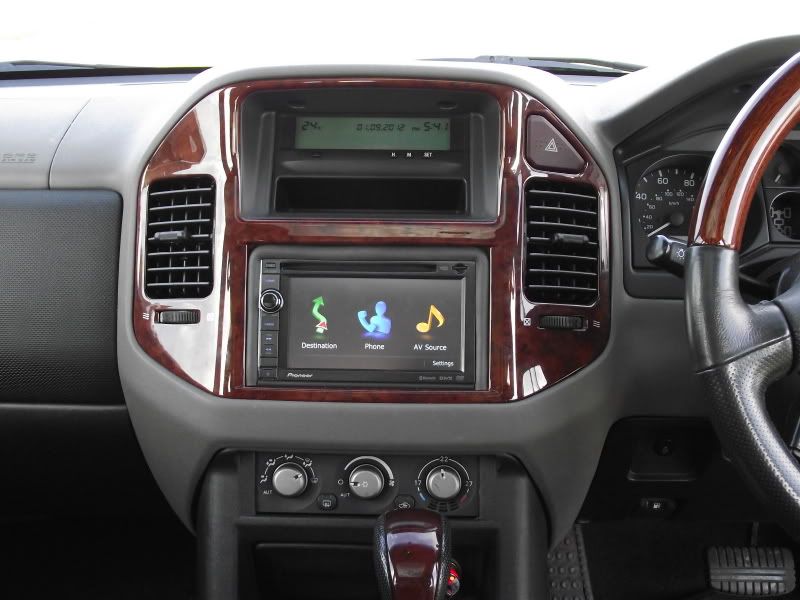
it went together beauitful only bit of cutting i did was the piece of the suround that goes along the bottom of the unit i cut it off so it sits neater
and i would have had to cut the dash if i had kept the 4 sides of the suround so i though this was the less of the 2 evils ! everything works perfect
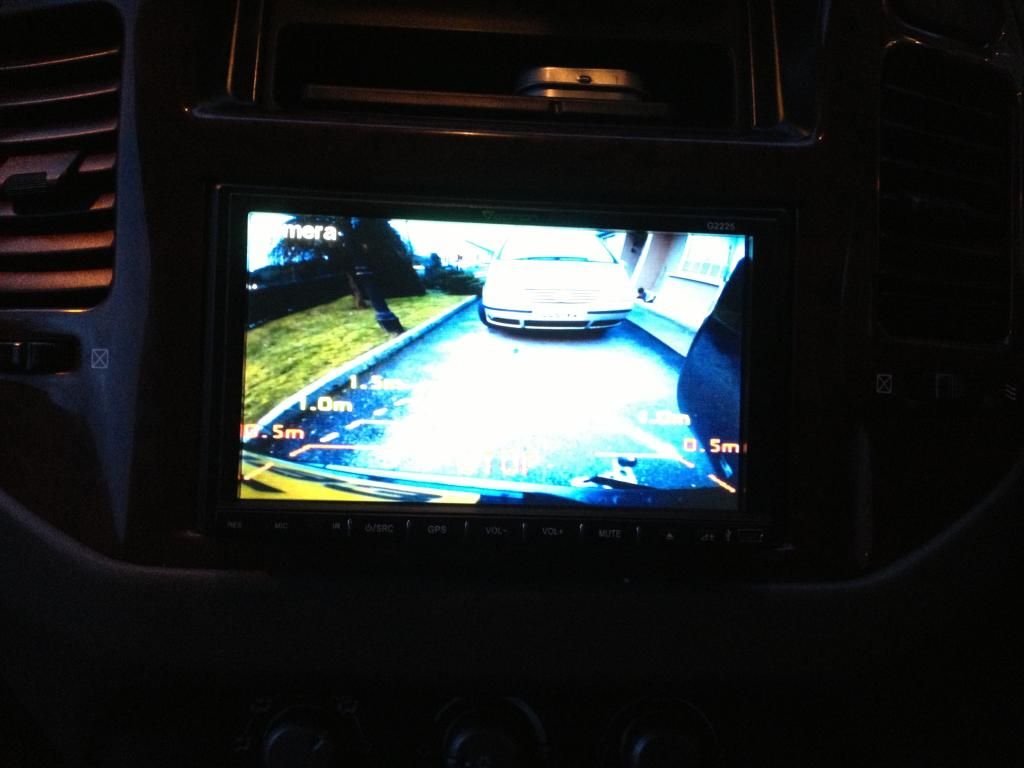
the picture on the reversing camera is brilliant and you will notice from the light that it is very bright as this picture was taken in a darkish time of day
i took the power for the camera off the reversing light (just poped out the rh taillight) and as soon as you put the car in reverse the screen changes to the camera
the gps is good also , plenty of info on the screen and seems to pick up plenty of satalites as in northern ireland we can be pickie what sat navs are best (garmin is the best over here)
the virtual HD is good , i put a 32GB sd card in it so now when i put a cd into the player it automaticaly stores it on the card . there are piles of other stuff that i dont need and probley never will
like leads for iphone (no music on mine so no sence in plugging it in) it has bluetooth for handsfree as well , only mistake i made was i never hooked up the illiumn wire ??? its for lighting up the
lower buttons on the player and i presume it will dim the display when the lights are turned on as its very bright at nite , i presume i just wire it into a dash light ! (should have read the instructions lol)
as i said i'll post another few photos later and if any of yous ever thought about doing this ,,,,, DO ! it looks the biZZ |
|
| Back to top |
|
|
radiomike
******

Joined: 04 Aug 2010
Posts: 1483
Location: North Bucks
|
| Posted: Sun Feb 17, 2013 13:05 Post subject: |
|
|
| Good write up, I have been telling people to do it this way for years! I seem to remember the illumination wire is present in the OE plug but I could be wrong as your adaptor does not have it fitted (13 wires in the ISO but 12 in the OE plug) Either way it is easy to find, colour is green/white+silver and if not present on the radio plug is available at the small plug on the back of the info screen. |
|
| Back to top |
|
|
|


