| View previous topic :: View next topic |
| Author |
Message |
Hilux
**

Age: 66
Zodiac: 
Joined: 20 Oct 2013
Posts: 108
Location: North Herts
|
 Posted: Wed Nov 13, 2013 20:04 Post subject: Dealt with rust on fuel pipes and in the arch Posted: Wed Nov 13, 2013 20:04 Post subject: Dealt with rust on fuel pipes and in the arch |
 |
|
As the title says and as per my recent post about the fuel pipe cover fixings - I was lucky and found the lot in good nick but also found rust in the arch area so treated the rust, red oxided it all and waxoyled it all. Should be good for a few years. Going to do the same to the other arches.
As found
[img]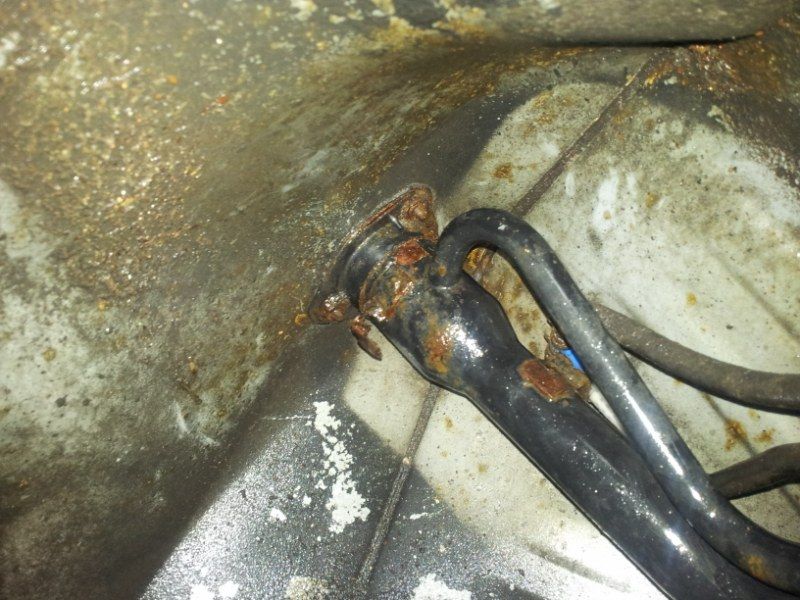 [/img] [/img]
[img]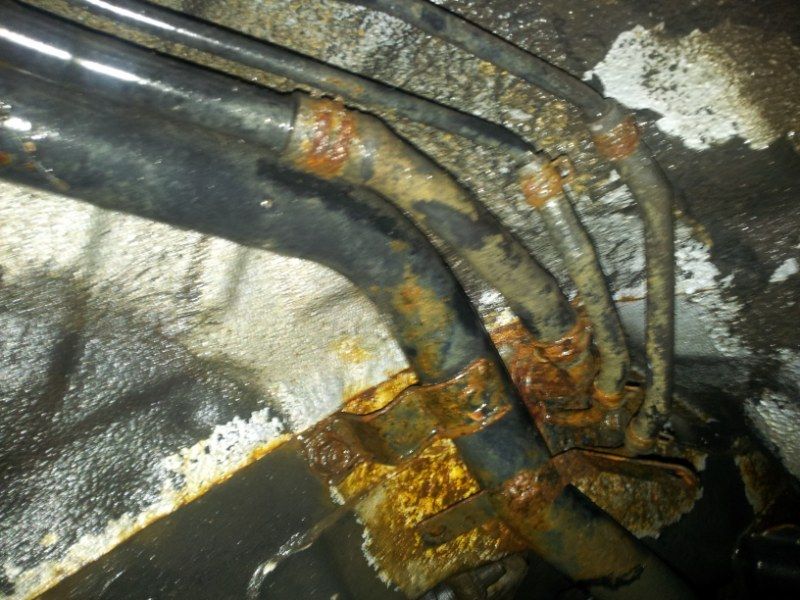 [/img] [/img]
Rust treatment
[img]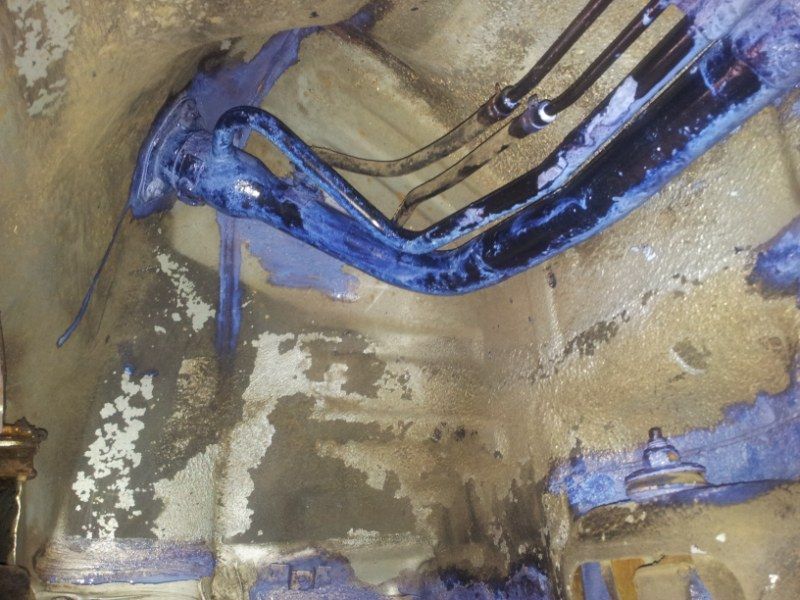 [/img] [/img]
After treatment
[img]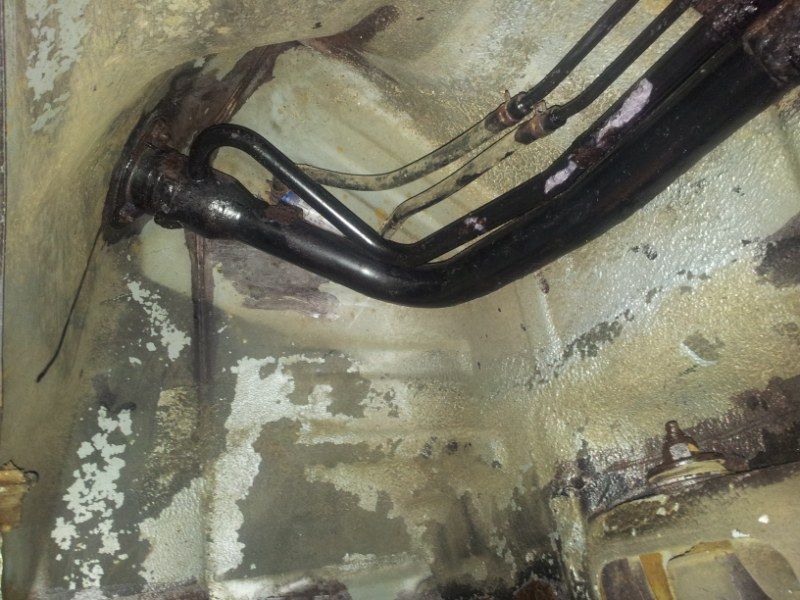 [/img] [/img]
[img]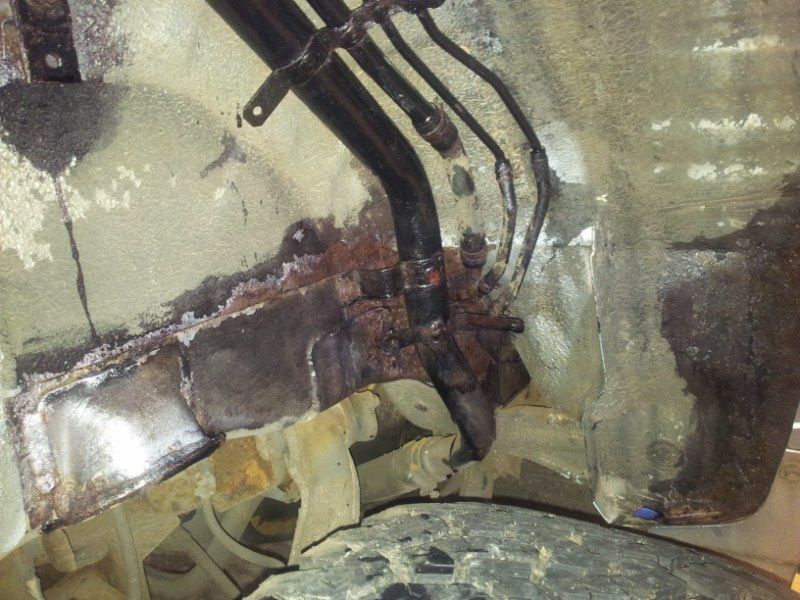 [/img] [/img]
Red oxide
[img] [/img] [/img]
[img]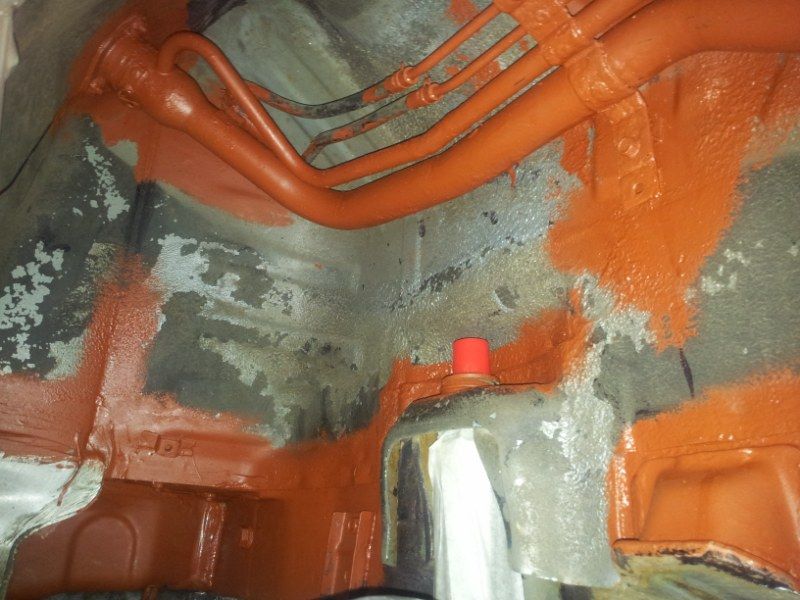 [/img] [/img]
Waxoyled
[img]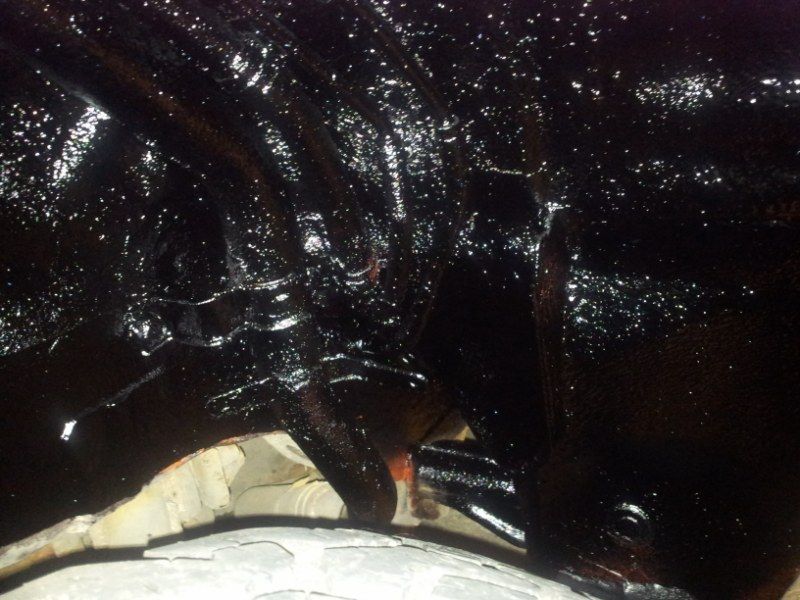 [/img] [/img]
[img] [/img] [/img] |
|
| Back to top |
|
 |
Google
Sponsor

|
| Posted: Wed Nov 13, 2013 20:04 Post subject: Google Ads keep the POCUK free to join! |
|
|
|
|
| Back to top |
|
|
Davie5316
*****

Joined: 31 Dec 2011
Posts: 513
Location: Scotland
|
| Posted: Wed Nov 13, 2013 20:54 Post subject: |
|
|
| Looking good mate, I'd check the back of your cils there's rubber caps that come out. Mine were rusted along the bottom were the draiage points are. Ended up cutting out and welding in in metal. Also bottom of wheel arches behind the rear bumper. Bad drainage point, it was same again cut and weld. |
|
| Back to top |
|
|
Hilux
**
Age: 66
Zodiac:
Joined: 20 Oct 2013
Posts: 108
Location: North Herts
|
| Posted: Thu Nov 14, 2013 20:02 Post subject: |
|
|
| Davie5316 wrote: |
| Looking good mate, I'd check the back of your cils there's rubber caps that come out. Mine were rusted along the bottom were the draiage points are. Ended up cutting out and welding in in metal. Also bottom of wheel arches behind the rear bumper. Bad drainage point, it was same again cut and weld. |
Noted, thanks.
Seemed ok when I was under there but I will double check.
I noted the cap at the back of the sills never thought to take it out and have a look as it all seemed solid but I am ordering more rust converter and waxoyl and will do the sills - the doors were waxoyled by the previous owner.
I must say that compared to Toyota Hiluxes and Land cruisers (which I have owned various types for over twenty years) these do seem to have a lot more corrosion issues, especially with the cheap plating on bolts and screws etc. The Toyota bolts are passivated and generally come out like new where not exposed to the elements!! |
|
| Back to top |
|
|
elv
****

Age: 50
Zodiac: 
Joined: 18 Jan 2004
Posts: 257
Location: Fife, Scotland
|
| Posted: Sun Dec 01, 2013 18:43 Post subject: |
|
|
Did you manage to get to the 3 pipes (vent pipes?) where they pass through the chassis?
ive just cleaned mine up today as they where completely covered in wet mud when I took off the arch liner. The pipes looked pretty corroded but thankfully it was only surface rusy and all of the pipes are still solid.
Cleaned all the mud off with a hose and then then wire brushed / sanded all the pipes to remove the loose rust and then a liberal covering of degreaser and another hose down.
Not sure how long theyre going to take to dry in this weather but should be able to help the process with a heat gun tomorrow.
Plan is then to apply jennolite rust converter followed by hammerite straight to rust paint and then waxoyle.
The problem is that the pipes that pass through the chassis joining the rubber pipes look to be in the same state but removing the bolt on the wheel arch side only allows the pipes to be pulled out a few mm and i cant see how to get to the other side to disconnect them?
Are these 3 pipes just vents? |
|
| Back to top |
|
|
BenKenobi
****
Age: 63
Zodiac: 
Joined: 03 Aug 2013
Posts: 335
Location: Glossop'ish
|
| Posted: Sun Dec 01, 2013 19:22 Post subject: |
|
|
| Quote: |
| i cant see how to get to the other side to disconnect them? |
Simple answer is that you can't unless you have the hands of a three year old, even if you get them off you sure as bears do it in the woods you won't get them back on again.
The only way to disconnect those little fockers is to drop the tank.
Chances are that the pipes on top of the tank need sorting too - the tanks corrode at the back, especially on top around the breathers and vents. |
|
| Back to top |
|
|
elv
****
Age: 50
Zodiac:
Joined: 18 Jan 2004
Posts: 257
Location: Fife, Scotland
|
| Posted: Sun Dec 01, 2013 19:46 Post subject: |
|
|
*beep*! Not the answer i was hoping for.
I dont know why mitsubishi didnt just continue the rubber pipes through the chassis instead of metal ones that corrode and you cant get to!
Are these pipes as critical as the filler pipe with regards to letting water in if they become porus, I really dont want a knackered pump. |
|
| Back to top |
|
|
BenKenobi
****
Age: 63
Zodiac:
Joined: 03 Aug 2013
Posts: 335
Location: Glossop'ish
|
| Posted: Sun Dec 01, 2013 20:00 Post subject: |
|
|
Probably worse I'd say - I ripped all mine out - tank included. These pipes sit in probably the worst possible environment and I seriously doubt that they ever properly dry out.
I did post a few images of the whole process - not for the feint of heart but for peace of mind it was worth it.

and this is what mine looked like ... one pipe was cracked evidenced by the rust inside it.


and now


even with the tank out it is a pig to get in to do anything |
|
| Back to top |
|
|
elv
****
Age: 50
Zodiac:
Joined: 18 Jan 2004
Posts: 257
Location: Fife, Scotland
|
| Posted: Sun Dec 01, 2013 21:05 Post subject: |
|
|
I take it that its a pretty major job to get the tank out?
Unfortunately my garage is stuffed with motorbikes, gardening equipment and other rubbish so all the work on the cars has to be carried out on the drive and I dont reallly fancy trying to get the tank out while laying on wet stones so its not really an option to attempt it at this time of year but hopefully fingers crossed the pipes will hold up until the spring.
Is there no access hatch to the top of the fuel tank like in the pajero?
Was thinking if there was I could disconnect the pipes at the top of the tank and on the wheel arch side and just run rubber fuel pipes straight from the tank through the chassis and connect them up in the wheel arch? |
|
| Back to top |
|
|
BenKenobi
****
Age: 63
Zodiac:
Joined: 03 Aug 2013
Posts: 335
Location: Glossop'ish
|
| Posted: Sun Dec 01, 2013 21:16 Post subject: |
|
|
There is but you can't reach these little beggars through it. Here is a shot of the top of the tank so that you can see how much is on top - note the metal pipes running down the side, note also the one with a spark plug lead in it (far left) - this is another one that corrodes - it corrodes where it joins the tank. (Ignore the SST in the background - it is a work in progress - and a long story)

I had to combine my breathers because the later filler system has only one breather line not two. (I bought the filler assembly for a later Shogun - including the little pipes that you are concerned about, and replaced all rubber and clips)

I know what you mean about weather, I still have three corners worth of suspension to sort but cold and damp really don't fill me full of enthusiasm ... |
|
| Back to top |
|
|
elv
****
Age: 50
Zodiac:
Joined: 18 Jan 2004
Posts: 257
Location: Fife, Scotland
|
| Posted: Sun Dec 01, 2013 21:48 Post subject: |
|
|
Jeez thats a big tank.
Ive managed to at least get rid of all the mud in the chassis opening and the pipes are corroded but looks just like surface corrosion (hopefully) so hopefully they'll hold up until the weather gets better and I can drop the tank.
What sort of time did it take you to drop the tank and is there much else that needs to be removed to get it out? |
|
| Back to top |
|
|
BenKenobi
****
Age: 63
Zodiac:
Joined: 03 Aug 2013
Posts: 335
Location: Glossop'ish
|
| Posted: Sun Dec 01, 2013 22:05 Post subject: |
|
|
Dropping the tank took a couple of hours but I was dealing with bolts and nuts that looked like the pipes - problem is some of them are captives so you need to be damn careful or the job gets bigger.
Run car until near empty.
Lower the back of the gearbox - lower the mount on it's bolts not so far that the bolts come out - about 30mm I recall, I do have images.
Removed the under tray - the plastic bit - the 10mm studs in the support straps will likely break off if you aren't real careful
Support tank at the rear on a trolley jack and then remove all the bolts in the tank leaving the front ones loose but in place near the bottom of the thread. Lower the tank at the rear slowly on the jack, remove the nasty little pipes - held with spring clips assuming that they haven't corroded away. don't worry
Disconnect the fuel gauge harness - at the rear oddly enough.
Remove the main filler hose from the filler neck and fold it over on itself to limit the amount of diesel that comes out.
Disconnect both feed and return hoses from the front of the tank.
Raise tank back into position and put a nut or two back on at the rear.
I then built a cribbing up under the tank in the center, removed the bolts and dropped the tank onto the cribbing - takes a bit of wiggling to disenge the tank from the captive bolt at the front but you need the back of the tank high to get it clear - slide it backwards so it drops onto the cribbing.
Then gradually lower the cribbing and slide it out from under the car ...
In this you can see the captive bolts and also the gearbox support lowered sufficiently to remove the tank.

Getting it all cleaned up, painted up, and put back took three weeks evenings and weekends. I replaced the brake pipes and did a lot of other stuff while it was out though - including fully refurbishing the tank (the Shogun isn't my only means of transport  ) . ) . |
|
| Back to top |
|
|
elv
****
Age: 50
Zodiac:
Joined: 18 Jan 2004
Posts: 257
Location: Fife, Scotland
|
| Posted: Sun Dec 01, 2013 22:28 Post subject: |
|
|
Cheers for that, definatly a job for when the weather gets better I think.
Your floorpan looks exceptionally clean in that last pic, has it been replaced recently? |
|
| Back to top |
|
|
BenKenobi
****
Age: 63
Zodiac:
Joined: 03 Aug 2013
Posts: 335
Location: Glossop'ish
|
| Posted: Sun Dec 01, 2013 22:37 Post subject: |
|
|
Nope most of the car's like that but the suspension is foobar thanks to the previous owner liking boats - the sidesteps were scrap - have new ones to fit but suspension needs doing first.
Car has only done 56k miles.
This little lot is my Christmas job ...

trouble is I don't feel like doing it - I'd trade the Shogun and all the new spares for the 2007 Shogun on repairable cars - crawling around under cars in winter is pretty much bottom of my list of things to do - there's £2k worth of parts in that shot. |
|
| Back to top |
|
|
elv
****
Age: 50
Zodiac:
Joined: 18 Jan 2004
Posts: 257
Location: Fife, Scotland
|
| Posted: Sun Dec 01, 2013 22:54 Post subject: |
|
|
Ha Ha I hear you. I enjoy messing around on the cars in the warmer months but I can think of plenty of things id rather be doing than crawling around under a car in the cold and wet. I did a fuel pump seal change on the Paj back in 2010 in -18c as I needed it to get to work through the snow as my other car at the time was a BMW so useless in the snow.
It took me all weekend as I could only stay outside for a maximum of 20 minutes at a time before I couldn't feel my fingers or face! Never again!! 
I do have a couple of project bikes to keep me busy over the winter but they're in the garage with a heater, music and a beer fridge........much more enjoyable way to pass the time! |
|
| Back to top |
|
|
|


